Table of Contents
DeskDirector Forms Overview
 Updated
by Niamh Ferns
Updated
by Niamh Ferns
Getting Started with Forms
With DeskDirector forms, you can have beautiful native forms, which allow you to ask the right questions to your clients the first time around. This article will help you go through the process of creating a form. We also have other articles that can be very helpful for forms and more advanced features of forms.
- DeskDirector Forms - Detailed Question Types
- DeskDirector Forms - Dynamic Content & Fields
- DeskDirector Forms - Webhooks
Creating a new form
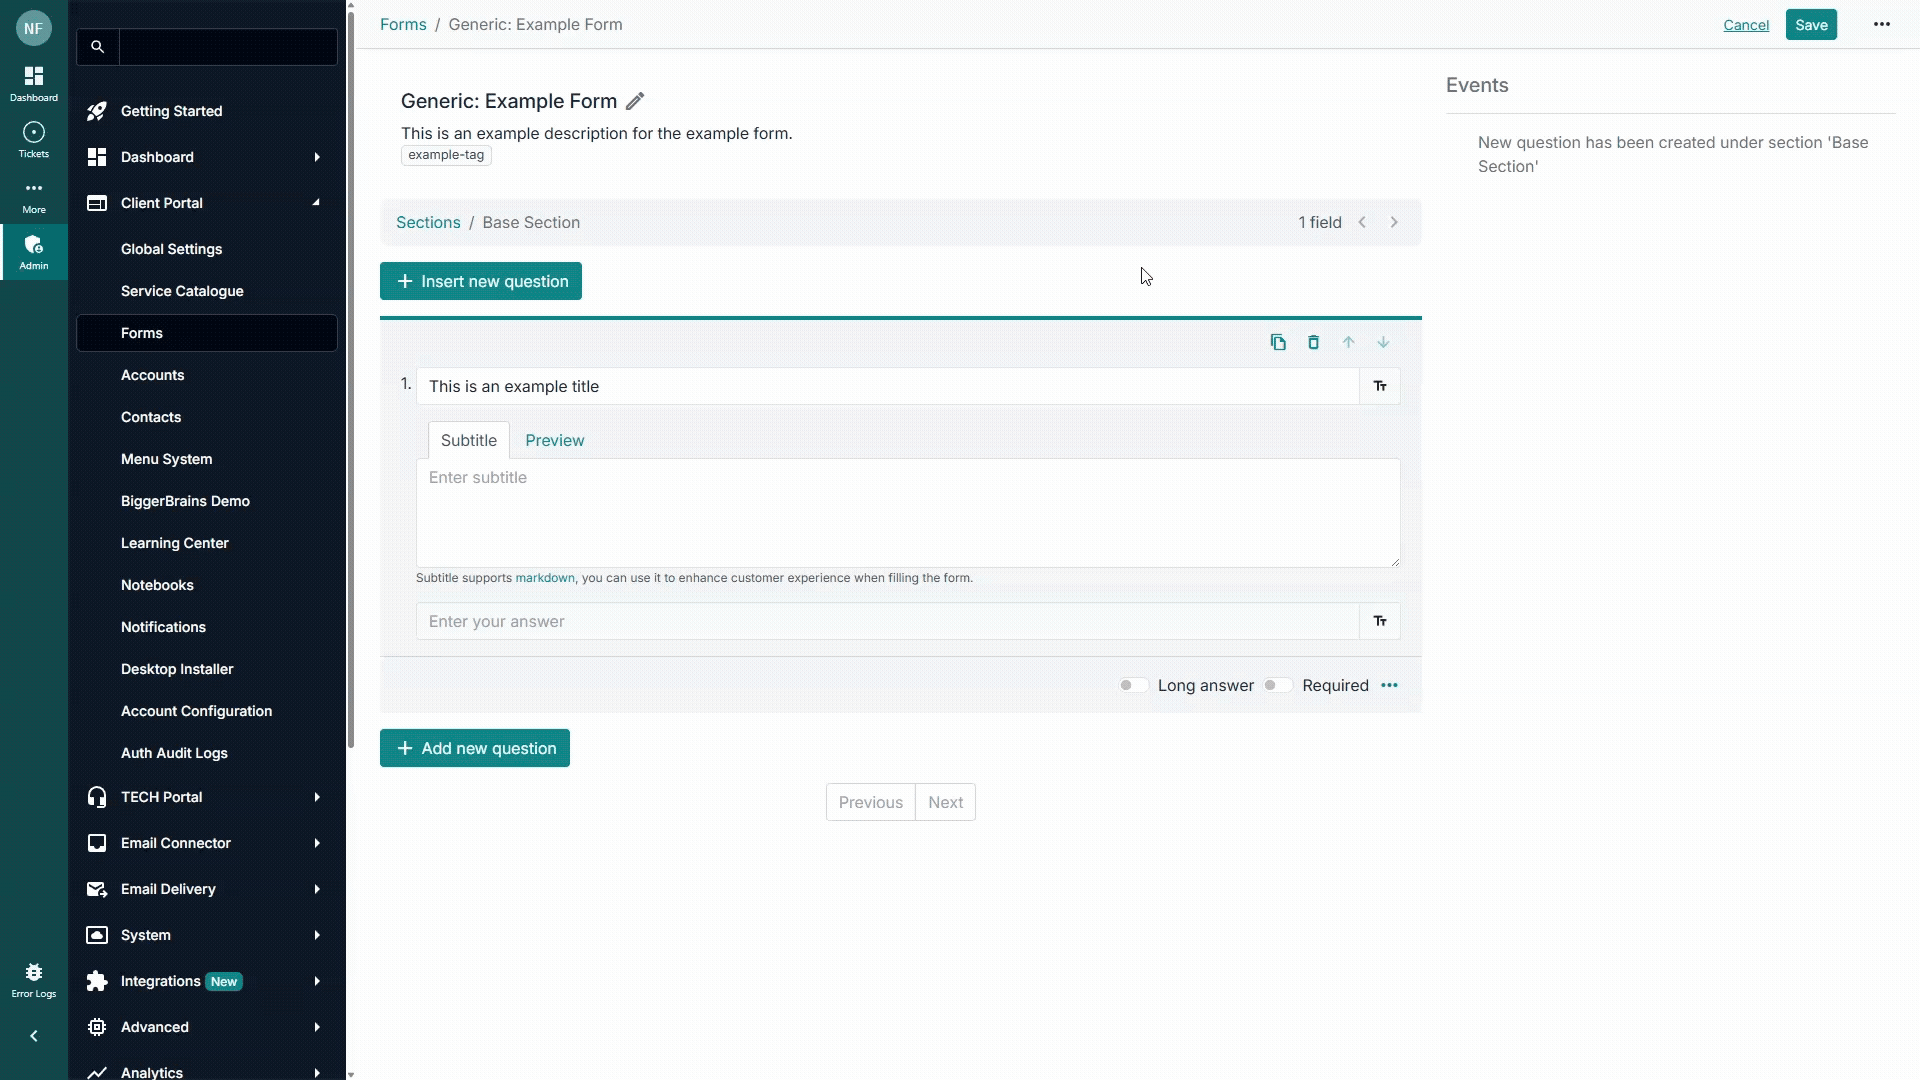
All of your DeskDirector forms will be created inside our Portal, using our own form builder. Just open the Admin Portal and head to Client Portal > Forms.
Adding a new form
From the forms list, click New and give it a name. Your customers won’t see this name; it’s for your reference, so you can be descriptive.
Adding questions - Basics
By default, all forms will have a “Ticket Title” field prepended to the top of them. This feeds into the ticket title when it is created. You don’t need to configure this yourself.
To get started, click “Add new” and then choose the type of question this will be. The most common choices are presented immediately, but more are available in the dropdown.
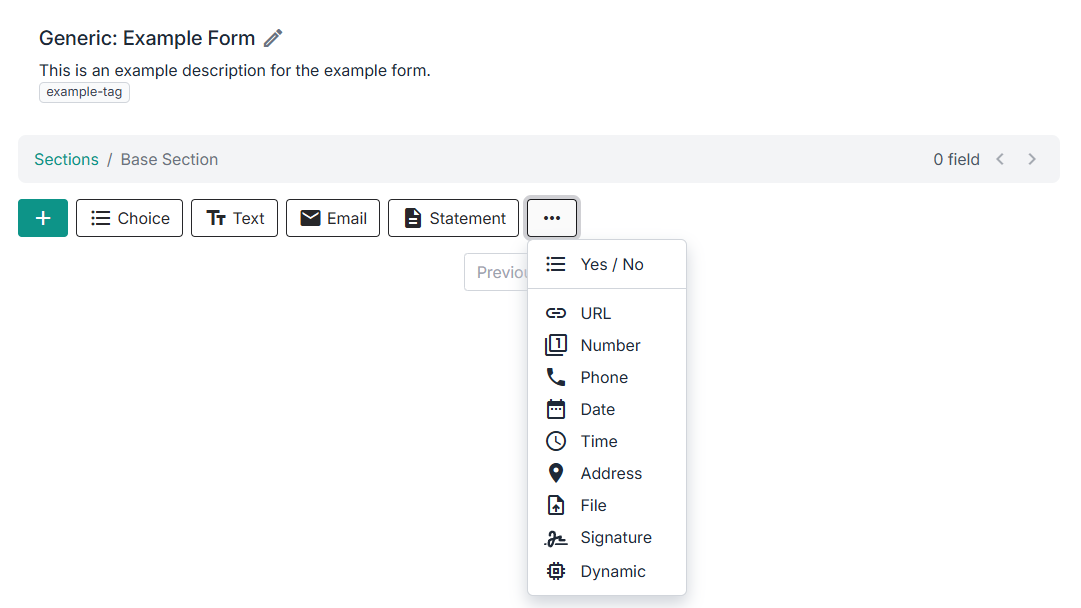
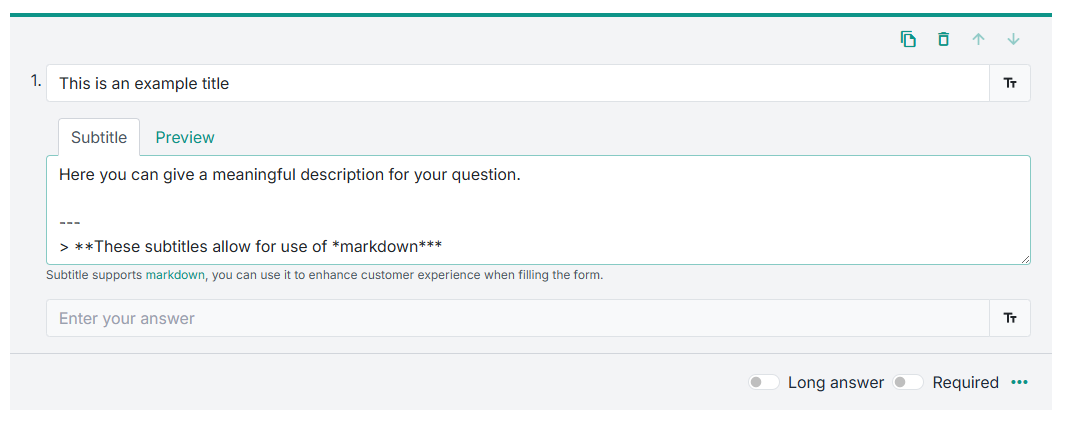
Every question type will have at least two fields to fill out. The first one is the question that the user is asked. (This is required.)
The second field is a question description/summary, which will be displayed in a smaller font (by default) under the question. To give you a bit of flexibility on the format of the text, this field can also take in Markdown. This field is useful if you wish to expand on the exact meaning of the question. (This field is optional.)
Input Validation
All field types support the Required flag. This marks the field as mandatory before the user can submit the form.
- The “Text” field type allows you to specify the maximum accepted length of an answer. You can also provide a custom error message, which will be displayed underneath the question when the answer length is exceeded.
- The “Number” field type allows you to specify certain inequality conditions on their answer. This will let them know their answer is not valid until they satisfy the conditions. You can also provide a custom error message, which will be displayed underneath the question when the number does not satisfy the conditions.
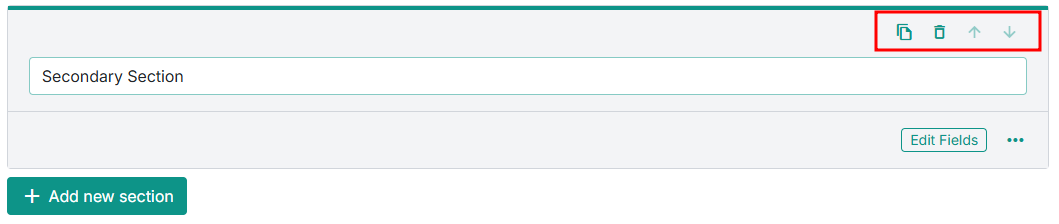
Deleting, Copying and Re-ordering
You will notice that on a given form, you may only select and edit one field at a time. At the top of the question you currently have selected, there are controls that allow you to duplicate, delete and re-order the given question.

Sections
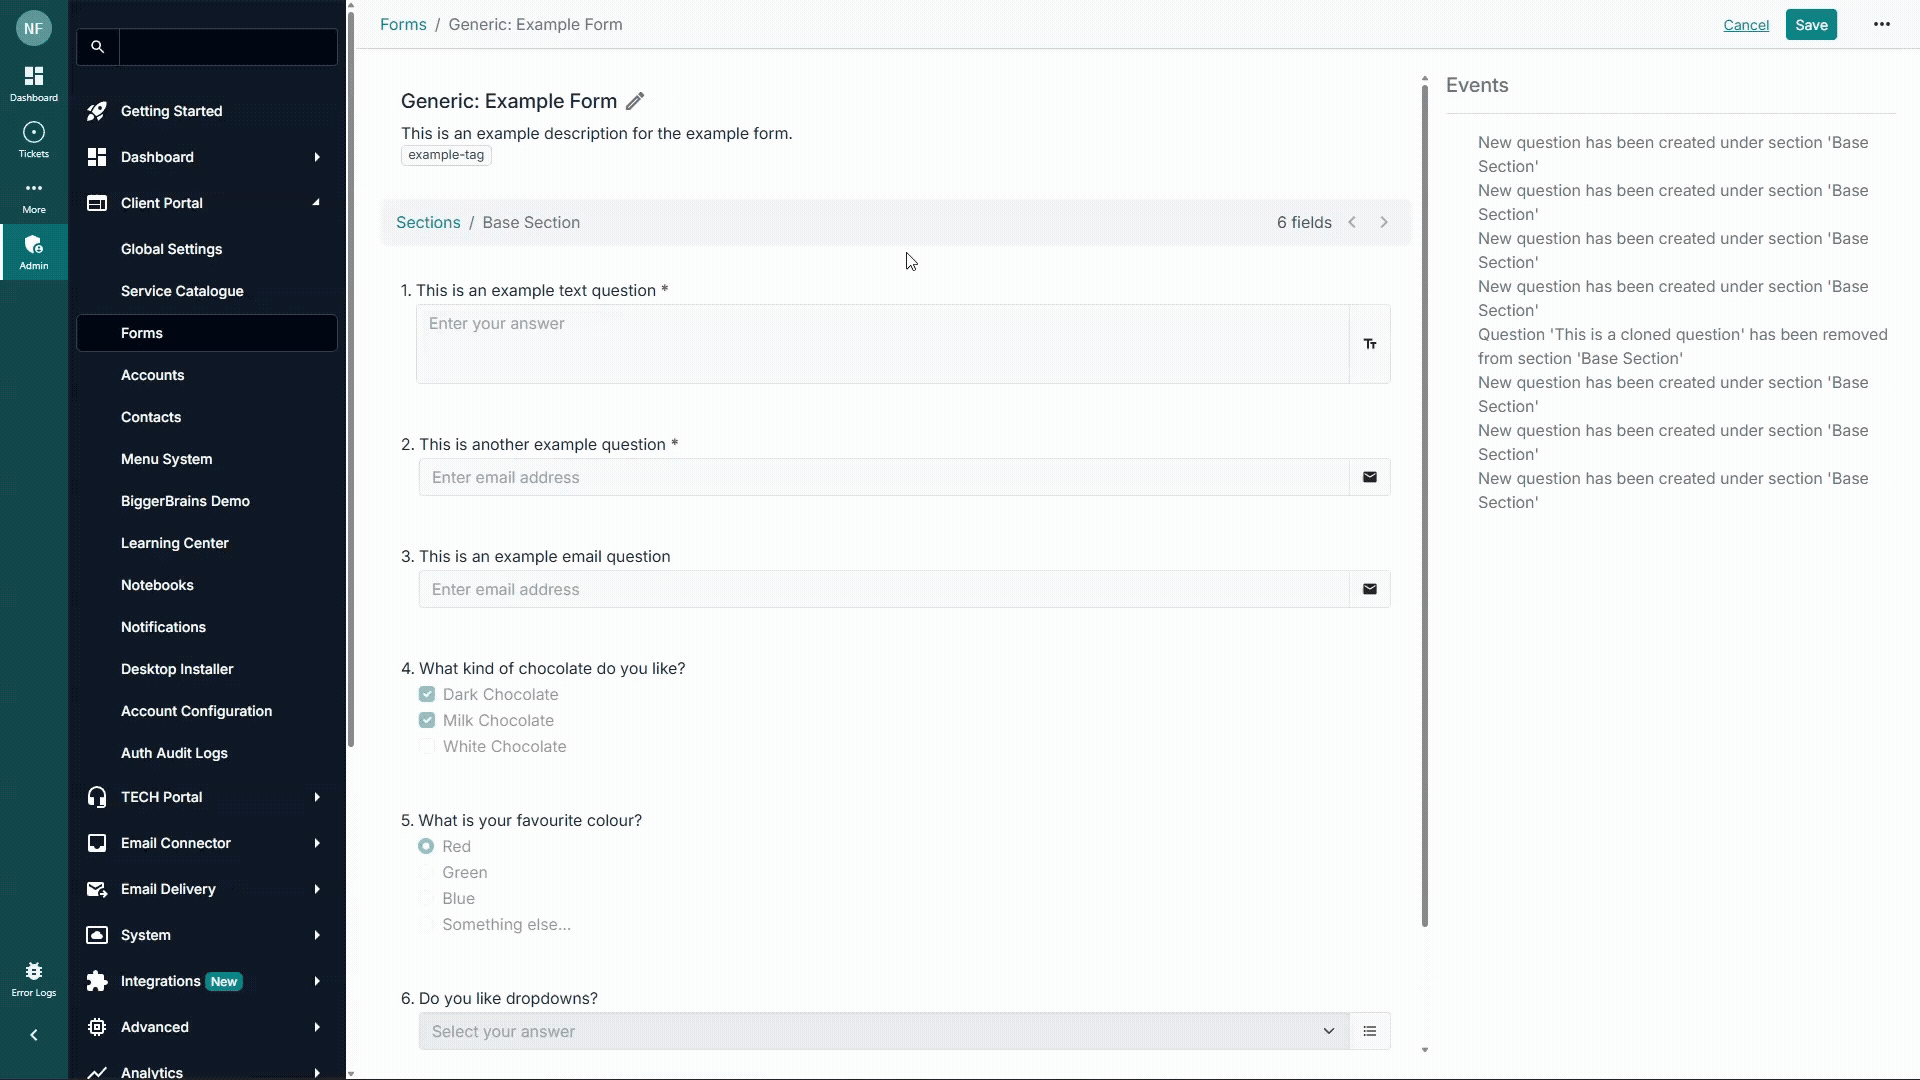
When you create a form, it will appear in what is called the Base Section by default. That translates to the form having one page in the Client Portal. Forms let you add new sections to your form, so you can break the form down into multiple pages, making it easier to fill, and more digestible for users.
To add a new section, all you have to do is click on Sections and on the Add new section button. You can then give it a name and click on Edit Fields.
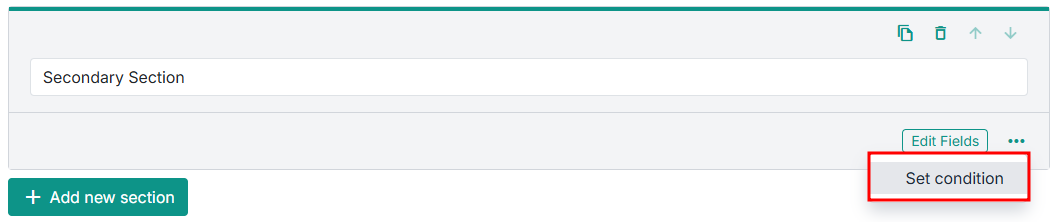
If you want to rename, reposition, copy, delete, edit, or set conditions to the sections you created, all you need to do is click on the Section name, and you will be presented with these options.
The 'set condition' option helps define whether the section should only appear if the end user chooses a specific answer to one of the previous section's questions. More information is discussed below.
Conditionals
You can have additional questions (and full sections) appear to the end users based on what they answered in previous questions. To set a conditional question up, click on the menu icon at the bottom right of the question's/section's box:
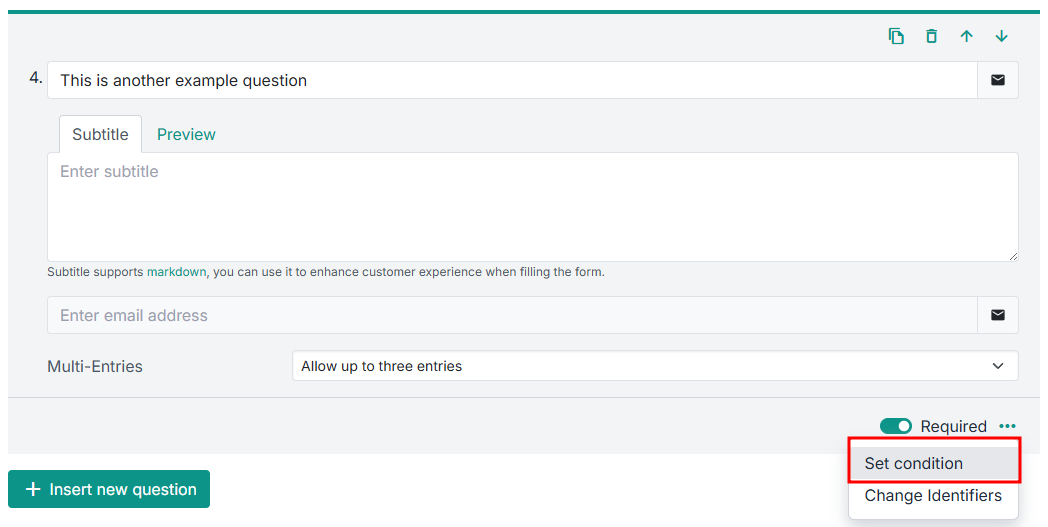
Conditionals can be set when your form has a Yes/No or a general Choice question to choose answers from.
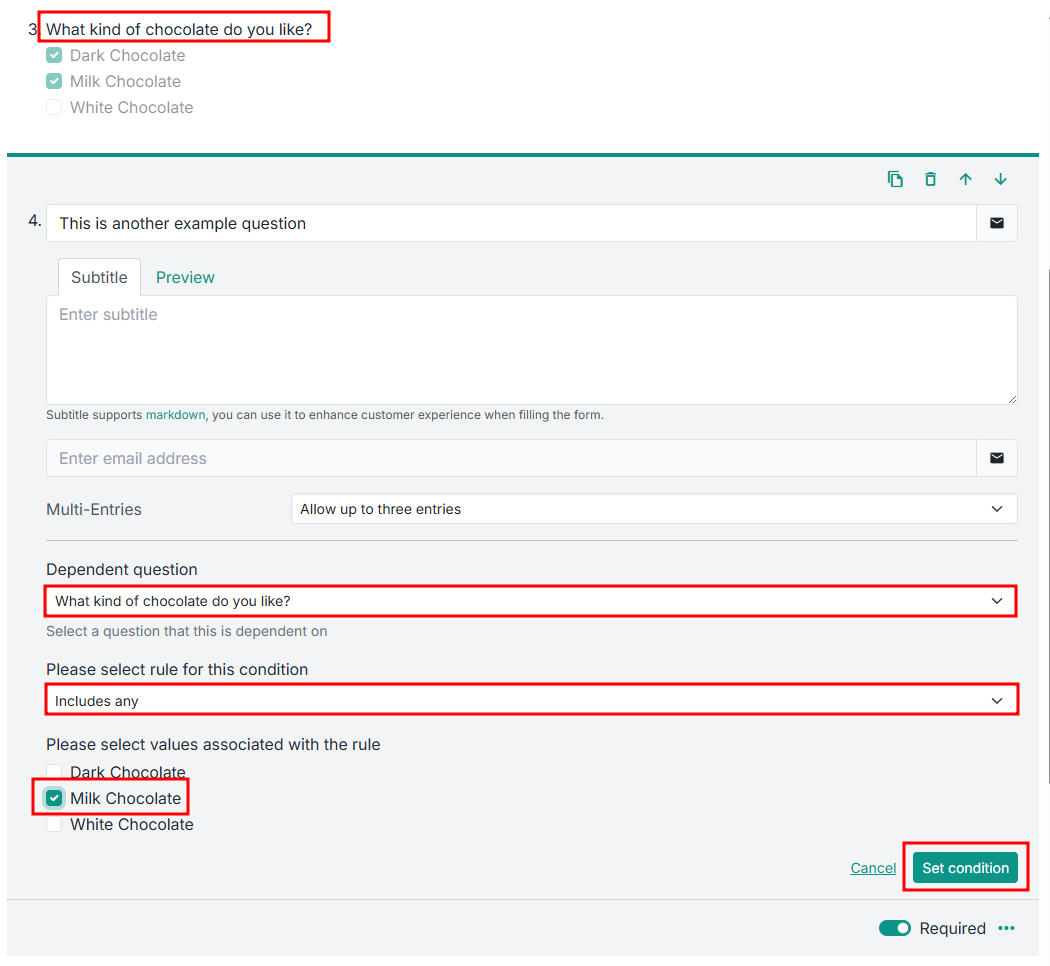
- You will get prompted to choose the Dependent question
- You will then need to define the rule you want this conditional question to follow. (In the example above, the question will only show if you select "Milk Chocolate".)
- Remember to click on Set condition to save all your changes
Embedding Content
You can embed content like YouTube links and images into your forms using markdown:

Title Automations
DeskDirector Forms come with adaptive titles, which will allow you to populate the ticket's subject line with relevant information from your form's fields.
Setting a Title Automation
- Open the Title Automation tab using the hamburger menu
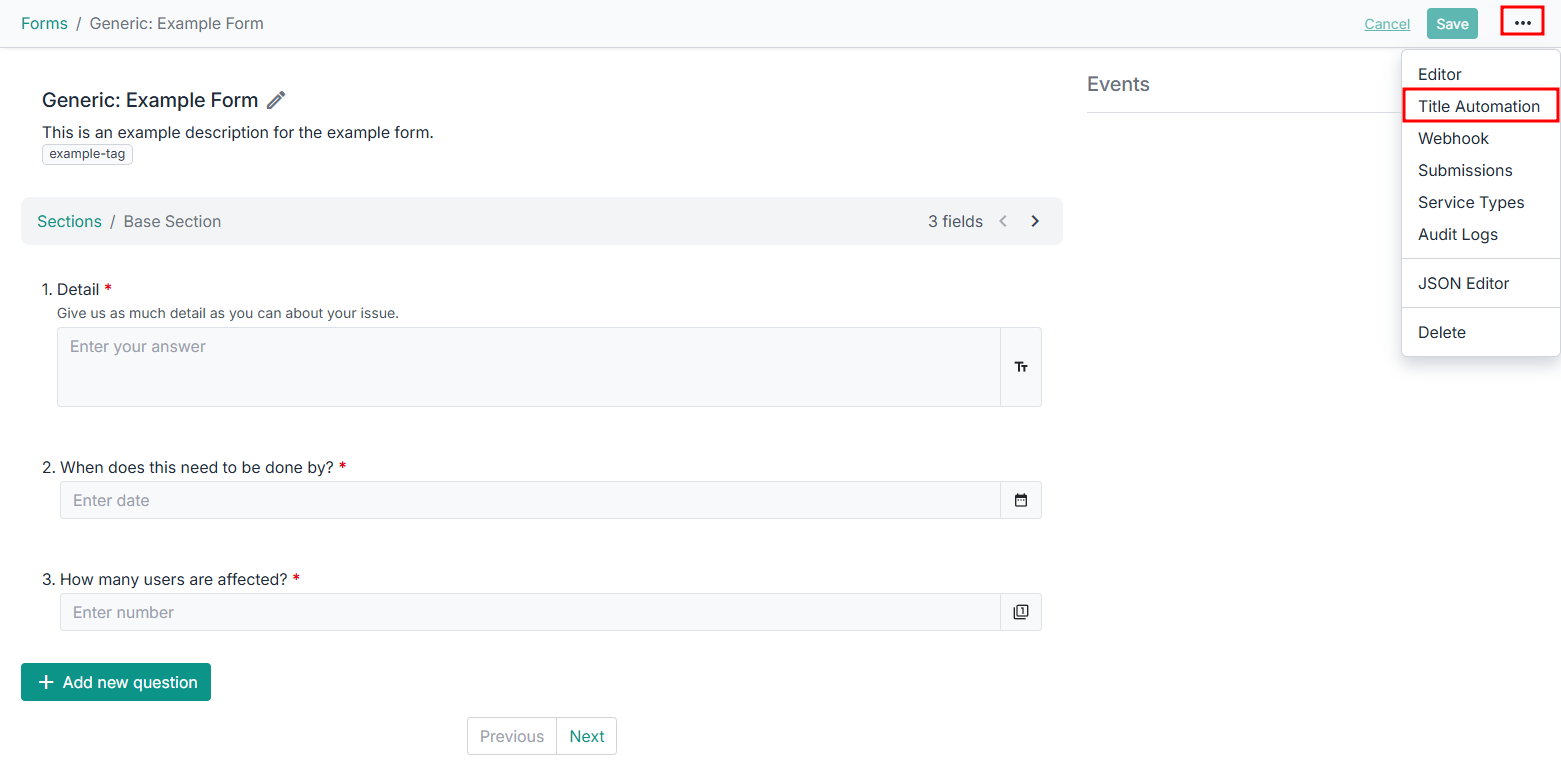
- Using the menu provided, add or remove arguments as desired
 Arguments will be replaced by a user's input from the form.
 - Add your arguments using the
{argument number}syntax in the title as shown in the example
Here is a title that could be generated for the above example: Urgent issue | Reported By Jane Doe | 3 users affected... | Resolve By 03/11/2025
Ticket title automation is a powerful feature, but overcrowding can hinder the at-a-glance idea of what the ticket contains. We recommend choosing a maximum of 3-4 arguments from your form.
Frequently Asked Questions
"What happens if we don't enable Title Automation?"
Your forms will still work, but the summary field will be automatically added to the top of the Service Types for users to fill out in addition to the rest of the questions in the form.