Table of Contents
The Learning Center
 Updated
by Niamh Ferns
Updated
by Niamh Ferns
Learning Center Overview
The Learning Center is a great way to educate your clients and share documents with them. You can also link to videos and files hosted online. In this article, we'll show you what the Learning Center looks like and how to configure it to fit within your DeskDirector instance.
This article will just specifically discuss how the Learning Center looks/behaves in the client portal. Learning Center is a native menu item in DeskDirector, so it is very likely to appear in a client's portal, assuming a Learning Center permission is enabled for them.
- Any user who has been given the Learning permission via the Admin Portal will be shown this module in DeskDirector
- Microsoft learning materials are set up as a starting point.Please note, we do not maintain the links. We are giving this as an example. You can replace with your own learning materials or update the Microsoft learning links.
- Customised learning categories can be created on a per-client basis using the DeskDirector Admin Portal.
Setting Up the Learning Center
To get started, log in to the Admin Portal and head over to Client Portal > Learning Center.
Creating Learning Center Category and Items
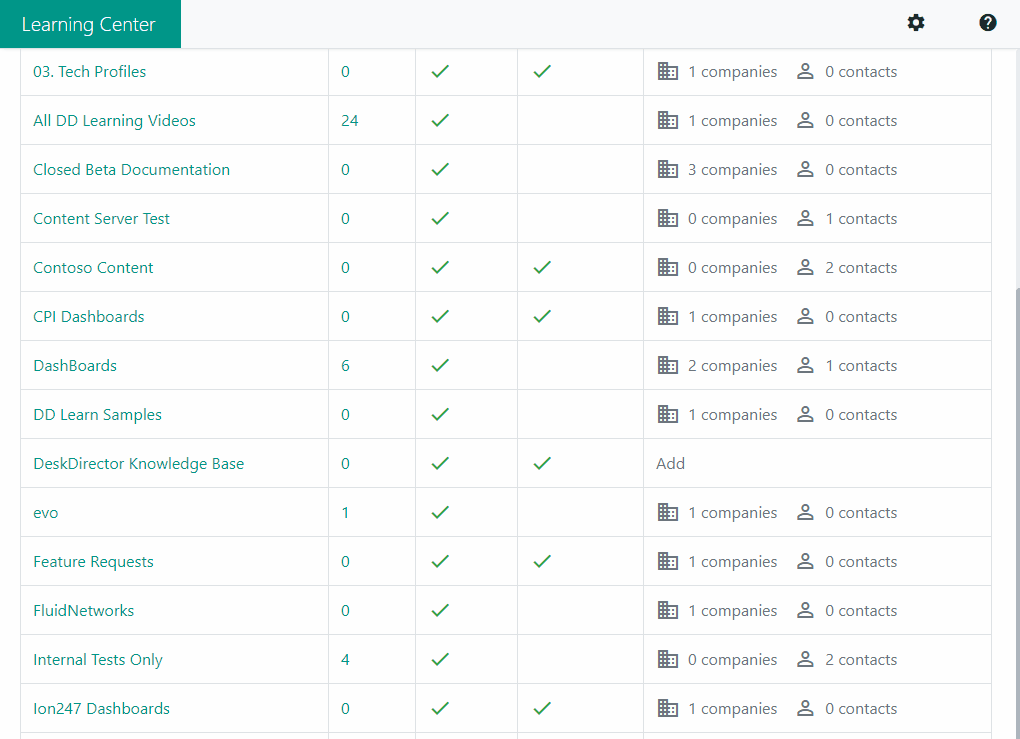
You can think of Categories as the folders that contain individual Learning Center pages. We provide everyone with some Microsoft examples to get them going. You can, of course, change or delete these if you wish.
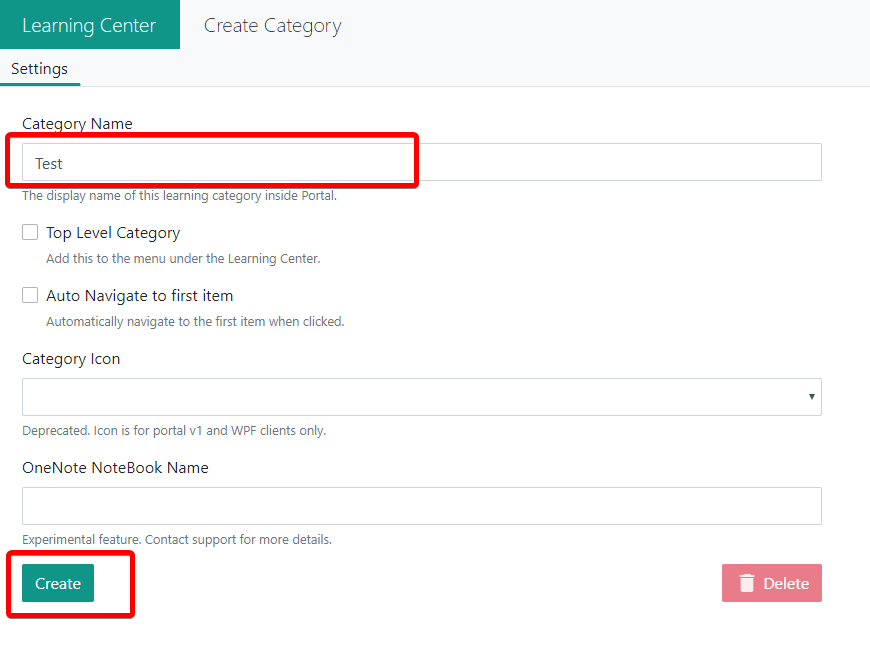
Insert a New Category
To insert a category:
- Click the Add Category button
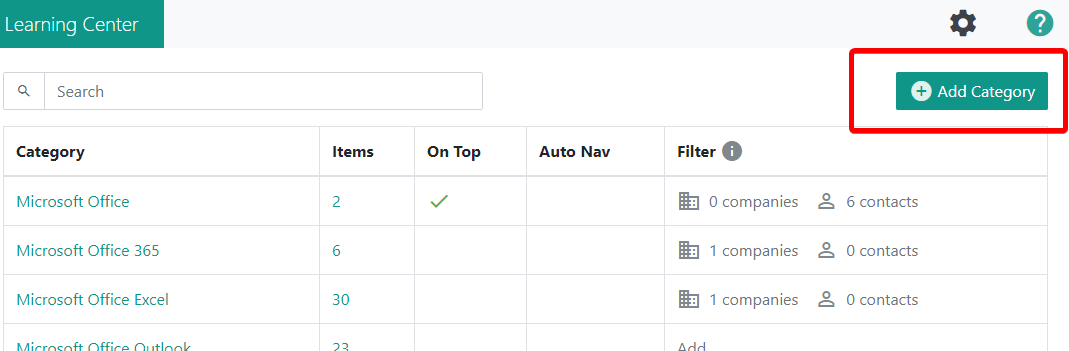
- Enter a Category name that you want your clients to see
- Click Create.
Add/Update/Delete Items in a Category
To modify or add items:
- Open the category you wish to add the items to
- Click on the Items tab (This tab contains all the learning items in the current category.)
- Make any desired changes:
- To add an Item, click Add Learning to open the new item screen, then fill in the needed information.
- To edit an item, click on the name of the learning item. This will take you to a new screen to edit the details.
- To delete an Item, simply click Delete in the edit item screen, and when the pop-up screen appears, click Ok.
- To set up who can view the Learning Center, click on the Filters tab. You can specify a company or contact in this tab.
Setting up Learning Center Access
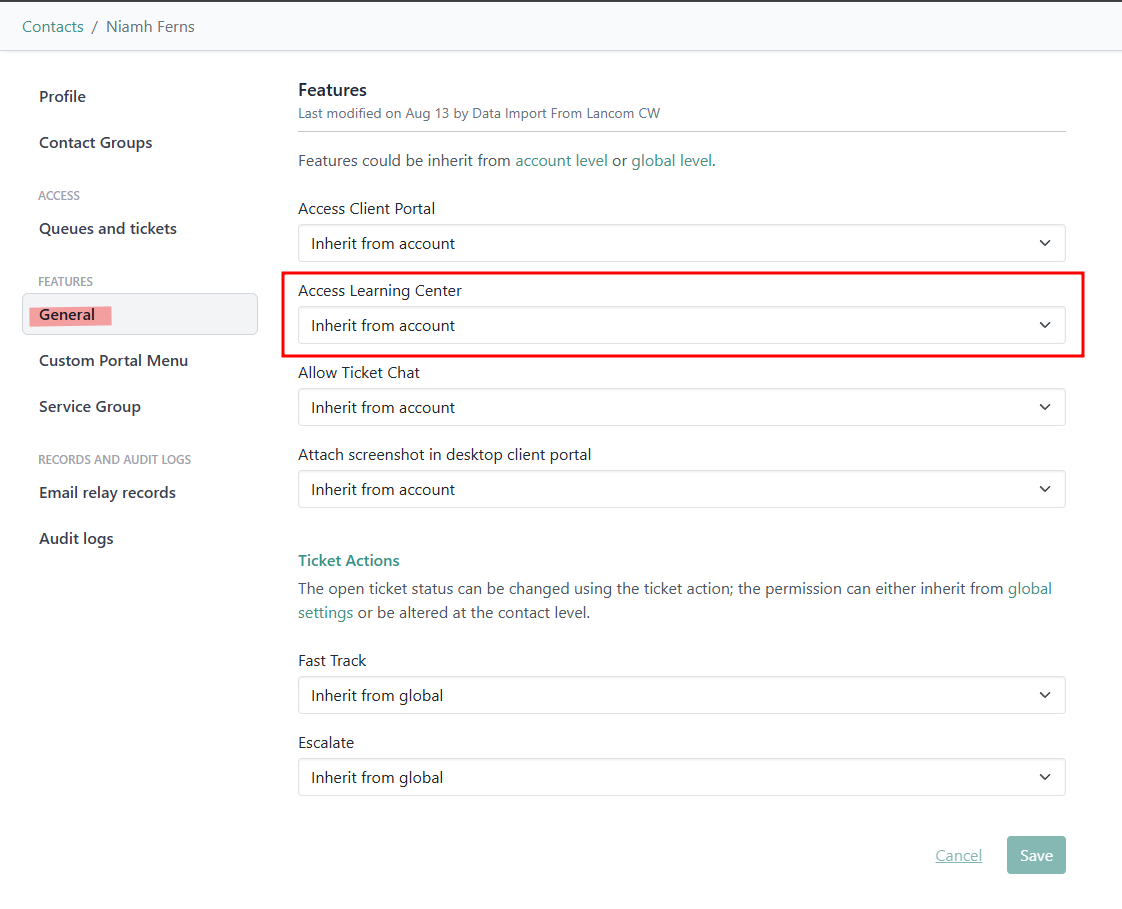
To set up the Learning Center, head over to your Admin Console under Portal > Settings. On this page, under the Permissions tab, simply select Learning and add it to the list of global permissions. This will enable Learning for all your clients:
Account Level:
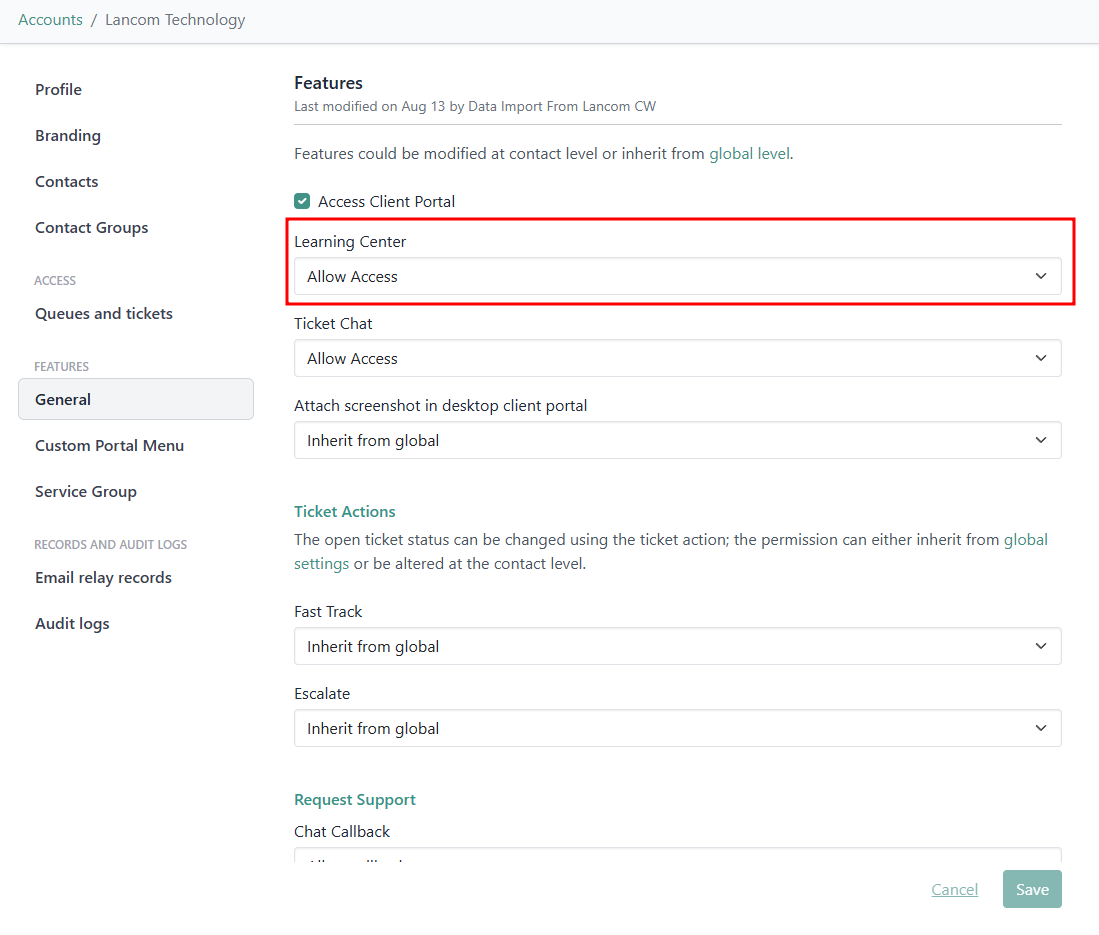
Contact Level:
Set up Category Filters
Any user who has been given the Learning Center permission via the Admin portal will be shown this module in DeskDirector. You can create Categories that can only be seen by particular clients. This can be done in the Learning Center.
- Click on the Category you want to add a filter for to open the Category Settings page
- Click on the Filters tab
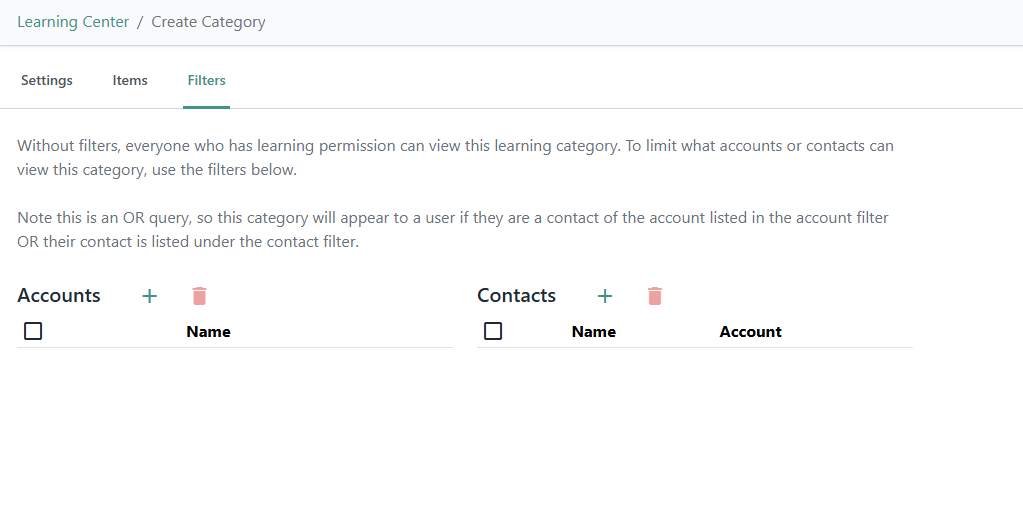
On this screen, you can add/remove entries to the accounts or contact filter. Click on the + icon to add accounts/contacts from a pop-up. To remove accounts/contacts, just click the checkbox beside their name and click the delete icon.
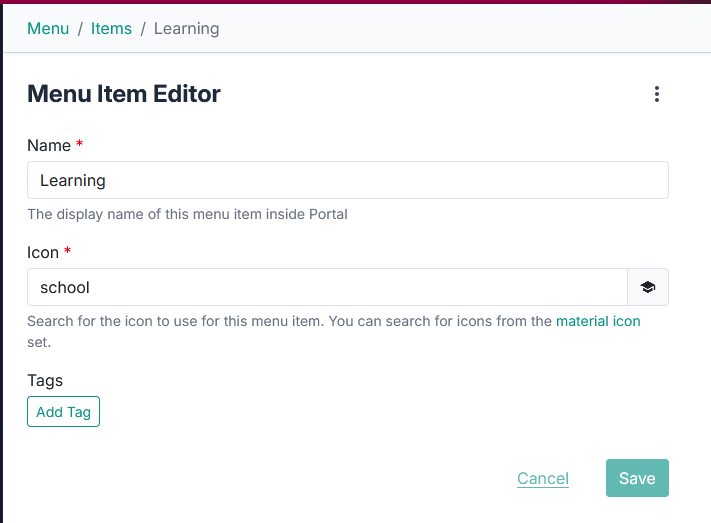
Change the Learning Center Name
To change the name of the Learning Center, open your Admin Portal and head to Client Portal > Menu System > Menu Items. In the default menu items, you'll see one for the Learning Center. When opening, you can change the name and icon:
External File Hosting
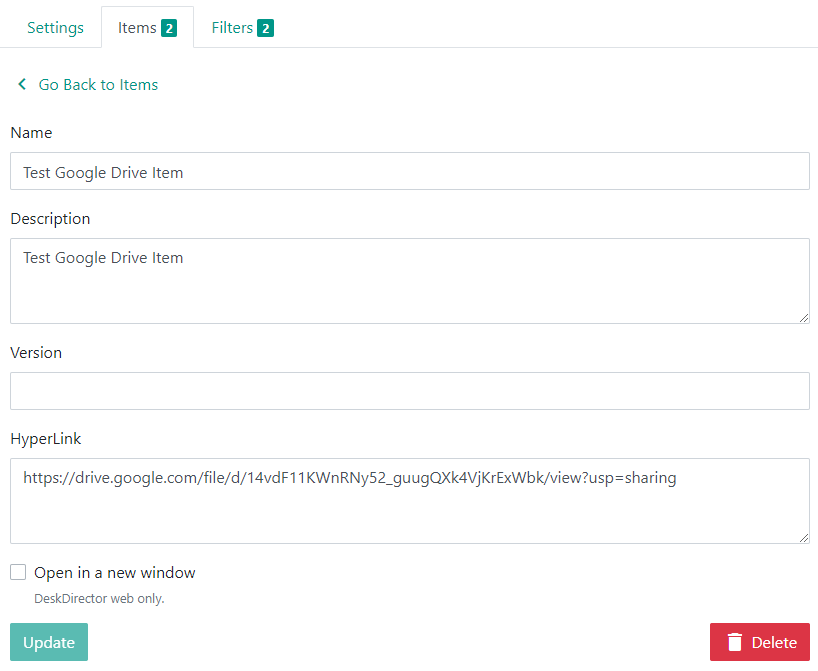
DeskDirector's Learning Center can cater to files hosted in file repositories like Dropbox, Google Drive and others.]
Add Your External Item
Edit the Learning Center item you want to use the Dropbox/Google Drive file for, and paste the link into the Hyperlink field:
Test your Learning Center item, and you should be all set!
Frequently asked questions:
"Why are some links on the sample Microsoft learning materials not working?"
The Microsoft learning materials are set up as a starting point, and we do not regularly check if the links are working. We are giving them to you as an example. You can replace them with your own learning materials or update MS learning links manually.