Table of Contents
Task Lists
 Updated
by Niamh Ferns
Updated
by Niamh Ferns
Task Lists Overview
Task lists are essentially checklists for tickets. Here are a few ways you can benefit from using task lists:
- Consistent and systematic approach to tickets: create and use a template to ensure your agents follow SOPs
- Track ticket progress: keep track of ticket progress, for both agents and end users
- Ad-hoc reminders: add items to task lists on the go
- Assist agents: help new agents navigate a ticket by providing instructions
- Ticket reference: see what actions were taken for a ticket at what time and by whom
Feature Summary
- Task list templates: create reusable templates that you can attach to certain request types or add to tickets
- In ticket editor: create task lists from scratch or extend a template, all within a ticket

- Markdown support: insert formatted text and rich content into instruction descriptions
- History: progress and edit history are visible to agents and end-users
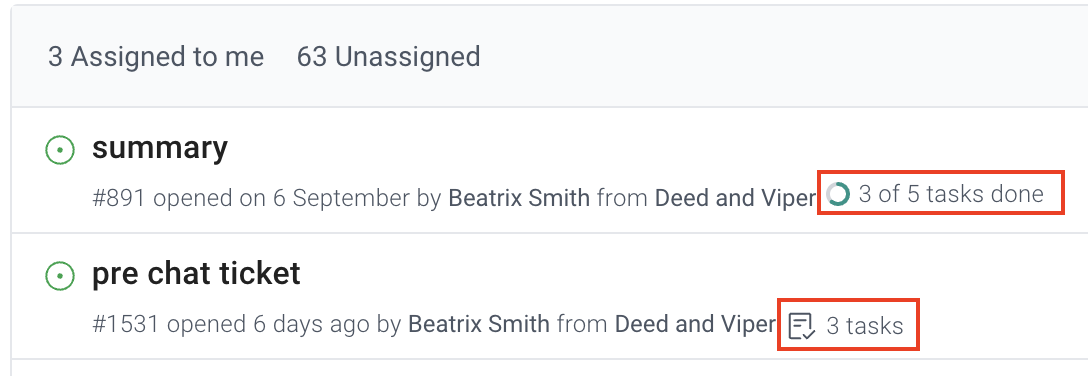
- Task list summaries: task list summary counts are displayed on each ticket overview. When there are multiple active task lists in a ticket, they will be summed up.
Task List Templates
Task list templates are reusable templates that can be attached to service types, or manually attached to a ticket by an agent. The template editor can be accessed in the Admin and Tech portals by members with the following permissions:
- Master Admin
- Admin
- Advanced Member
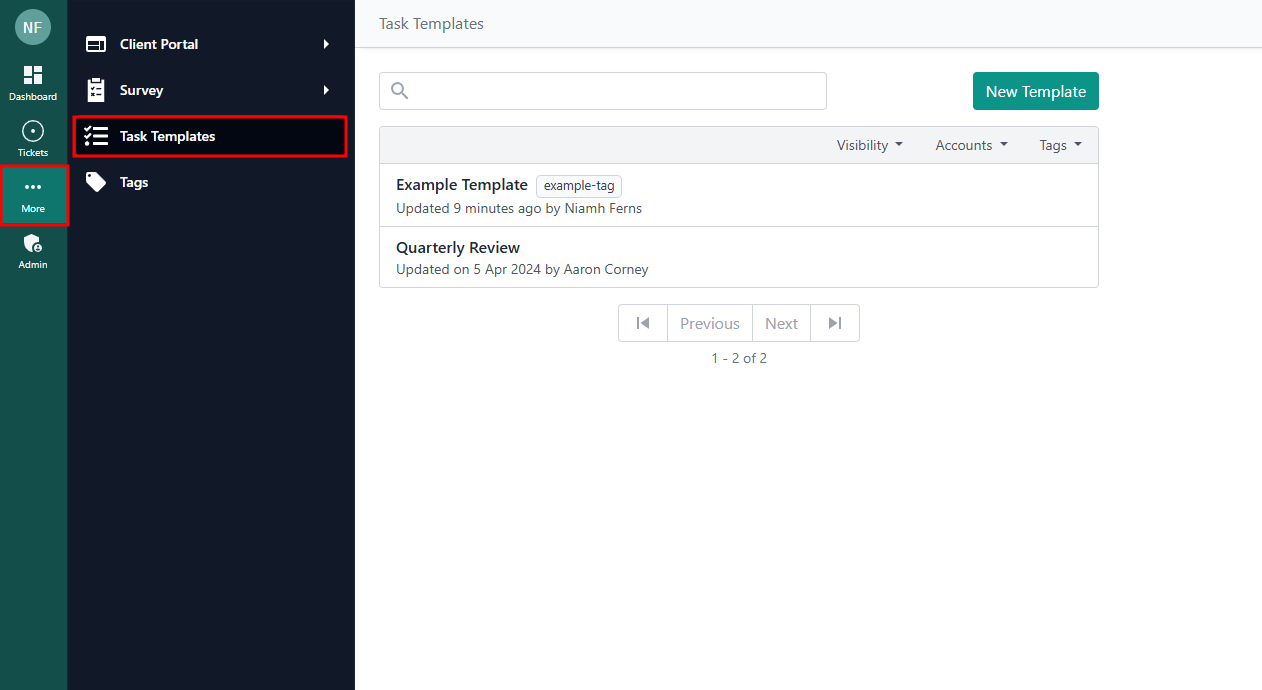
You can find a list of your Task Templates on the left-hand navigation panel.
Task List Template Gallery
This is a collection of task list templates that you can import into your own instance.
Template Overview
Menu>Settings: edit the name, tags and company restrictionsMenu>Edit: opens task list template editor- Service Types: the task list is automatically added when a ticket is created using the Service Type. Read more.
- Company Restriction: restrict the template to certain companies. If a company does not have access to the template, it will not be automatically added via request type. The template also won't appear as an option if a tech is manually adding a task list to a ticket from that company.
- Task List Demo: displays a preview of the task list. Expand an item to see the description.
Template Editor
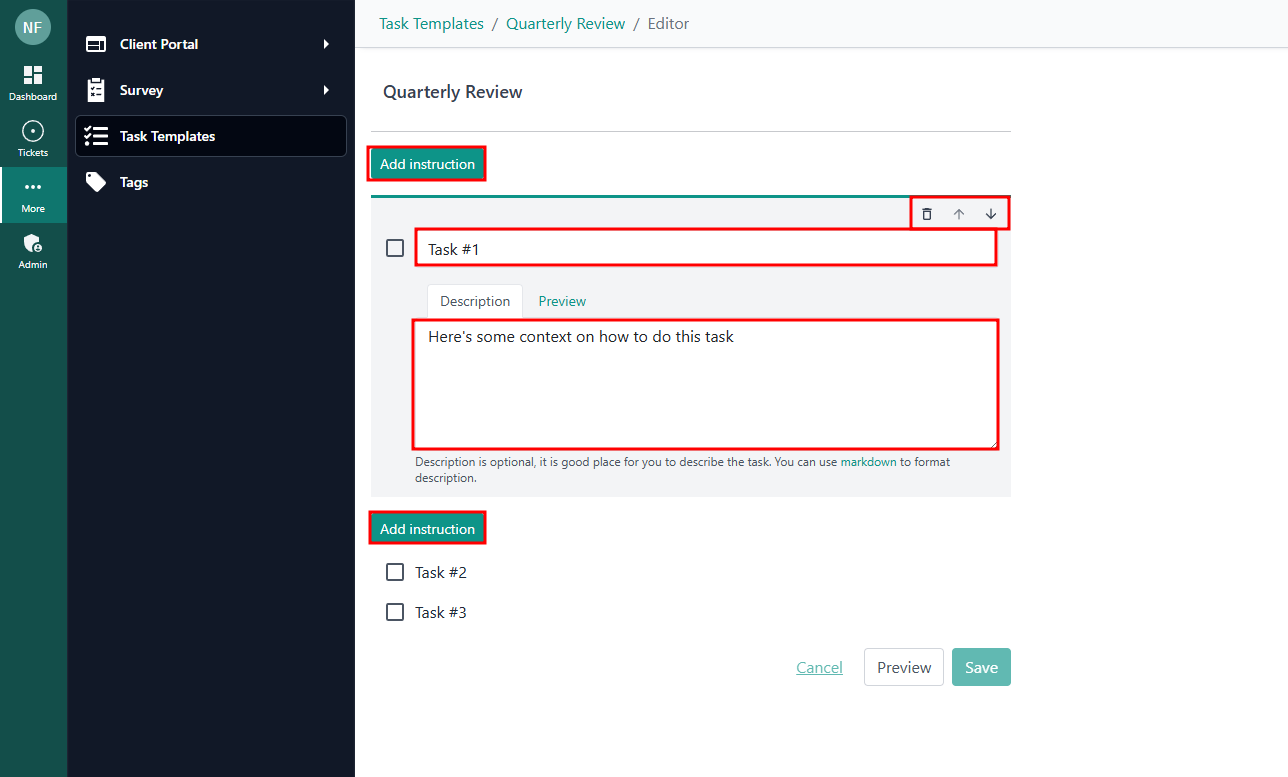
In the editor, you can add, remove and reorder instructions in the task list. Preview individual instructions or the whole list.
- Title: plaintext only
- Description (optional):
You can have up to 25 instructions per task list. Split into multiple task lists if you need more than 25.
How to Use Task Lists
Task List templates can be assigned to service types, but you can also manually add task lists to tickets in the Tech portal. When task lists are added to a ticket, they will be visible to the end user, along with the history of progress and edits.
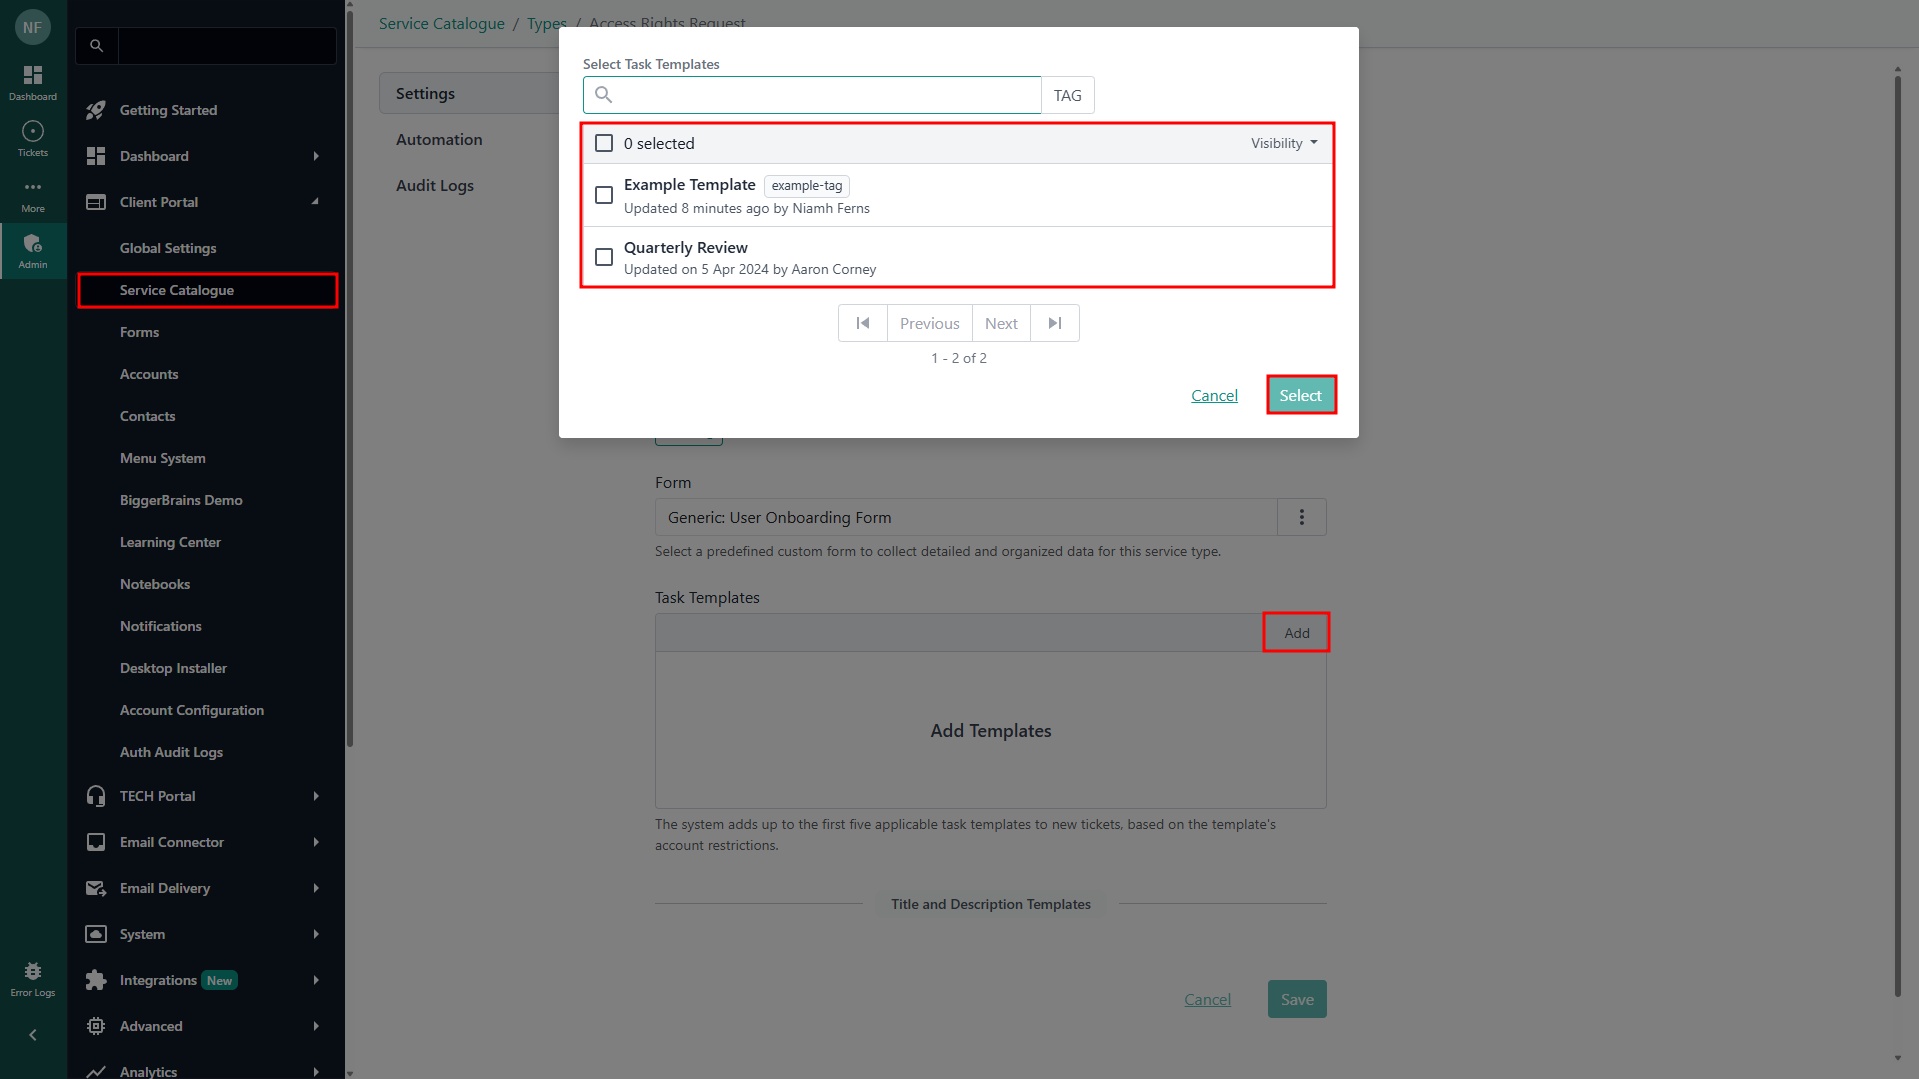
Assigning Templates to Service Types
When task list templates are assigned to a Service Type, any ticket that is created using the Service Type will automatically have the lists attached. There is no limit to the number of templates that you can assign to any given service type; however, the system will only attach the top 5 templates based on company restrictions. You can manually add more task lists after the ticket has been created, if required.
To assign templates to a Service Type, navigate to the Service Type. In the "General" tab, there will be a "Task Templates" section. Drag to reorder, from high to low priority.
Adding Task Lists to Tickets
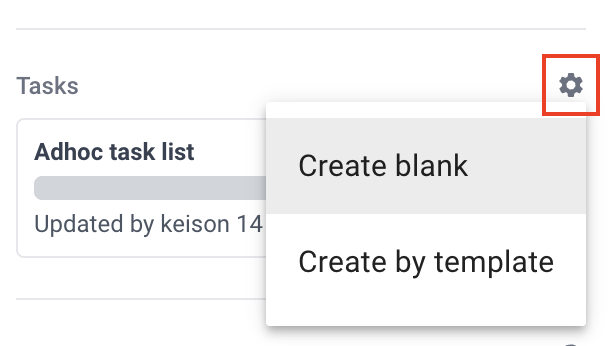
In a Tech portal ticket, you will find the task lists section on the right-hand side, below contact information.
- Create blank: adds a blank list. A name is required (can be edited after)
- Create by template: adds an existing task list template. The list name will be the same as the template name.
Ticket Task List Menu
There is a menu available for each task list in the ticket.
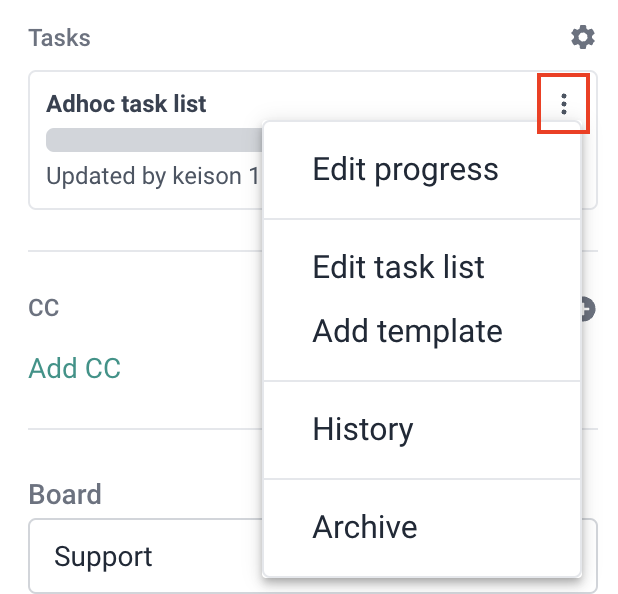
In this menu, you will find:
- Edit progress: tick or untick items in the list. Can also edit progress by clicking on the task list name. Each action is logged in history.
- Edit task list: opens an editor modal. It will look almost identical to the template editor. On every save, the state of the task list will be logged in history.
- Add template: append tasks from a selected template onto the bottom of the current task list. If the resulting task list exceeds 25 items, it will fail.
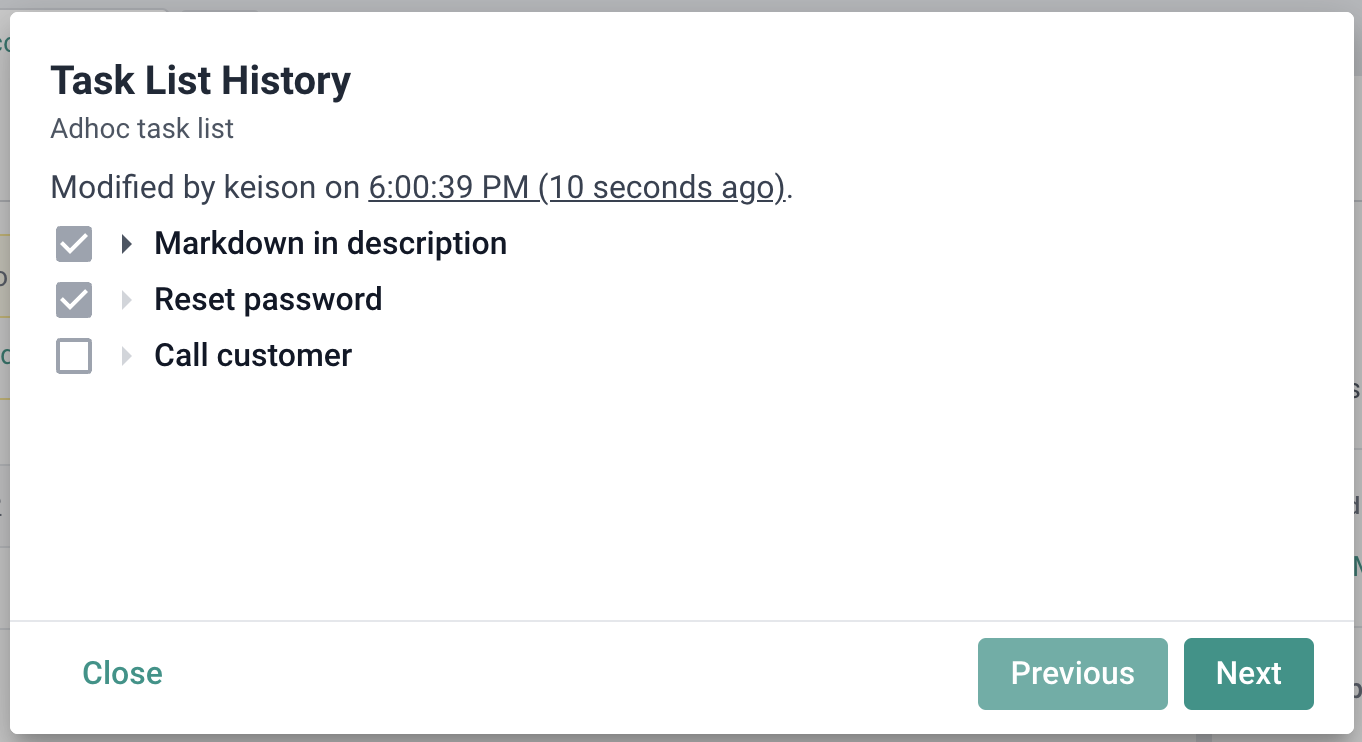
- History: view the history of progress and edits. This is also visible to end-users. History is only retained for 120 days.
- Archive: this will make the task list read-only, remove the task list from active task lists, and remove the task count from the summary total (seen in Tickets overview). The list will still be visible to agents and end users after archiving, under the timeline.