Getting Started with DeskDirector
DeskDirector Portals
Browser Support
What is the DeskDirector Admin Portal?
What is the DeskDirector TECH Portal?
What is the DeskDirector Client Portal?
Desktop Portal
Managing Your Account
Pricing & Subscription Plans
Deskdirector - Sign up walk through
Managing your DeskDirector Subscription
Admin Essentials
Release Notes
Permissions & Feature Configuration (ConnectWise/Autotask Partners)
Automatic Contact Creation
The Developer Corner
DeskDirector Features Overview
Desktop Portal Version Differences
Logging in to DeskDirector
Managing Tickets with DeskDirector
User Profiles & Profile Pictures
Office Hours
How Searching Works
Embedding Help Page Media
Get started with the DeskDirector Power Automate Connector
Features
Portal Customization
Service Catalogue
Forms
Communication
Actionable Messages for Emails
Real-Time Chats
Notifications
Email Notifications
Email Template Engine
Surveys
Broadcasts
Generative AI
DeskDirector with Generative AI
Setting up AI Service Providers
AI Assistants in DeskDirector
Custom Tools for AI Assistants
Knowledge Bases for AI Assistants
Ticket Summary for TECH Portal
Set up Microsoft Foundry Agent Service with DeskDirector Portals
Advanced
Login & Authentication
Accounts and Companies
Contacts
Contact Groups
Approvals
Task Lists
The Learning Center
Tags
Custom Domains
File Storage
Portal Deep Linking
Service Dashboard
Auditing and Analytics
Integrations
ConnectWise
ConnectWise Custom Menu Item for DeskDirector Tech Portal
ConnectWise
ConnectWise Quotes & Invoices
ConnectBooster
ConnectWise - Avoid Aggressive Notifications
AutoTask
Switching or Merging PSAs
QuoteWerks
Wise-Pay
TimeZest
BiggerBrains
OneNote Notebooks
Integrations - Frequently Asked Questions
IT Glue
Microsoft Teams App
Introducing the DeskDirector for Microsoft Team App
Installing the Microsoft Teams App (Client Mode)
Installing the Microsoft Teams App (TECH Mode)
Setting up Tags for Teams Discussions (TECH Portal)
Branding the DeskDirector Teams App
DeskDirector Teams App Notifications
User Groups Integration with Microsoft Teams
Setting up Content Security Policy (CSP)
Advanced topic: Setting up Tech & Client Mode in the same tenancy
Integrating Microsoft Teams with DeskDirector Tech Portal
Smart Alerts for TECH Users
Microsoft Power Automate
Actions
Solutions
Power Automate Template Gallery
Featured Solution: Teams Ticket Discussion
Featured Solution: Ticket Briefing
Power Automate Administration
Power Automate Connector - Setting up your first flow
DeskDirector Power Platform Connector Reference
Troubleshooting
Troubleshooting via Web Developer Tools
Desktop Portal - Common Issues
Contact & Service Agent Impersonation
Diagnose Entities Tool
DeskDirector Desktop App - Installation Issues
Troubleshooting DeskDirector Connection Issues
Login & Authentication - Common Issues
Permissions & Access - Common Issues
Tickets & Chats - Common Issues
Approvals - Common Issues
Email & Email Delivery - Common Issues
PSA Entity Syncing - Common Issues
PSA Integration - Common Issues
ConnectWise Integration - Common Issues
Autotask Integration - Common Issues
ConnectWise Audit Trail - Exporting API Logs
Microsoft Teams App - Common Issues
Contact DeskDirector Support
Security
Glossary
Archived
- All Categories
- Archived
- DeskDirector Forms - Dynamic Fields Implementation Example
DeskDirector Forms - Dynamic Fields Implementation Example
Using dynamic fields in DeskDirector forms requires an API endpoint to be created. This may be a barrier to people who don't necessarily have the time or expertise to develop such an API.
In this article, we will be going through a simple endpoint implementation using Power Automate, with our data source being an Excel sheet in Excel Online.
Prerequisites
- Power Automate licensing with access to standard connectors.
- For this example, we are only using a standard connector: Excel Online (Business)
- Download the source Flow template and Excel sheet (click to download)
Video Guide
Step by step guide in video form. No audio.
Step by Step Guide
- Upload the Excel file into a document library in one of the supported locations as specified by the Excel connector: OneDrive for Business, SharePoint Sites, Office 365 Groups. We are using SharePoint in this demo.
- Create an Excel Online (Business) connection in Power Automate. The account you use needs to have access to the document library where you saved the Excel fileTip: use service accounts for all connections and flow ownership
- Import the flow in Power Automate
- Upload the template zip file and map the required connection.
- The import is expected to fail as the Excel action placeholders point to a non-existent file. Click 'Save as a new flow' to continue. This should open up the flow editor.
- Find the 'List rows present in a table' action. Navigate to the source data table in the Excel sheet. The table is called 'DatesTable'.
- Save.
- Copy the HTTP trigger endpoint URL. Needed in next step.
- Turn on the flow.
- Create a form in DeskDirector
- Add a new field of Dynamic type. It should be at the bottom of the dropdown menu.
- Change the HTTP method to POST.
- Remove the
/from the input box before pasting the HTTP trigger endpoint URL in. - Save.
- Create a request type in DeskDirector
- Attach the form you just created.
- Enable the request type.
- Save.
- Test the dynamic field in Portal
- Impersonate a Portal user from the admin console
- Find the request type. Click on the field without typing to see the top 30 dates. Type something to search, e.g 'Monday'.
- Exercise for the reader: The dates are currently returned in descending order. Try edit the flow to show the dates in ascending order.
- Congratulations! You have now implemented a dynamic field API endpoint for DeskDirector forms.
Pros and Cons of using Power Automate over a bespoke API
Pros
- Fast to implement, low code
- Easy to deploy and maintain
- Connectors to other Microsoft and third party services. Any potential auth is managed within Power Automate.
Cons
- Slow due to action overhead
- May get capped by action limits if endpoint is busy
- Limitation of available data actions and expressions may require you to do clunky workarounds/hacks for things that are trivial in code
Conclusion
You should now have some basic understanding of what is required to implement an API endpoint for a dynamic field, along with a working, practical example that you can build out from.
This template, along with others are also available in our template gallery.
Troubleshooting / FAQ
- I can't find the request type in the Portal
- Make sure the request type is enabled and the contact you are impersonating has access to it.
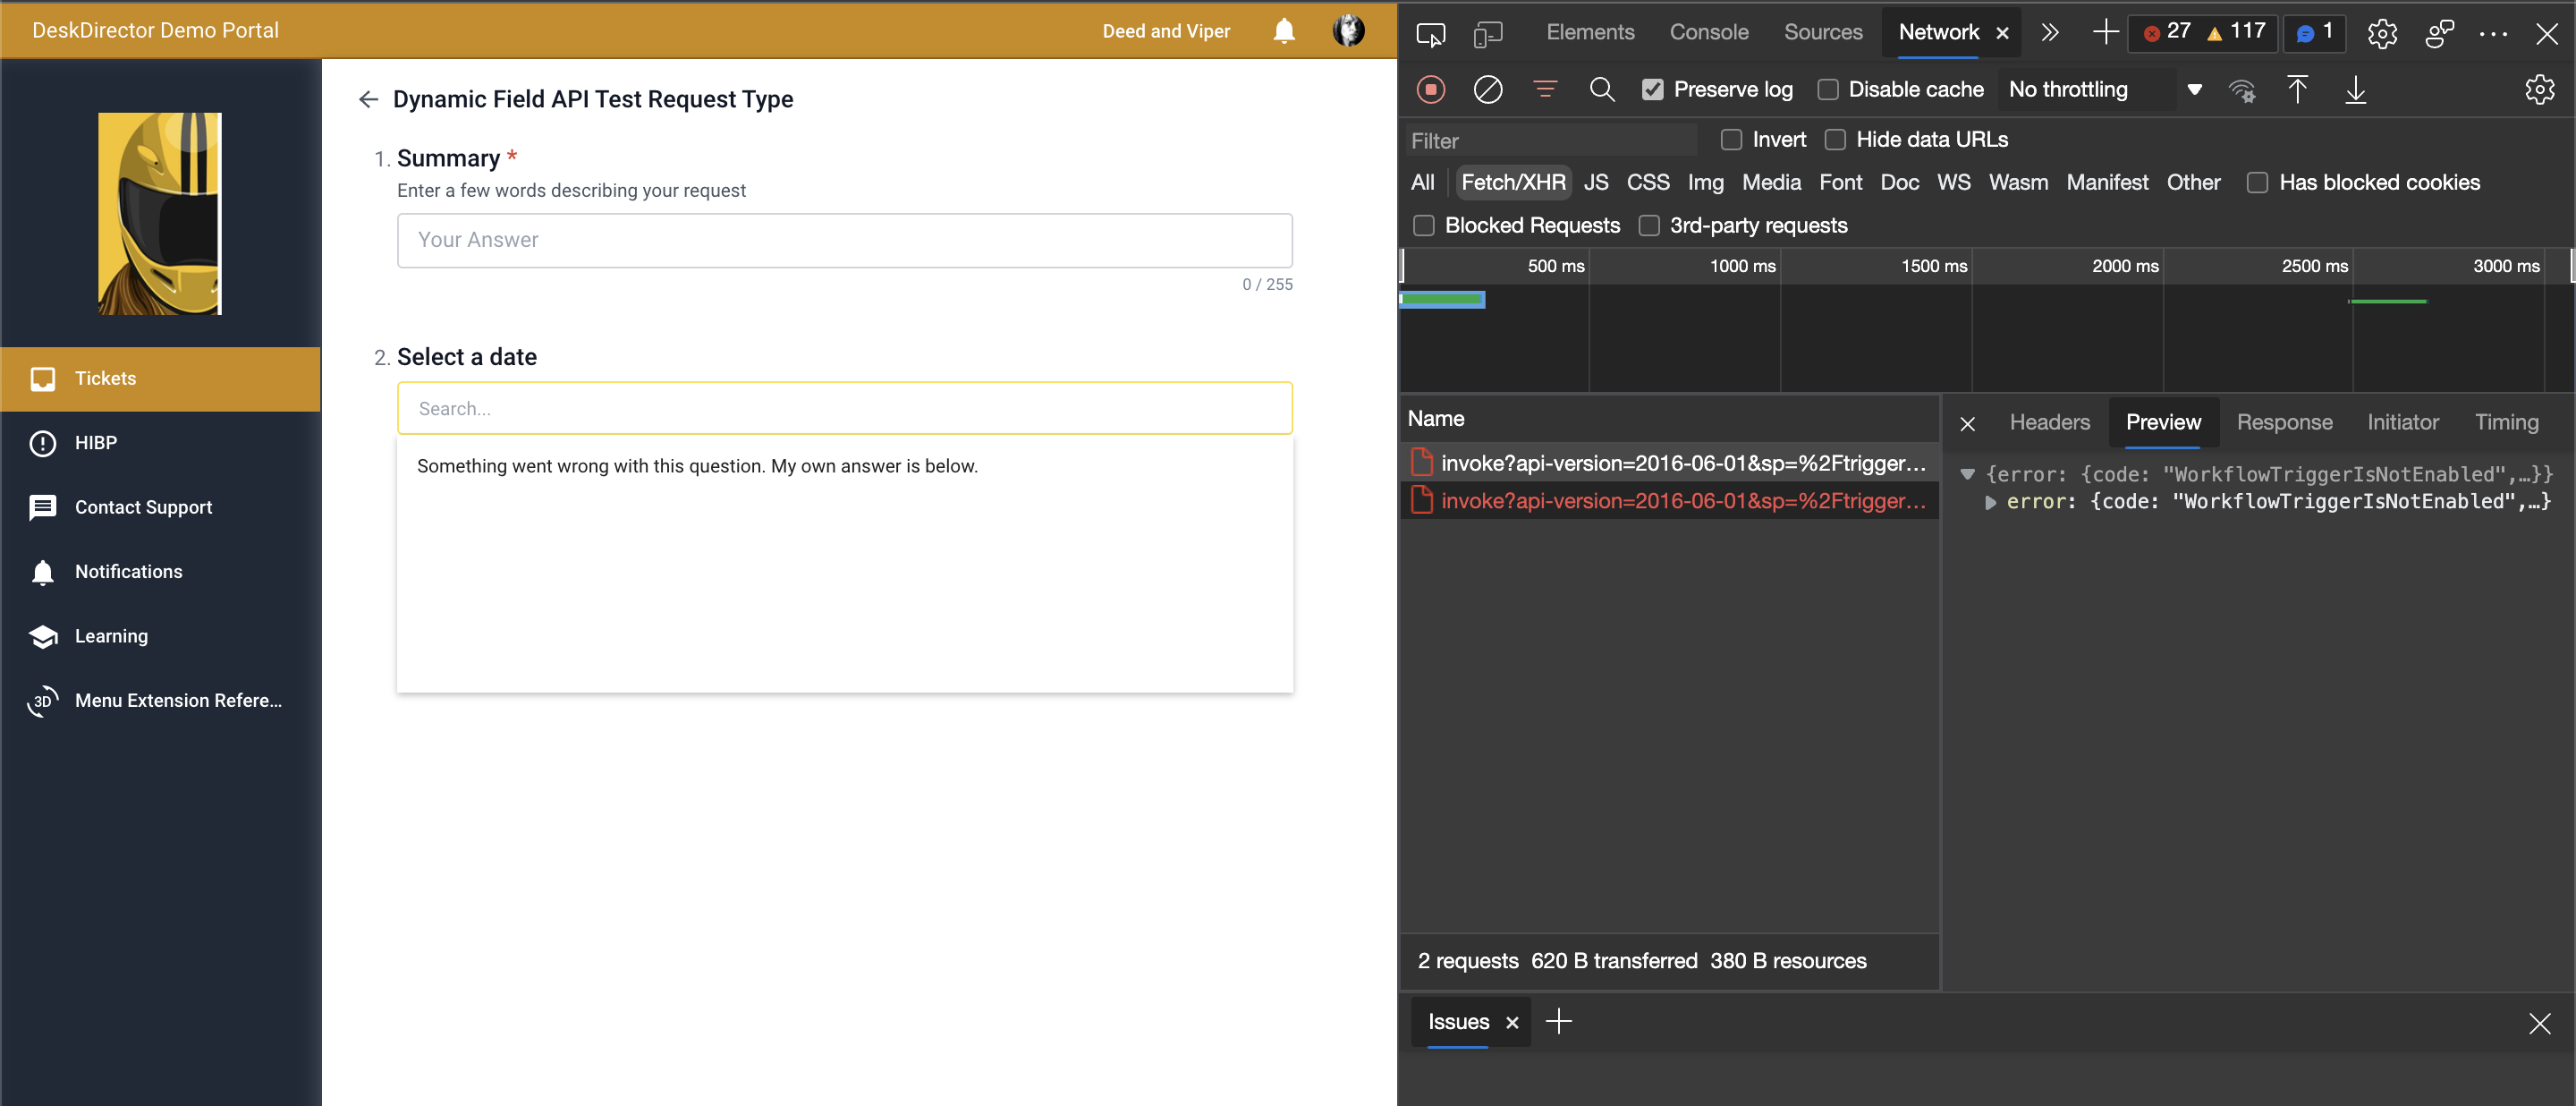
- In the Portal, the dynamic field returns "No results" or "Something went wrong with this question"
- This could one of many possible reasons. If you are familiar with your browser's dev tools, it is easy to check if your endpoint was successfully called and diagnose the issue. In the image below, the error is because the endpoint is not available (either off or doesn't exist anymore)
- If you are not familiar with dev tools, you could check the following:
- Is the flow on?
- Is the HTTP method set to POST?
- Did you remove the / (forward slash) from the URL input box before pasting in your own endpoint? If the forward slash is still at the front, it gets treated as a relative URL, and the dynamic field will try call an endpoint that looks like this:
https://subdomain.deskdirector.com/https://prod-06.australiasoutheast.logic.azure... - If your flow is on and was triggered (there is run history), then check the run logs for any issues.
Dynamic Fields Tutorial
59 STEPS
1. In this example, we are going to display dates in our dynamic field, by retrieving them from an Excel file.
2. Upload the demo Excel file from your OneDrive location. Click to view its contents.
3. The data is in tabular format.
4. Click the Table Design tab.
5. Click the name of the table. This is the table that we will retrieve the data from.
6. Next, open Power Automate and click More.
7. Click Connections.
8. Click New connection.
9. Click the Search box.
10. Type Excel.
11. Click Excel Online (Business).
12. Click Create to create a new connection. We need this connection to retrieve the data from our Excel file.
13. Select your Microsoft account. Provide the password, if asked.
14. Now, click on My flows.
15. We are going to import a flow as a zip package. Click Import.
16. Click Import Package (Legacy).
17. Click Upload. Browse to find and select the zip file.
18. Once the package is imported, click the action button to configure the Excel connection.
19. Select the connection.
20. Click Save.
21. Click Import.
22. You will receive an error, this is expected. Click Save as a new flow.
23. The edit page for the flow will open. Click the drop-down box to select who can trigger the flow.
24. Click Anyone.
25. The HTTP POST URL will be generated after we save the flow.
26. Click Connections.
27. Click the Excel connection that you previously created.
28. Once the connection is accepted, we will be able to select the Excel file to retrieve the data.
29. Click the cross icon to select the location of the Excel file.
30. Click OneDrive for Business.
31. Click the cross icon to select the Document Library.
32. Click OneDrive.
33. Click the folder icon to select the Excel file.
34. Click the name of the Excel file that we saved in the previous steps.
35. Click the cross icon to select the table name.
36. Click DatesTable.
37. Finally, click Save to save the flow.
38. Scroll up and click the back arrow to go back to the previous page.
39. Our flow is now saved and initialized. If the flow is OFF, click the Turn on button.
40. Our flow is now on.
41. Click the Edit button.
42. Click the first step of the flow named Manual.
43. From the properties window, click the copy icon against the HTTP URL. We will need this URL to input into our dynamic field.
44. Click the back arrow to exit the editing window.
45. Open the DeskDirector Admin Portal and click New Form, or click on an existing form to edit it.
46. Click Add new question.
47. Click the three dots menu to view more options.
48. Click Dynamic.
49. Type the question title.
50. Type the subtitle.
51. Click the Request type drop-down box to change the request from GET to POST.
52. Click the URL path textbox and delete its contents, if any.
53. Type or paste the URL that we copied from our Power Automate flow.
54. Then, click Save to save the form.
55. When users fill out this form, they will be able to select the date.
56. Click Search.
57. The dates will be retrieved from the Excel file. Select any date from the drop-down list.
58. The date will be selected and accepted as an input.
59. That's it. You're done.
Here's an interactive tutorial
** Best experienced in Full Screen (click the icon in the top right corner before you begin) **https://www.iorad.com/player/2331867/Forms---Dynamic-content-Implementation