Table of Contents
DeskDirector Forms - Question Types in Detail
 Updated
by Niamh Ferns
Updated
by Niamh Ferns
Question Types in Detail
Here are all the types of questions currently supported in forms.
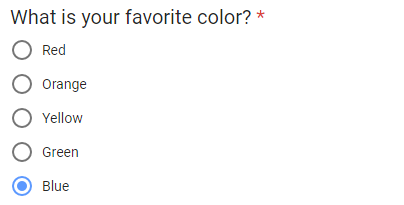
Choice
By default, this is a single-choice question (radio buttons). If you want to change it to a checkbox that allows multiple selections, enable the Multiple answers option. If you want to convert the field into a dropdown selection, enable the Dropdown option. The name given will be displayed to the user:

Text
This is a simple text input field and, by default, allows for a single line of text. You can check the Long answer toggle switch to allow users to submit text with multiple lines.

Email / URL
This looks similar to a text input field but has additional validation in place to make sure users are inputting a valid email address.

Statement
This will add a text entry with no question/field for users to fill in, and is useful for providing further context or information to a user. You can use it to explain form sections, or show text under certain conditions.
For example, the statement field in the form below is only visible when an end user selects yes:

Number
This allows users to enter a numerical value (either with or without a decimal point). You can also add validation to expect values above or below a certain amount (both inclusive or exclusive of the value you set), or specify that a whole number is expected.

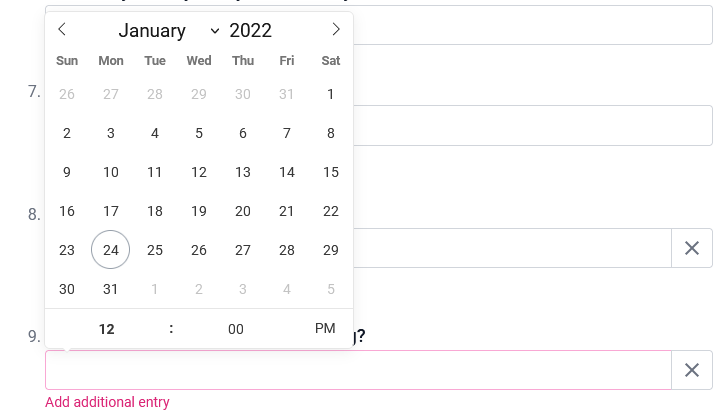
Date / Date Time
Users will be presented with a calendar where they can pick a day, month, and year.
Time
Users will be presented with an easy-to-use time input:

Phone
A phone input allows users to enter a phone number with format validation. Our system performs the heavy lifting to verify phone format according to the country code that's been selected.

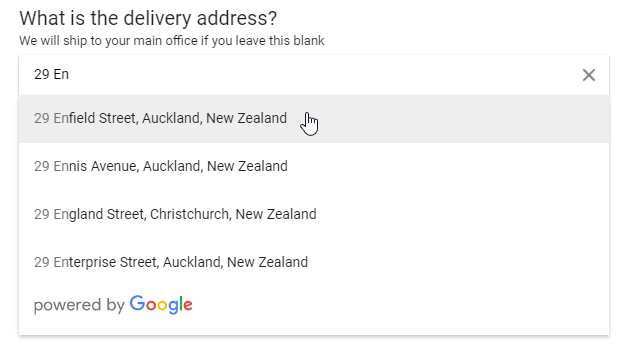
Address
A standard short text input with Google auto-complete support. You can specify which country Google will provide suggestions from.
Dynamic
More information regarding this field is in this separate guide - DeskDirector Dynamic Fields
Field Value Format for Automations
One of DeskDirector's core offerings for forms is the ability to collect accurate data that can be used for automations. Through this, you can extend DeskDirector's forms to work with whatever automation platform you choose. It also allows you to integrate DeskDirector's forms cleanly and comfortably into your existing systems.
We try to make these work for you, not against you.
Field JSON Data Model
{
  "name": "question title",
  "description": "Description markdown",
  "identifier": "id_of_field",
  "type": "field_type",
  "choices": [
    {
        "name": "Name of first choice",
        "identifier": "choice_1",
        "selected": false,
    },
    {
        "name": "Name of second choice",
        "identifier": "choice_2",
        "selected": true,
    }
  ],
  "value": "Value for text, phone, email, number, date, time, address fields. Or used for additional info of other choice field."
}
For the choice field and the dynamic select field, the field result is easy to understand. For fields such as phone, date, time, and email, it requires a deeper understanding of how systems format the result value. You can find more on this below.
Phone Field
For the phone field, we employ the E164 format.
E164 format is also supported by telephone link and all phone-related applications.
tel:+14155552671 equal to +1 (415) 555-2671
Date Field
For the date field, the format is according to the ISO 8601 spec. This includes formatting for dates or date times.
- Date: 2022-01-24
- Date Time: 2022-01-24T13:34
Time Field
For the time field, the format is also according to ISO8601 spec. It records the time in the 24-hour format. Hours will be displayed as 00 through 23, minutes displayed as 00 through 59, etc.
- Example 1: 01:23 - 1:23 AM
- Example 2: 12:59 - 12:59 PM
- Example 3: 23:59 - 11:59 PM
Multiple Entries
Multiple entries are currently supported by phone, date, time or email fields. Entries are delimited with ;.
- Date Time: 2022-01-24T13:34; 2021-11-02T00:23; 2022-05-21T23:03
- Date: 2022-01-24; 2021-11-02; 2022-05-21
- Phone: +14155552671; +12015550123
- Email: sample_1@test.com; test@deskdirector.com
Frequently Asked Questions
"Can a form result contain corrupted or invalid data?"
If forms are submitted through the Client Portal, then all values should be validated and correctly formatted. But if the result is submitted through other automation platforms, then our server does not perform validation against the form result. Which means, it is best for automations to have fallback logic.
"For multi-entries, can one of the entries be empty or in an invalid format?"
No, if a form has been submitted through the Client Portal. It is still best for automation to apply a defensive programming approach however, in case your automations lead to errors. Always assume data could be corrupted.
"Can we update the form result through API?"
Not at moment. In the future, we plan to introduce a feature to update a ticket note that has been created with a form. You will be able to modify results through our UI and through our internal API (although it is not recommended to do so).