Table of Contents
Service Types
 Updated
by Niamh Ferns
Updated
by Niamh Ferns
Service Types Overview
Service types are used by end-users to submit tickets in your portal. To get started, log in to your admin console and head to Portal > Service Catalogue > Service Types.

Generic vs Customised Service Types
You will need to identify generic service types that suit all needs and client-specific service types that only work for one company.
The best practice is to keep a good balance of both types of services. Most MSPs, when they first start with DeskDirector, go for the global service type approach, where they create 5-10 service types that fit roughly the needs of all their clients. As you get more comfortable with DeskDirector, we recommend slowly catering more to your specific clients' needs while still retaining a base set of Service Types to pull from. This gives you a good balance of generic and client-specific types.
When you're setting up your types, it also pays to think first about their purpose and where they will ultimately go. Do all tickets go into a single board/queue? Do some clients have their own? Thinking like this will help you determine whether your types should be shared or client-specific and can help you see where you might be creating extra types unnecessarily.
Think about request type management as cable management; a tangle of cables might work as it should, but when you need to make a slight change, you are in for a big shock. If you aim to keep your cables neat, then any changes in the future are a breeze.
How to Use Service Types
Service Types List
This is the main page when managing service types. From here, you can:
- Create Types: You can easily create new service types by hitting the green "+ New" button.
- Test Types: You can test companies and contacts against existing service types to see which have access.You can also log in as any contact by using contact impersonation!
- Clone Types: You can copy settings from one Service Type to a new one via cloning. This copy's the filter and automation settings.
- Export Types: You can use this button to export your current service types.
- Search: Filter and search for service types.
Creating a Service Type
Cloning a Service Type
Service Type Editor
You can edit and configure a service type's behaviour using these tabs: General, Automation, and Filter.
Settings Tab
The settings tab is where you set things like the category, name, tags, and templates for a service type.
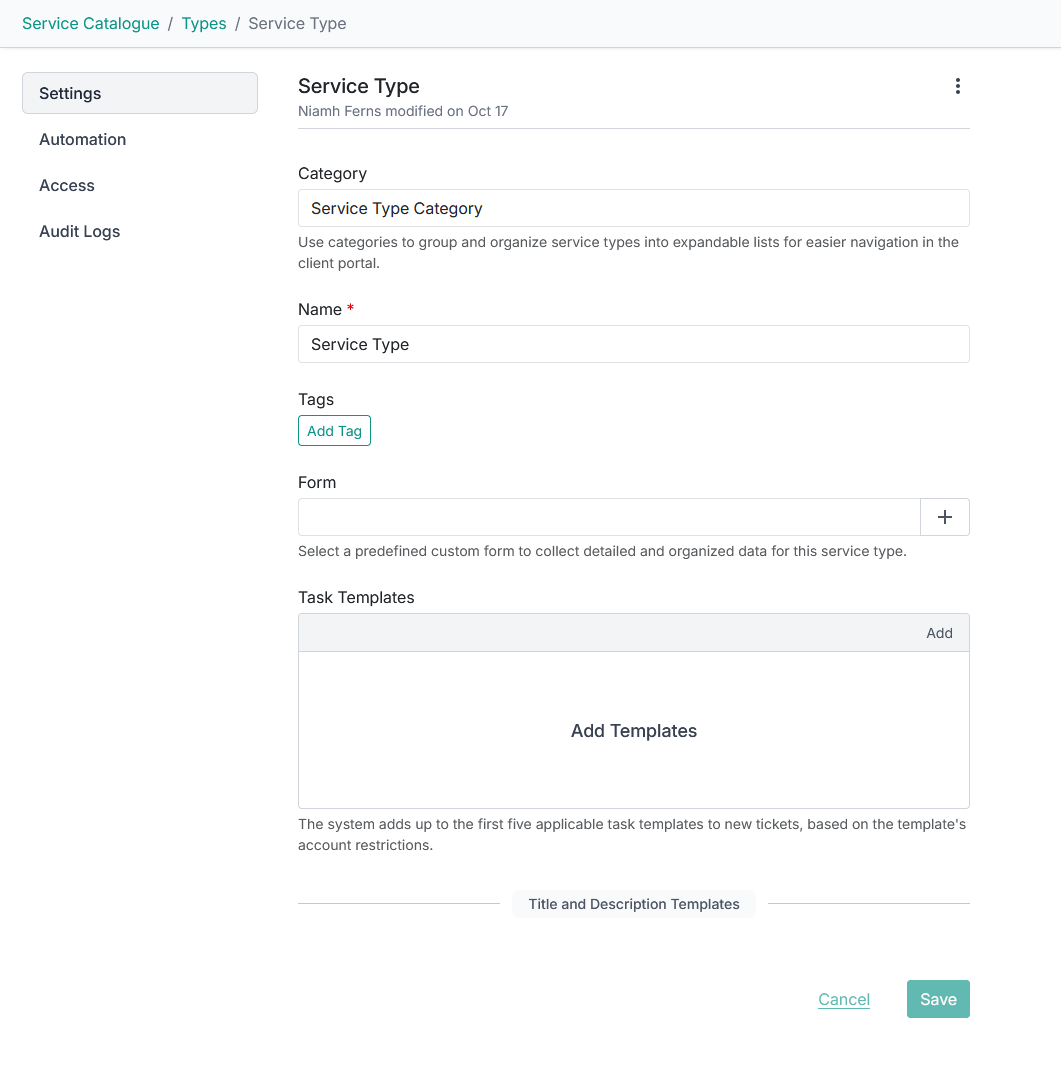
- Category: Determines which dropdown the service type will appear under in the Client Portal.
- Name: Determines the name for the service type in the Client Portal.
- Tags: The tags that will be assigned to tickets created with this service type.
- Form: The Form that will be used to gather information from a user for their initial request.
- Task Templates: Tasks that will be automatically added to the ticket after it is created with this service type.
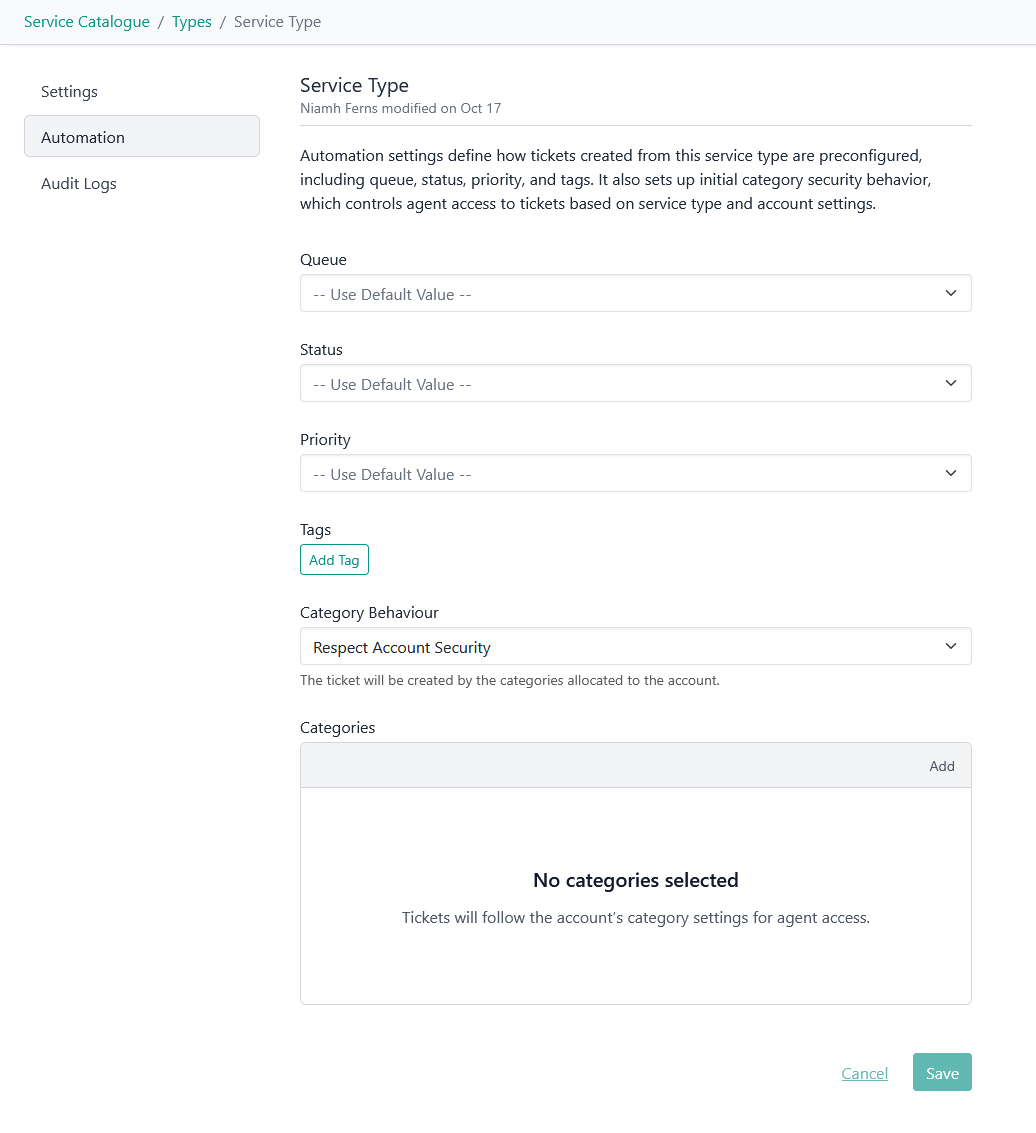
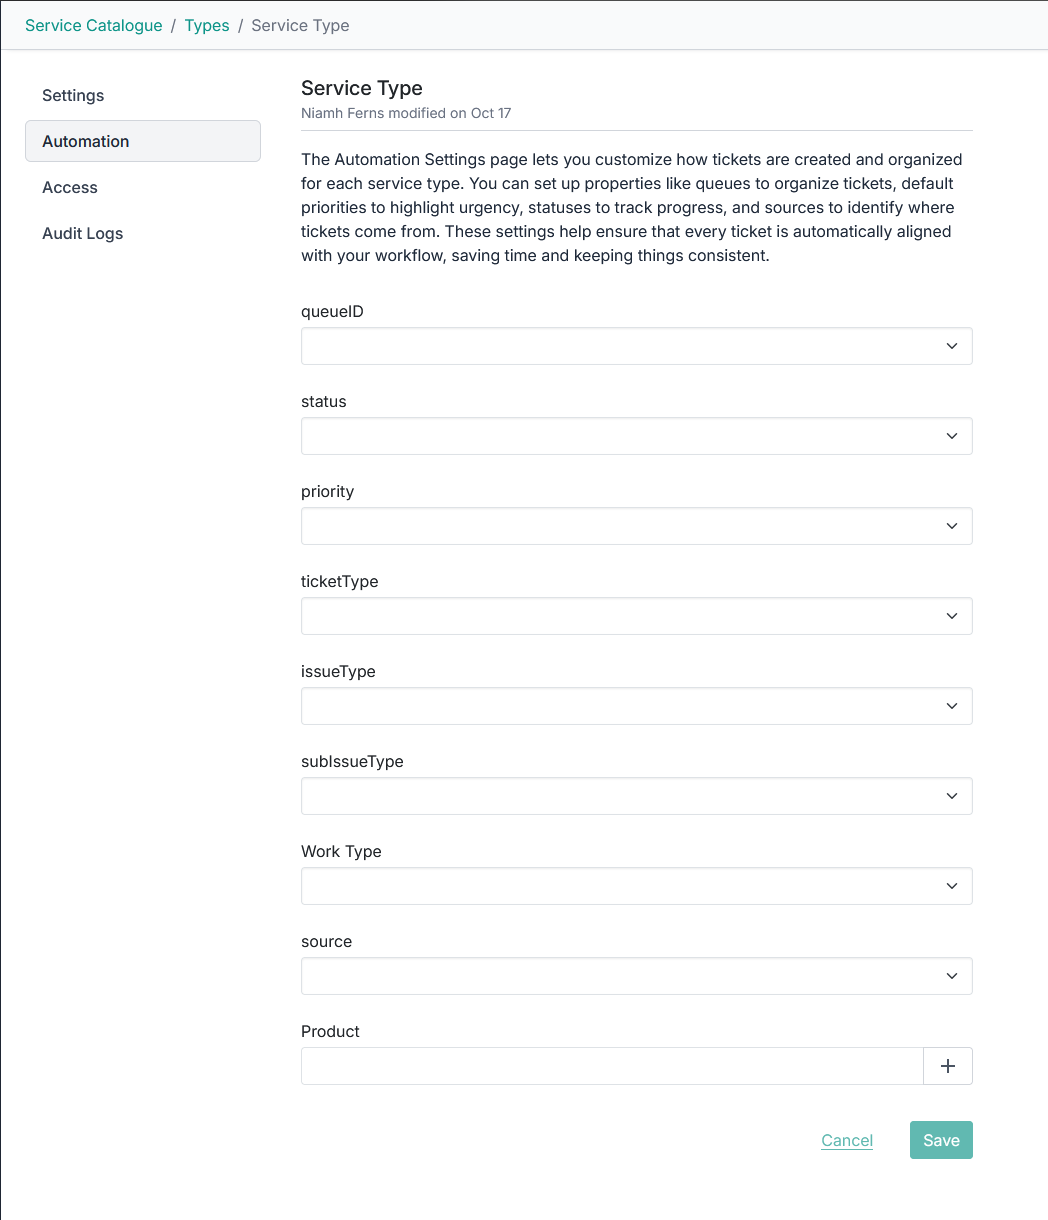
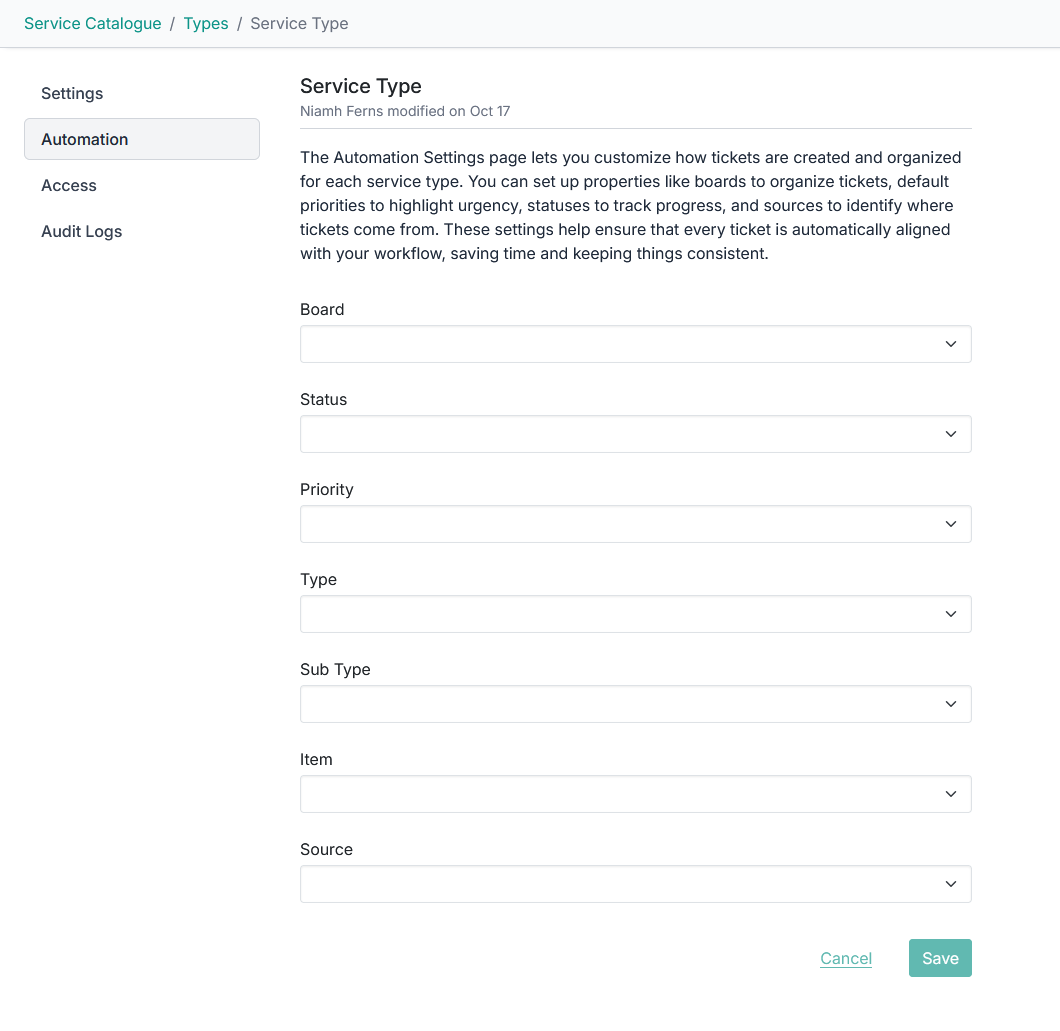
Automation Tab
The Automation tab is where the ticket created by the service type should be sent to: the queue, status, priority, source, etc. The ticket tabs for different DeskDirector backends are also not identical. Here are screenshots showing the ticket tab of each instance, and the options/fields available for finetuning tickets created from the request types.
Standalone:
With Autotask PSA Integration:
With ConnectWise PSA Integration:
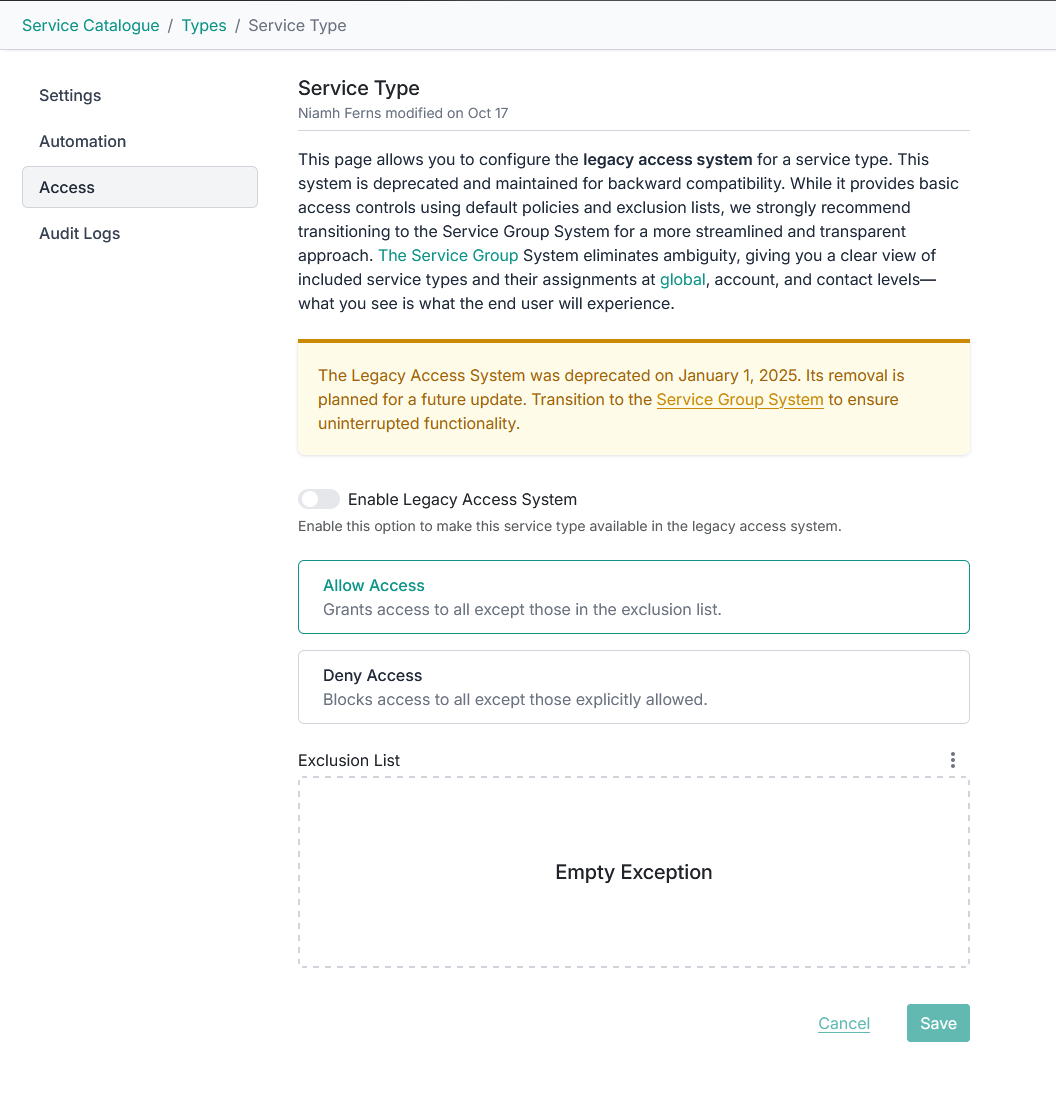
Access Tab
The Legacy Filtering System is deprecated and will be removed from DeskDirector in upcoming versions. Going forward, access should be configured using cascading permissions and service groups or contact groups.
The access tab is where you can configure which accounts and contacts have access to your Service Types through the Legacy Filtering System.
- Default Access. This defines the default access level of this type. Global on means that everyone will have access to this type; global off means that no one will have access to this type. It also changes the functions of some of the buttons (from exclude buttons to include).
- Add Exceptions. If Default Access is set to on, this button will allow you to exclude companies and contacts from accessing this portal type. If Default Access is off, it will allow you to include companies and contacts.
- Company exclusion. Contacts from this company will not have access to this portal type by default, unless you drill down another layer and give specific contacts access
- Contact inclusion. This contact's company has been excluded from using this type; however, they have been included and will be able to use it.
Service Type Ordering
A service type's name and category can be reordered to appear in a specific order in the Client Portal.
To achieve this, enter a number in front of the category or name. Anything without an ordered number will be displayed below those with ordering numbers. If two items have the same order number, they will be ordered alphabetically.
For order numbers in the names, there are two different behaviours:
- Order numbers followed by a colon will be trimmed
E.G.12: This is request with order of twelvewill display asThis is request with order of twelve. - Order numbers not followed by a colon will not be trimmed
E.G.12. This is request with order of twelvewill display as12. This is request with order of twelve.