Table of Contents
What is the DeskDirector TECH Portal?
 Updated
by Niamh Ferns
Updated
by Niamh Ferns
Tech Portal Overview
You may have seen it referenced as TECH, DD Tech or the DeskDirector Tech Portal. These all refer to this simple-to-use tool, designed from the ground up to help your Level 1 & 2 helpdesk technicians be more efficient in handling and managing support tickets.
DeskDirector TECH Portal Features
- Create, view, edit, and close tickets from a single interface
- Chat with customers using the DeskDirector Chat from the same interface
- Send Broadcasts to your users to inform them of important messages
- Automate ticket replies, or trigger webhooks when updating a ticket with Macros
- Format & standardise using markdown for a shared, professional & branded response within the Client Portal
- Trigger notifications using our API to notify your techs of important events
- Create and enforce standard operating procedures (SOPs)
- See your customers' presence
Simple
Simplicity is a core goal of the DeskDirector Tech Portal. The interface is modern and clean, designed for a Level 1 or 2 helpdesk tech, removing all the unimportant “extras” that exist within your PSA. Given the high number of different people PSAs cater for, they can be very complex and hard to learn, especially for new hires. DeskDirector Tech Portal focuses only on helpdesk operations of creating and managing tickets and capturing time, and removes the other distractions of a full PSA.
Fast
DeskDirector Tech Portal is built to be fast – it’s a web-based SaaS application built upon your existing DeskDirector infrastructure. Create new requests, enter notes, capture worked time & close tickets all within a single screen. All extended functions, such as Chat, Broadcasts, Notifications, etc, all live in the same single pane, easy to find and ready for immediate use.
Efficient
Everything your helpdesk technician requires is all in one place and nothing else. Techs can create and triage tickets quickly, manage live chat and customer expectations all through one interface. Custom macros mean repeatable work can not only be automated and standardised, but quickly shared & consumed across the team. Automated timers start, stop and insert time instantly, which means no more lost time. Our multi-tab interface allows your team to manage and work on multiple tickets at once, and they are persistent even on browser refresh.
Getting Started
The DeskDirector Tech Portal can be accessed by opening your DeskDirector in a browser, then providing your email address in the login form.
If your email address is tied to an Admin Portal or Client Portal account, you will be presented with a choice of platform:
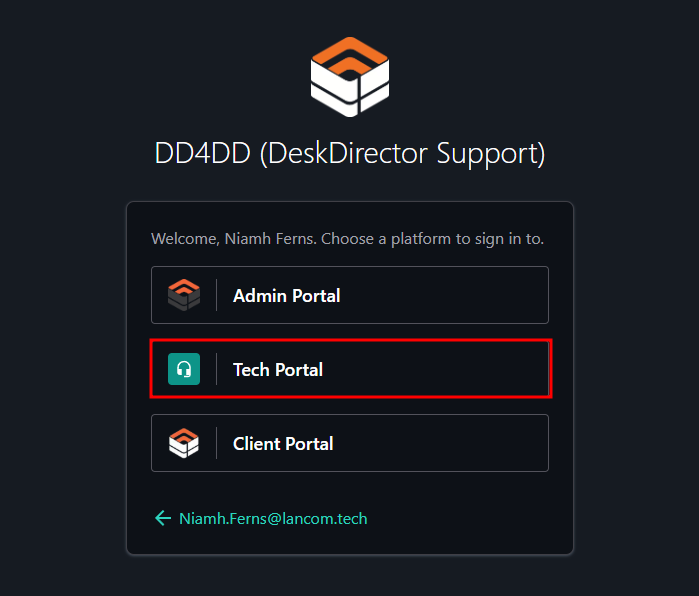
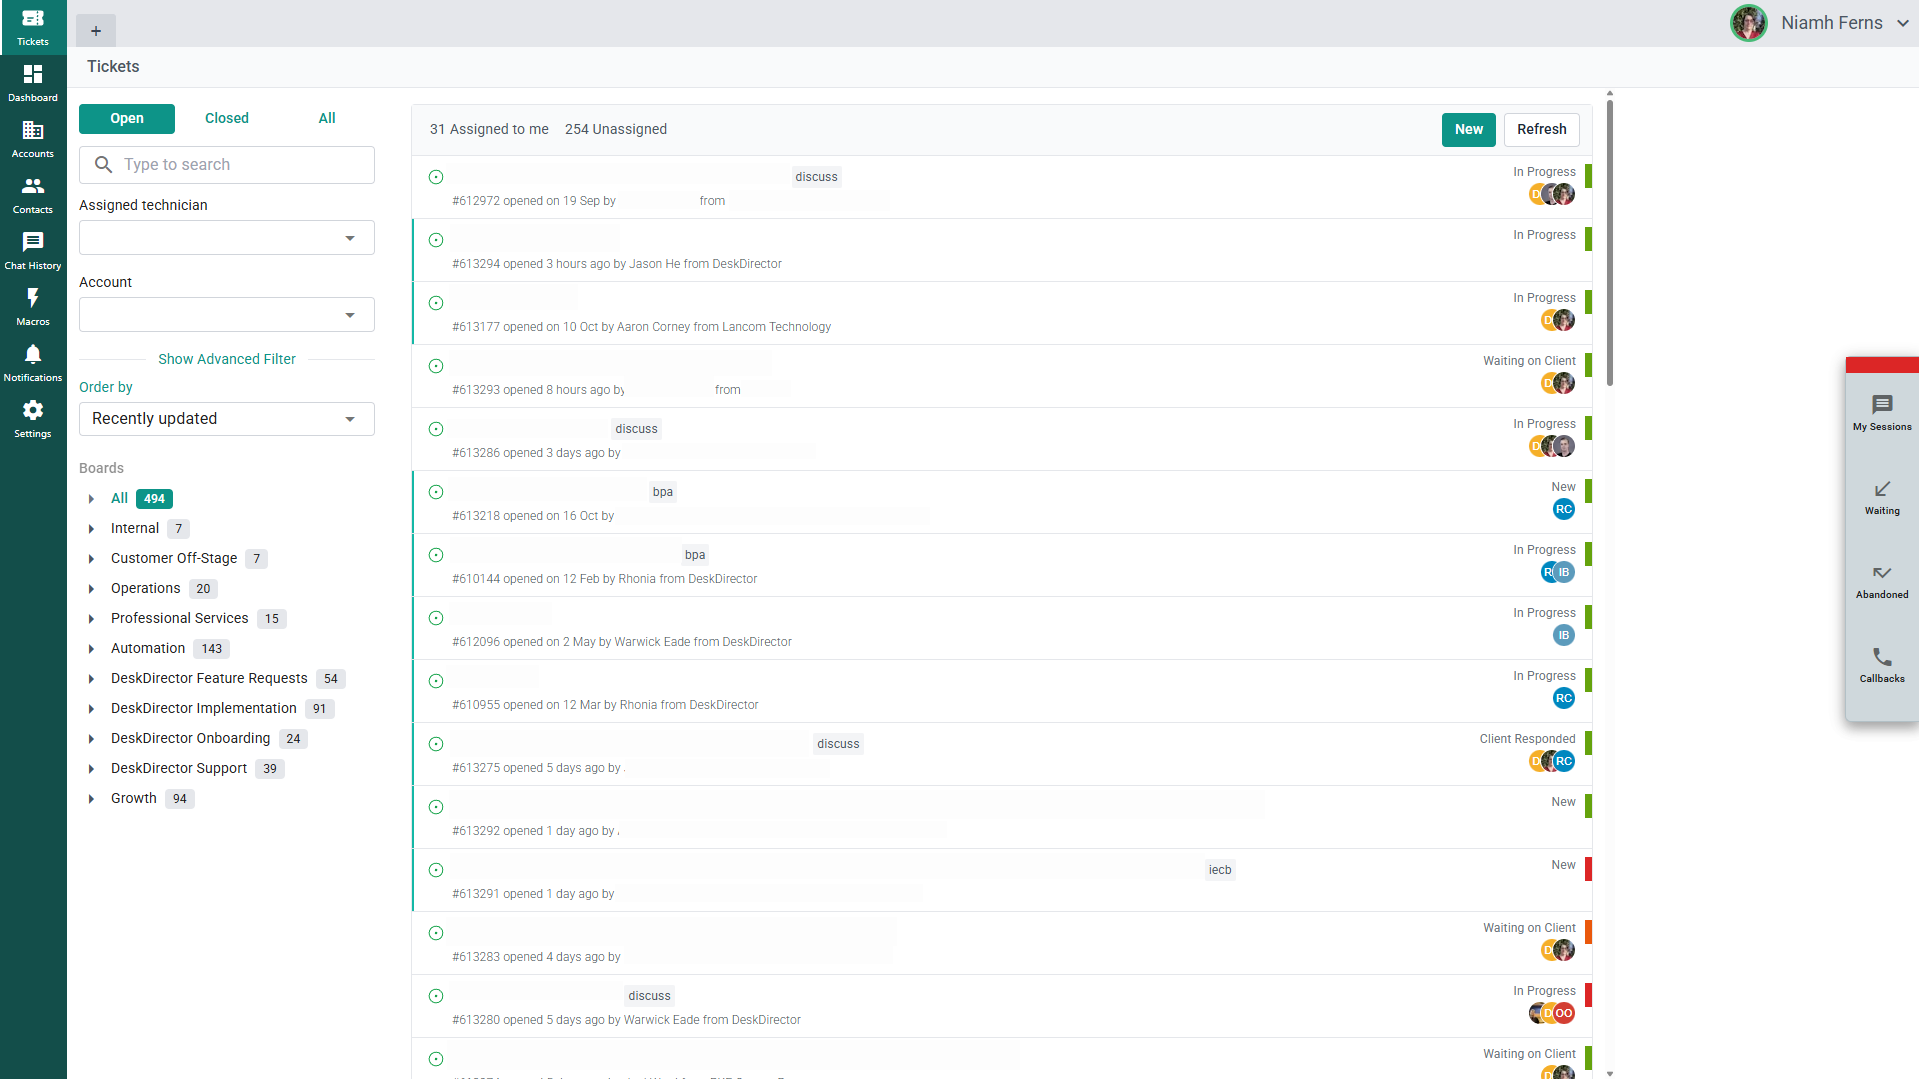
Select "Tech Portal", and it will prompt for a login method. Once logged in, the layout of the tech portal should be like this:
Agents must be an Admin or Master Admin to access the Admin Portal and must have TECH Portal access enabled.
Let's try to break down each part of the tech portal:
Left Pane
- Tickets - This is the default tab when Tech Portal loads. This shows the Ticket list of the boards/queues the technician has access to. (see: Tech Board/Queue Access)
- Service Radar - This is the tech portal version of Service Radar from the admin console
- Broadcasts - This is where broadcasts are created and managed
- Accounts - This is where you can see a list of the companies you provide support for. (If an agent has company restrictions set, they'll only see the companies assigned to them.)
- Contacts - This is where the contacts for the companies assigned to an account appear. (If an agent has company restrictions set, they'll only see the contacts for companies assigned to them.)
- Chat History - This is where the chat history appears
- Macros - This is where macros are created and managed
- Notifications - This is where notifications regarding ticket actions appear
- Settings - The settings page for an agent's portal. Here, they can update their profile picture and configure optional settings
Top pane
- Top tabs - This area is where the custom tabs as main tabs or ticket tabs can be added
- Profile area - This area shows your name and profile picture. Clicking on the dropdown will show an option to sign out and your status in chat. This is where your techs control their chat presence.
Main Central Area
- Ticket List - What appears here are the boards and tickets that the tech has access to, the ticket filters and the option to create a new ticket.
Floating Pane
- Chat Session Manager - This is where chat sessions appear and are managed.
Managing Tickets
Creating Tickets
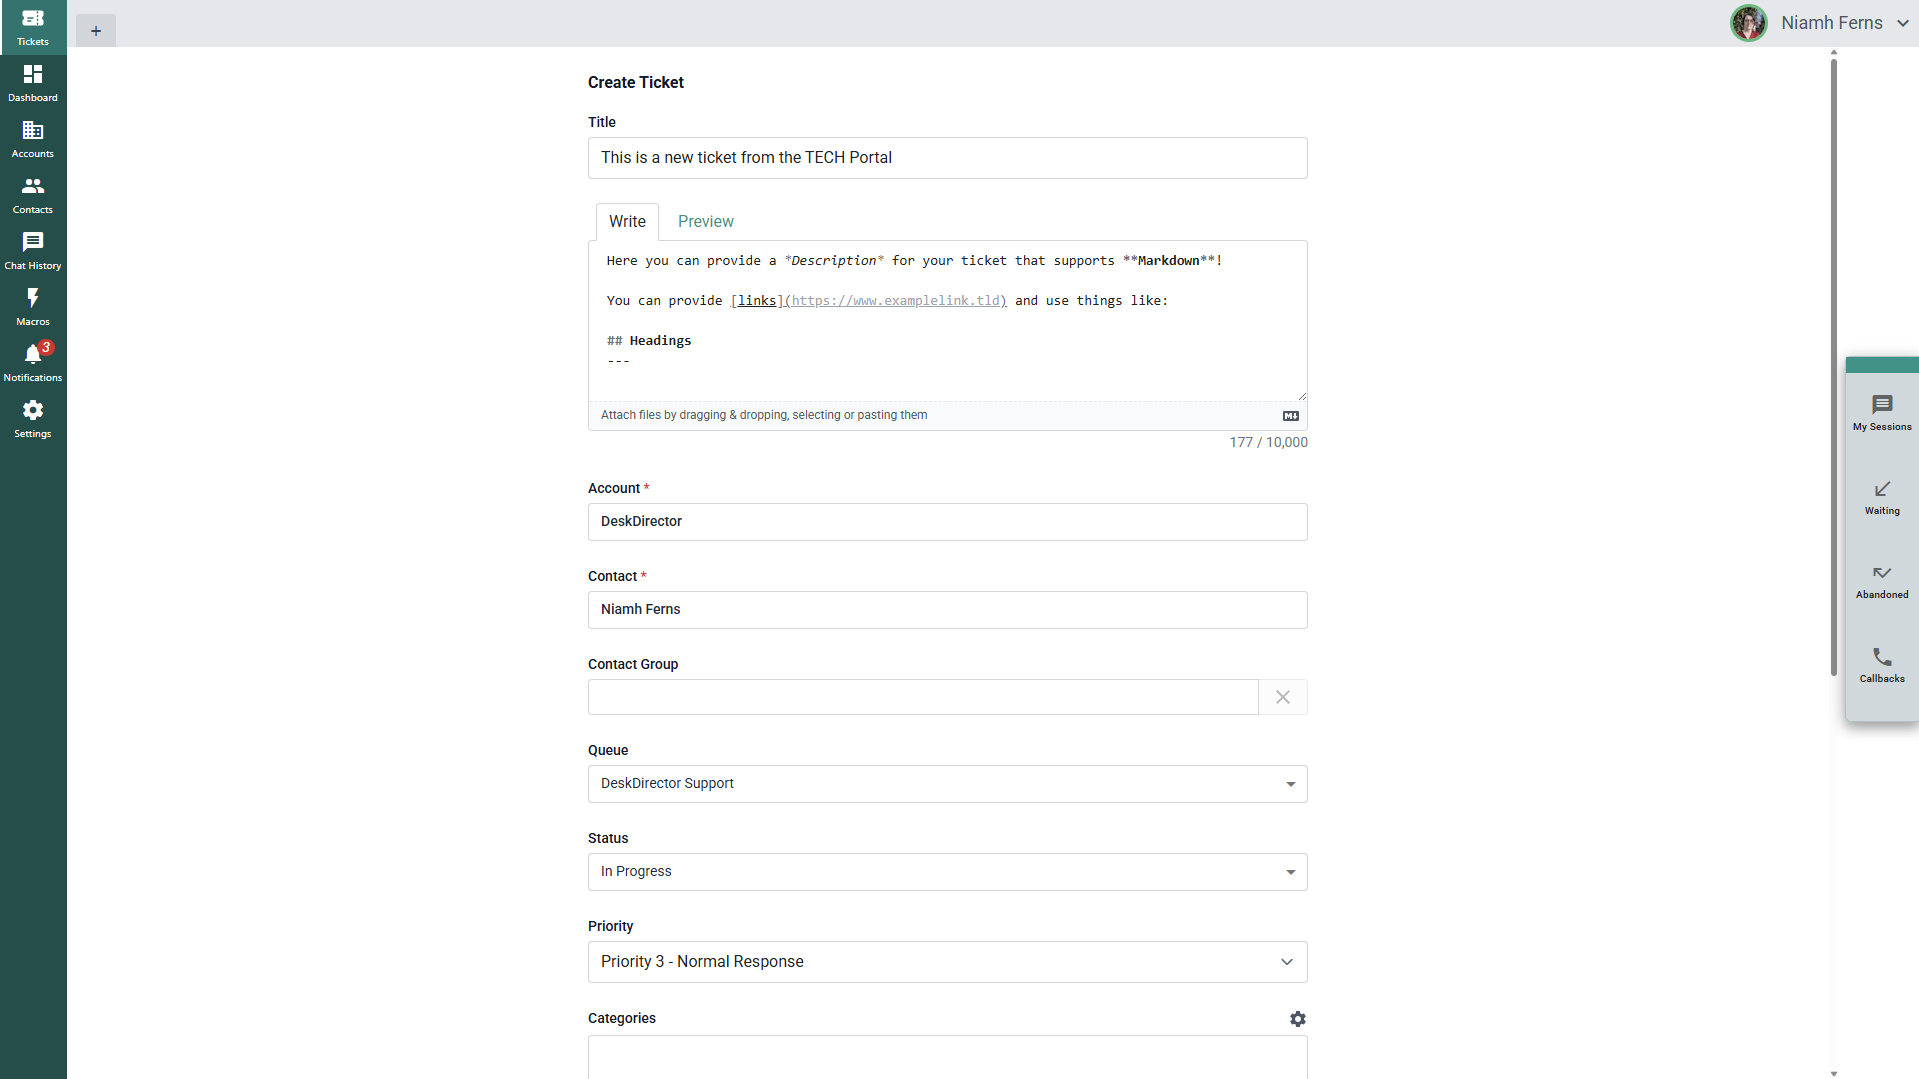
Techs can create tickets from the tech portal or initiate contact by creating a ticket. To create a ticket from the DeskDirector Tech Portal, simply select Tickets from the left side menu, then click on the New button at the top of the ticket list.

After clicking on the New button, you will be redirected to a new page where there are multiple ticket detail fields to complete:
Working on Tickets
The DeskDirector Tech Portal's main use is for technicians to interact with customers via tickets or chats. Normally, interaction with technicians is initiated by customers by submitting a ticket from the Client Portal, although they can be created by service agents too, as mentioned above.
You can find the ticket list under the Ticket menu item.
Filtering Tickets
For companies that handle a large number of users and tickets, going through them all can get really tedious. This is where the ticket filters come in:
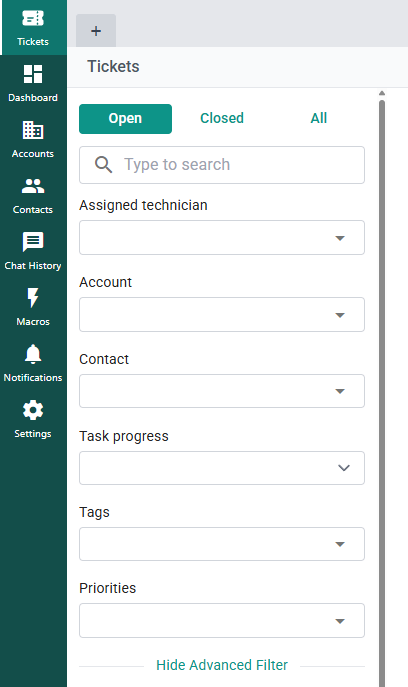
The ticket filter is broken into several parts:
General Filters
- Ticket state: Choose whether you want to search for tickets that are closed, open or both.
- Search: Using this, you can use keywords from the ticket details, summary, tags, ticket number, and others to search for the ticket.
- Assigned Agent: Restricts to show tickets assigned to a specific agent.
Advanced Filters
- Account: Restrict results to tickets from a specific company
- Contact: Restrict results to tickets from a specific contact
- Tags: Restrict results to tickets with matching tags. Tag context only exists in DeskDirector.
- Priority: Restrict results based on priority.
Ordering
- Newest
- Oldest
- Recently updated
- Least recently updated
- Summary
- Summary descending
Ticket Boards & Statuses
Every board you have access to will be shown in a list (just below the ticket filters).
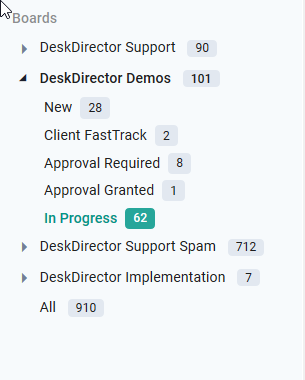
Each board in the list will show the count of the number of tickets on that board. If you click a board, the list will expand to show every status under that board as well as the counts for tickets in that status. Clicking on a board or status will restrict results to tickets on that board or status.
Request more Information
Task Forms allow you to send forms to Portal users to fill out after a ticket has been created. This is perfect if a ticket has come through the email connector, or if the user has used the wrong Service Type to create their ticket, and they haven't provided your technicians with the correct information.
Sending a form
You can select a form to send from DD Tech by navigating to a ticket and then clicking the 3-dot menu, then Request More Info:
The forms shown here are those that have been attached to Service Types that the ticket contact can access. This ensures that forms that are meant for other companies or contacts aren't sent to the wrong person.
After you have selected the forms to send, click on the "Select" button. The forms will be attached to the ticket, and an email will be sent to the contact notifying them that they have to fill out a form.
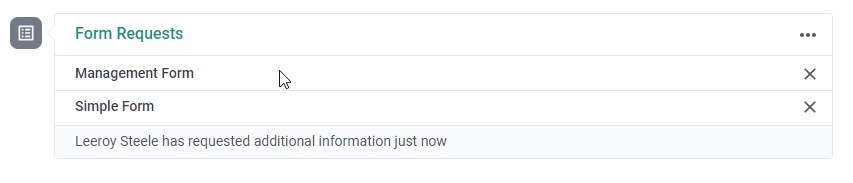
Viewing and Editing Pending Forms
Form requests will be shown under the timeline inside DD Tech. From here, you can remove forms and see which ones have been completed.
Completing a form
Portal users will see a prompt when they visit a ticket that requires a form to be filled out:
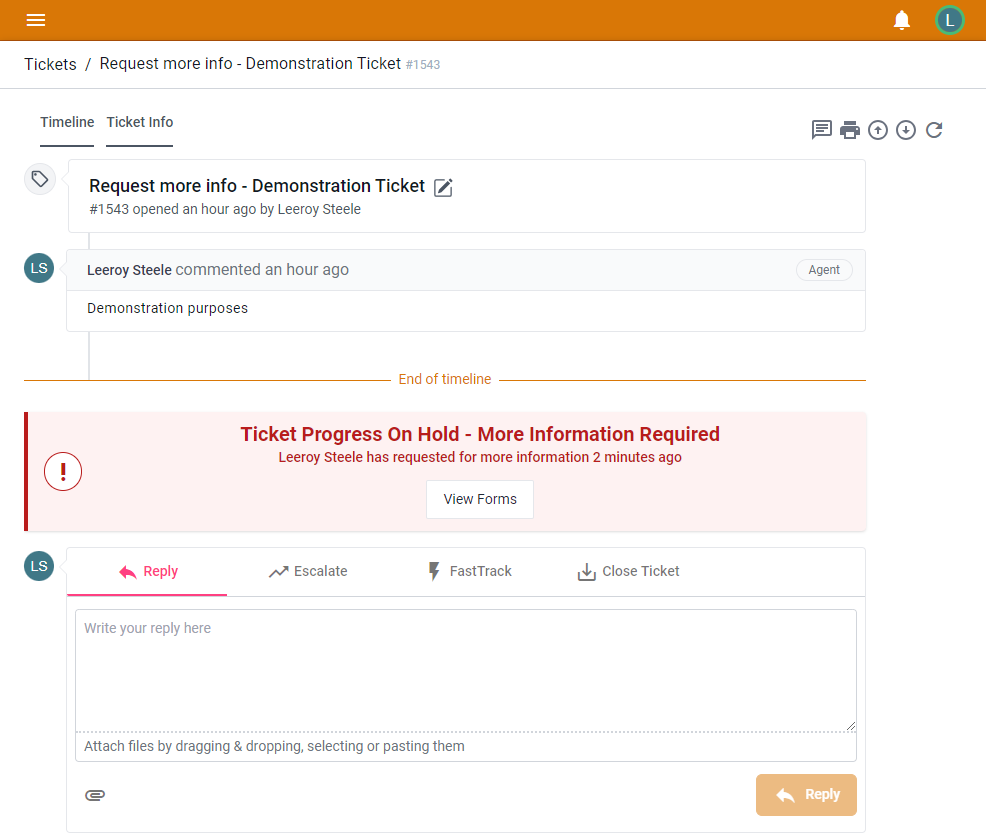
When they click the view forms button, a dialogue will open that allows them to fill out the required forms. The form submissions will be attached as a ticket note in the same way as creating a ticket.
Email Notifications
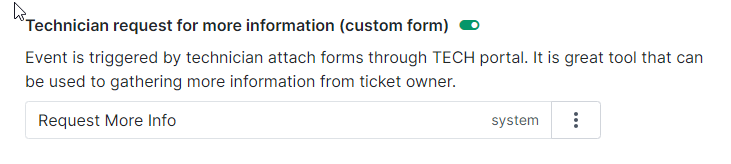
When the Task Forms have been added, the ticket's contact will get an email notification for this event.
This email can be disabled in the Admin Portal, under Email Notifications > Notification Events > Ticket Global Events > Technician request for more information (custom form)
Ticket List
Each item on the ticket list contains the following information.
- Ticket owner
- Account of the ticket's contact
- The ticket's age (Mouse over to see exact time.)
- Ticket priority (Colour coded on the right-hand side. Hover to see full text.)
- Ticket title/summary
- Ticket ID
- Ticket Tags
- Assigned technician. (Displays a maximum of two avatars, optionally displays all assigned by clicking on the number.)
- Last ticket note or time entry.
Ticket Details
The ticket details page is where you see all the specifics of the ticket: initial issue, tickets/notes added, assigned techs, sender, and all other information and features specific to the ticket. This is also where you can reply and edit ticket data.
Top Ticket Panel
The top panel is where you will be able to see the title as well as some other useful utility actions for your ticket:

On the left-hand side of the top panel, you can see a set of three options:
- Ticket Details (Left): This shows all the details for the ticket, the timeline, and is where you can enter your time.
- Account (Centre): This allows you to view the account for the user who submitted the ticket.
- Contact (Right): This allows you to see more information about the contact as well as their other tickets.
Right Ticket Panel
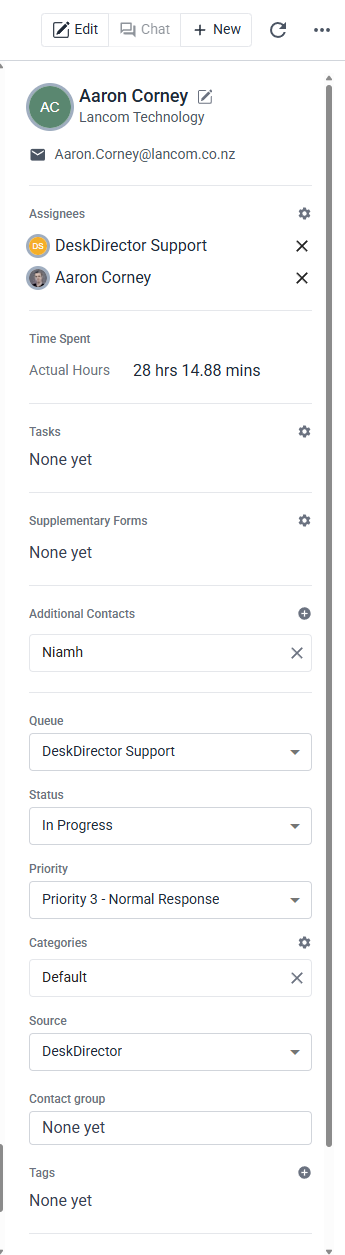
The right ticket panel shows the details about the ticket contact, its assigned Service Agents, CC'd contacts, the queue it belongs to and more.
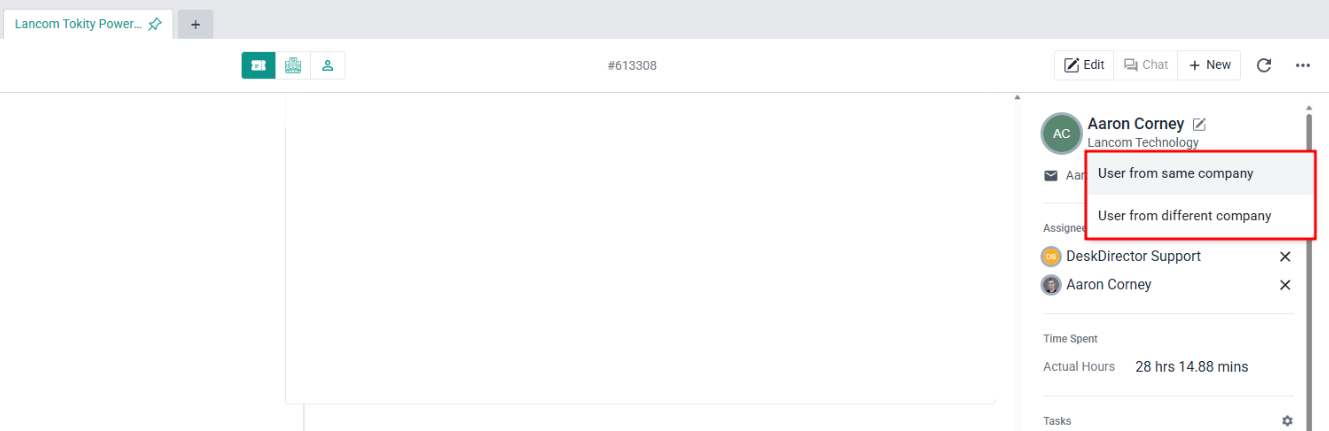
Ticket Contact: This section of the right panel shows who submitted this ticket and their contact information. As a tech, you can re-assign the ticket contact to someone else by clicking on the "Change" link. If the customer is also online, and he has Chat Permissions set, a tech should be able to push a chat to the contact via the "Chat with ___" button.
Assigned Resources: This panel allows you to view all the resources that have been assigned to the ticket. There is also an assign me button, which does what you expect. You can also assign other resources from this panel.
Time Spent: Is the sum of time entries for the ticket.
CCs: This is where you can see all the CC'd contacts for the ticket. An agent can add/remove CC'd contacts as required.
Ticket Details
This sub-section of the right ticket panel shows more details about the ticket. It shows:
- Queue/Board
- Status
- Priority
- Type
- Date created/updated
- Tags
- and others...
As a Service Agent, you can reclassify tickets using the dropdowns in the ticket details section, whether you want to move it to another Queue, change the ticket's status and priority, reclassify the type, then add/remove tags.
Ticket Timeline
The timeline will appear in the centre of your screen and shows all ticket notes (internal, resolution, and public), chat logs (if a chat was initiated in the ticket), and also shows all documents that have been attached to the ticket.
At the bottom of the timeline is the section to add a note/time entry/form:
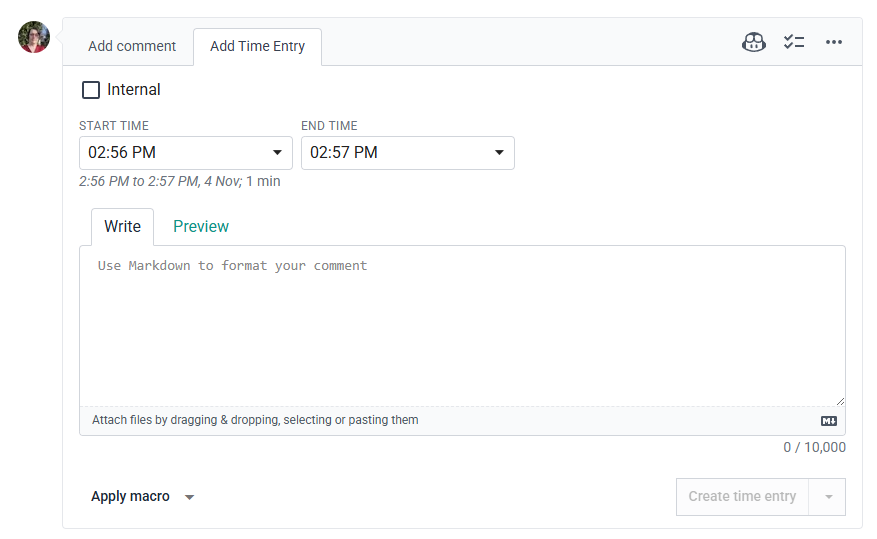
From here, you can either add a note or add a time entry. In order to add a time entry, the current status of the ticket must allow time entries. If it doesn't, the add time entry tab will be disabled until the status is changed.
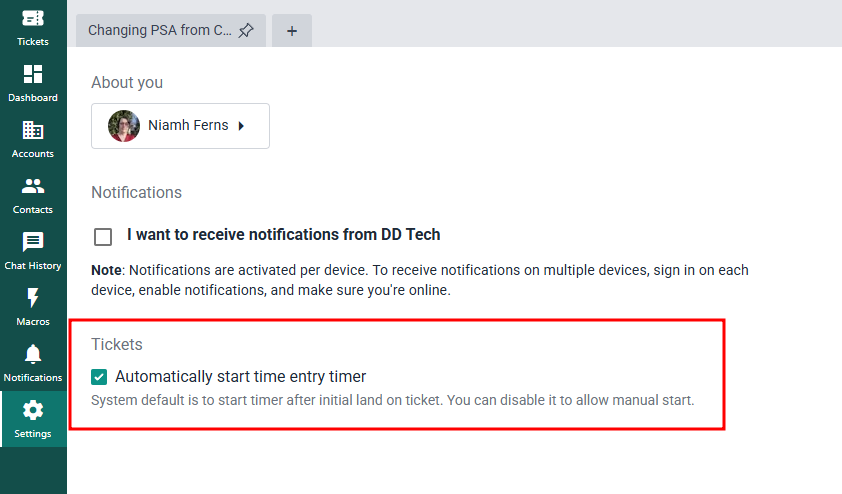
Auto-Timer
By default, the time entry timer is set to automatically start after landing on a ticket. This can be easily accessed from the Settings page of the Tech Portal.