Table of Contents
Broadcasts
 Updated
by Niamh Ferns
Updated
by Niamh Ferns
Broadcasts Overview
Broadcasts are an excellent way to notify your customers of critical outages and important messages. Broadcasts can be easily created from the DeskDirector Tech Portal. Broadcasts can be created by Service Agents with Master Admin. Managing service agents' TECH Portal roles can be easily done from the DeskDirector Admin Portal.
Creating a broadcast:
Broadcasts can be easily created from the DeskDirector Tech Portal. Click on the broadcast tab in the left panel, then click on create to configure the Broadcast's settings and content before sending. As mentioned above, the service agent must be a Master Admin.
- First, select whether the broadcast is "Important" or "Normal". Broadcasts set to "Important" will appear on several pages, while "Normal" broadcasts will only appear on the Notifications tab of the Client Portal.
- Enter a message of up to 255 characters. You can also add a link in the broadcast message, which can be used to direct users to an external site that contains more information about the broadcast that can't fit within the 255-character limit on the message.
- Optionally, set your broadcast to send an email as well. This allows you to include your broadcast in a formatted email that will be sent to a recipient's inbox. If you just want to send a simple broadcast that will appear in the portal, you can uncheck "Send broadcast email to notify users."
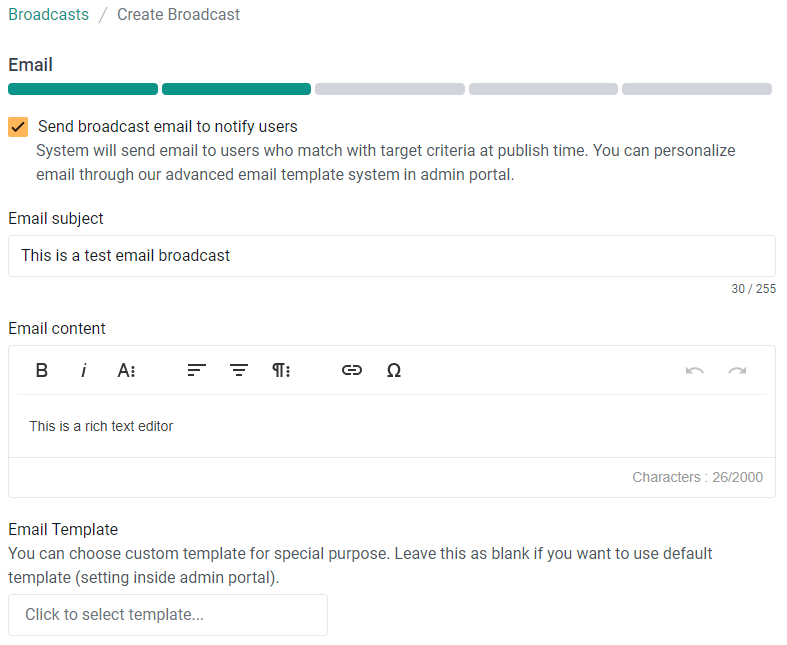 Only customers on the Dynamic Plan or Legacy Plan can create and send email broadcasts.
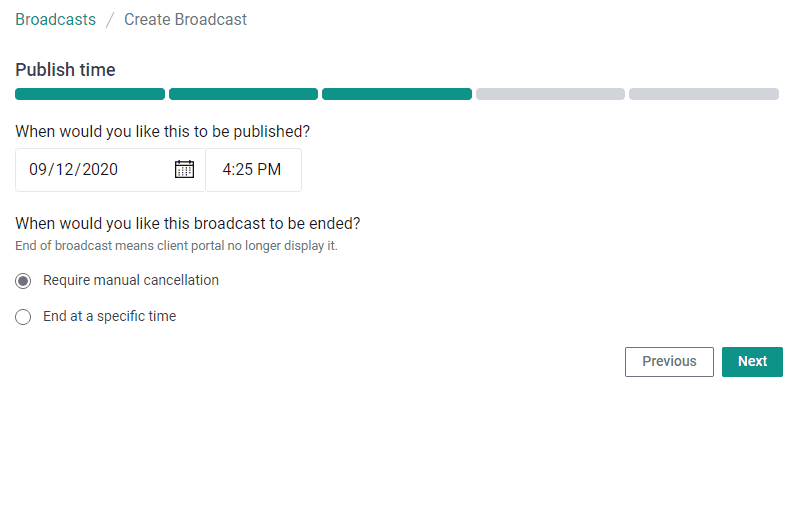
 - Optionally, specify when you want your broadcast to go live and when you want it to end (either manually or at a scheduled time).
- Select broadcast filters. This allows you to select the accounts you want to target for the broadcast.
You can search companies via their company names, or you can use company tags if you want to target the broadcast to companies with specific tags. You can finetune the targets for the broadcast using Contact tags. This comes in handy if you want to target a specific set of users with the same tags or those under a group tag.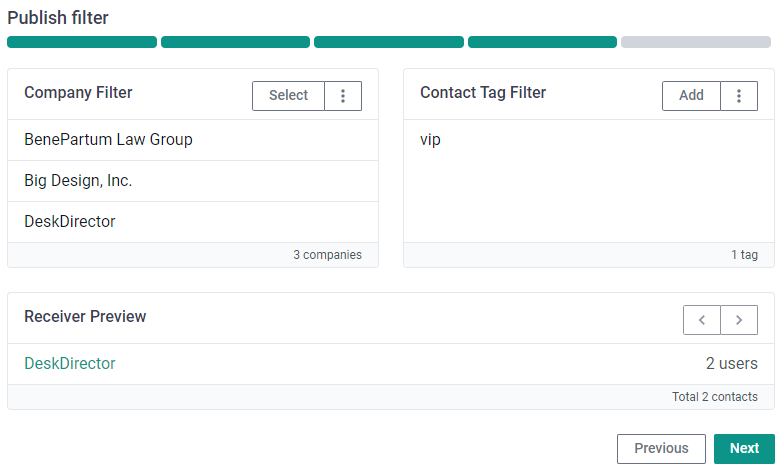 In the example above, we are trying to target the notifications to three companies, then filter further by targeting only contacts in the company that have the
viptag assigned. Only 2 users matched the filter and will be the only ones who will be targeted for this broadcast. - Review the broadcast
The last step in creating a broadcast should be a preview of everything that you have set so far. It will show how the portal notification will appear, the publish and end time, how the email notification will look and who the broadcast recipients are.
Managing Broadcasts
Broadcasts can be easily managed from the DeskDirector TECH Portal under the broadcast tab in the left panel. As mentioned above, the service agent must have a specific role to be able to see the tab or use the Broadcasts feature:
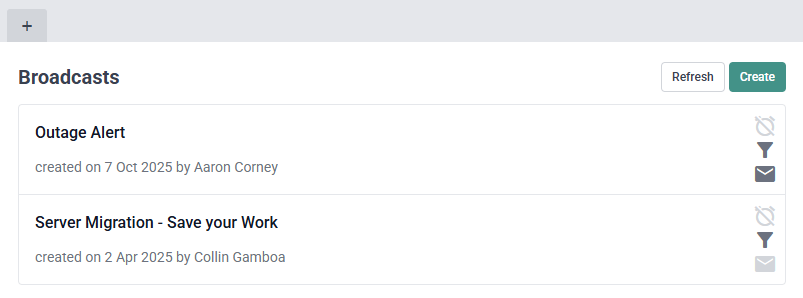
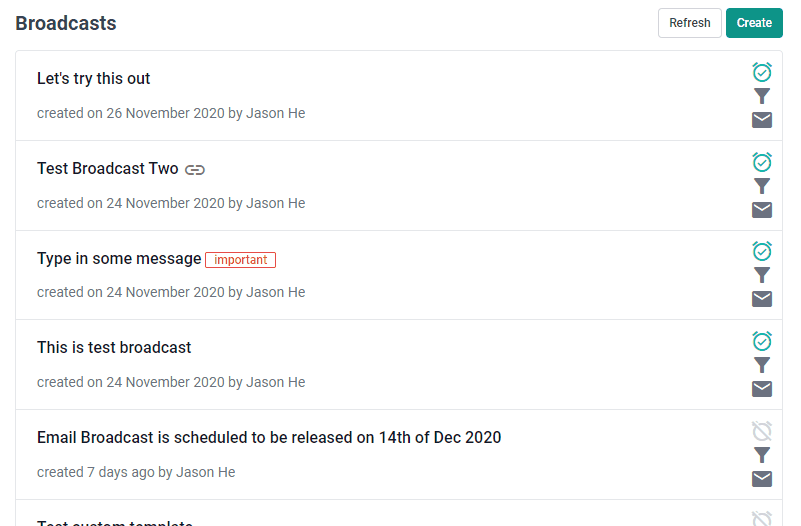
You will see a list of broadcasts that were recently created under your DeskDirector instance (both active and deleted). The broadcast list will show the broadcast message, when it was created and by whom, and icons indicating whether the broadcast is active, whether it was sent as an email broadcast, and whether it was using filters.
Enabling "Sticky" Broadcasts
All notifications in DeskDirector leverage the browser and OS notification systems to grab a user's attention by displaying a small pop-up in the corner of their screens. Sticky Broadcasts allow you to keep an important Broadcast on screen until the user has acknowledged it.
To control which users do and do not get Sticky Broadcasts, you can use a combination of both Admin Portal settings and registry keys created on certain machines.
Enable for Everyone
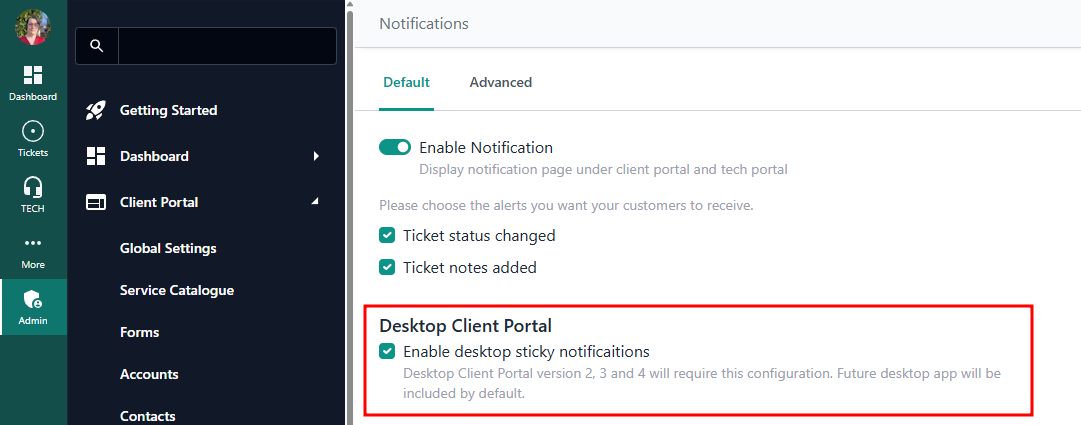
Navigate to Client Portal > Notifications section of the Admin Portal, then check "Enable sticky notifications."
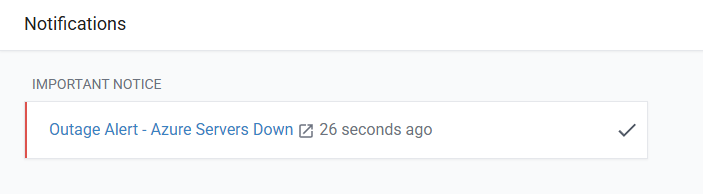
Any broadcast set as "Important" will now trigger a sticky notification pop-up that will only disappear once the customer acknowledges it. This makes sure that important messages are not missed.
Excluding Specific Users
To disable the feature on a user's machine, you will be required to create a registry key in one of these locations:
HKLM\SOFTWARE\DeskDirectorPortalfor 32-bit machines
- OR -HKLM\SOFTWARE\WOW6432Node\DeskDirectorPortalfor 64-bit machines
You will need to create a String value with the Name DISABLE_STICKY_NOTIFICATIONS and value true. Once you have performed this on all relevant machines, you can enable the feature for everyone via the Admin Portal.
Receiving Broadcasts
Broadcast notifications are received in multiple ways in the client portal, and they are received in real time from any new broadcast pushed from the tech portal. There are a few places where important notifications show inside the Portal:
From the Contact Support page.
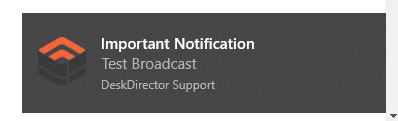
Any broadcast that is set to Important shows up in the Contact Support page. The purpose of showing important notifications here is to reduce the chance of a ticket getting created that is related to the broadcast. For example, if there's an outage and you sent out an important broadcast for it, people will be informed about the outage, possibly reducing the possibility that they will report the same issue.

Notifications page
The notifications page is comprised of two sections. The first section is the broadcast notifications, while the second section is the Ticket Update notifications.
All broadcasts created in the tech portal are added to the broadcast notifications section. A client can not dismiss/remove any broadcast notifications. They can only be removed by service agents or if they have expired based on their schedule.
Push Notifications
In addition to the notifications page and the Contact Support page, broadcast notifications are pushed to end users. Push notifications will work both on the web and the desktop portal. These notifications are subject to a timeout imposed by the Browser or operating system and will disappear after a short time.