Table of Contents
What is the DeskDirector Client Portal?
 Updated
by Niamh Ferns
Updated
by Niamh Ferns
Client Portal Overview
The DeskDirector Client Portal is the tool your customers use to reach out and interact with your technicians.
DeskDirector Client Portal Features
- Create, view, edit, and close tickets from a single interface
- Chat with technicians using the DeskDirector Chat from the same interface
- Process tickets for approvals
- Upskill with modules for Learning and BiggerBrains
- View Quotes and Invoices
Getting Started
The DeskDirector Client Portal can be accessed by opening DeskDirector in a browser or by opening the DeskDirector App, then entering your credentials. If the contact's email address is also tied to a Service Agent, they will be prompted to choose which portal they want to log in to.
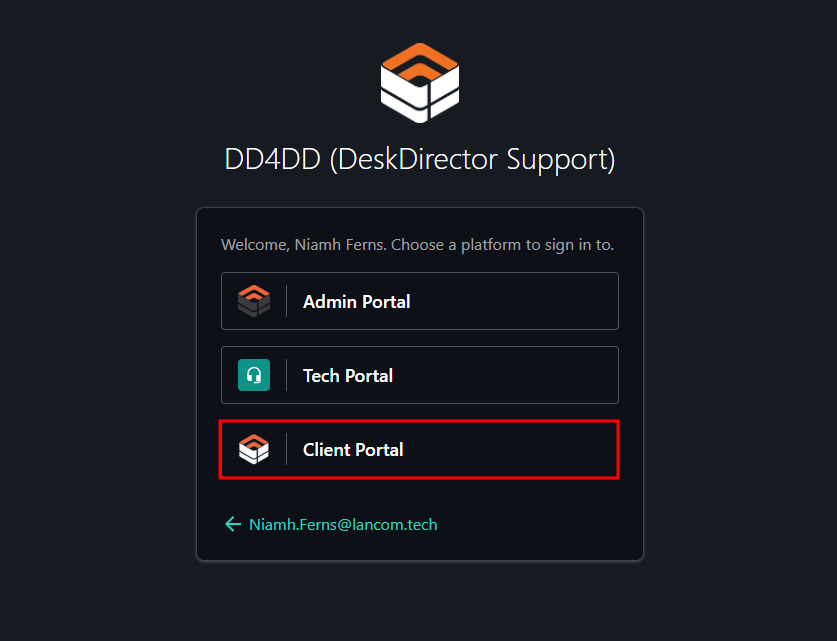
Select Client Portal, and you will be prompted for authentication. Lastly, if the email address is a contact for multiple companies, they will be prompted to choose which company's client portal they want to access.
Once logged in, you will be presented with the Client Portal:
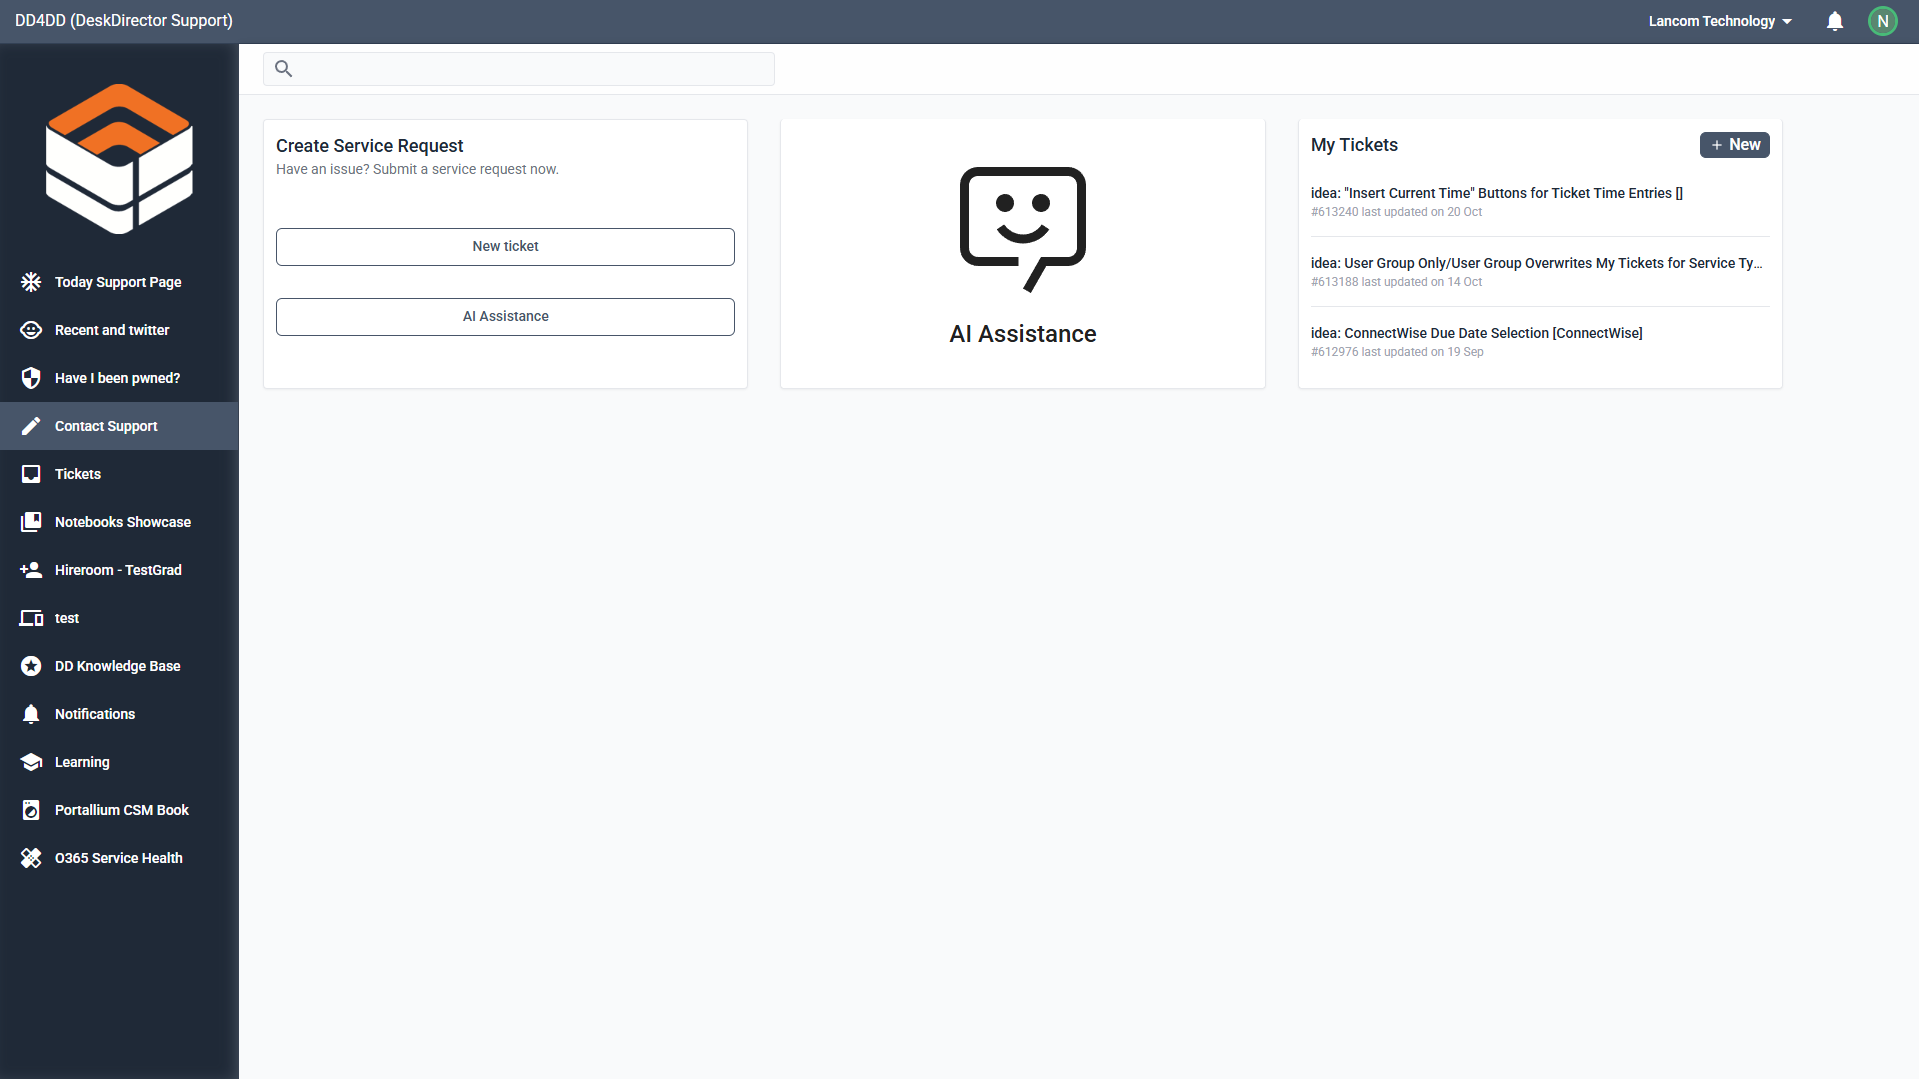
The first page that will load upon logging in is the landing page set for the contact (see here for how to set a landing page). The screenshot above is using the default system menu with the default menu items.
Switching Companies/Contacts
DeskDirector Portal users can easily switch which contact they are logged in as from the top right-hand side of the screen. This is great for situations where one contact belongs to several sister companies in one DeskDirector instance and wants to be able to keep track of their tickets from each business.
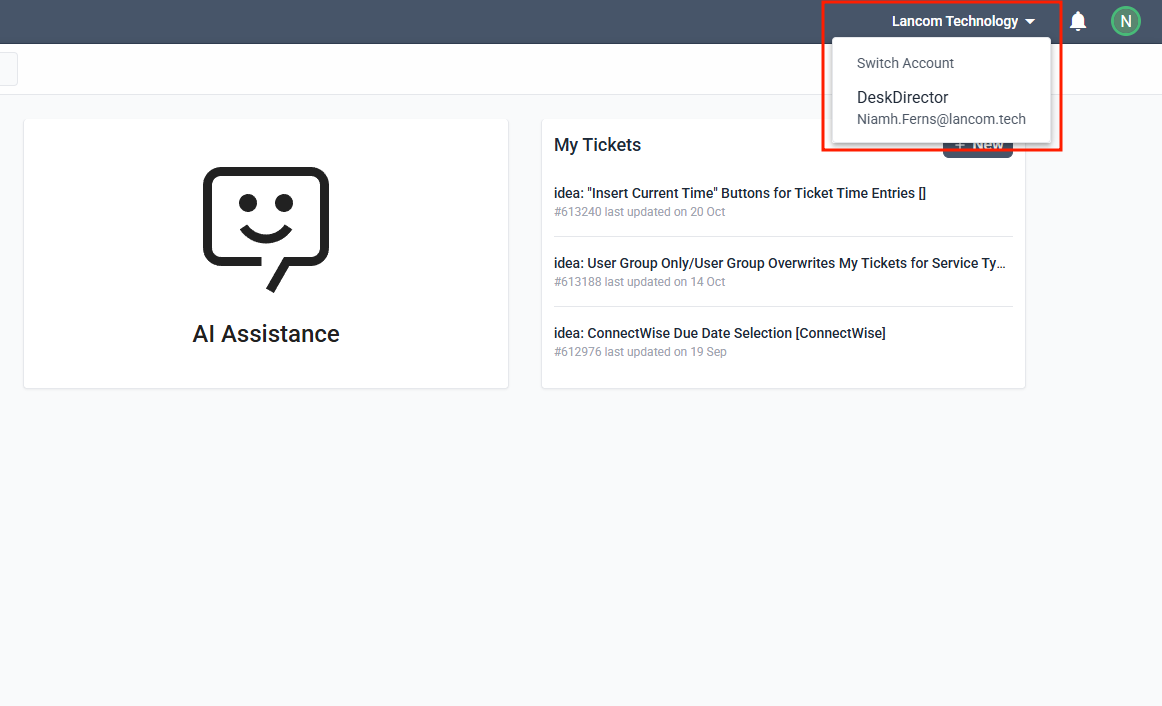
If they have other accounts in your system, they will be shown a dropdown where they can select a company to switch to. Once clicked, the page will refresh, and they will be logged into that account.
Alternate accounts are determined by matching the user's email address with other contacts in your system. If there is a match with another contact, and that contact is not disabled or inactive, the user will be able to switch to it.
Contact Support
Tickets/Service Types
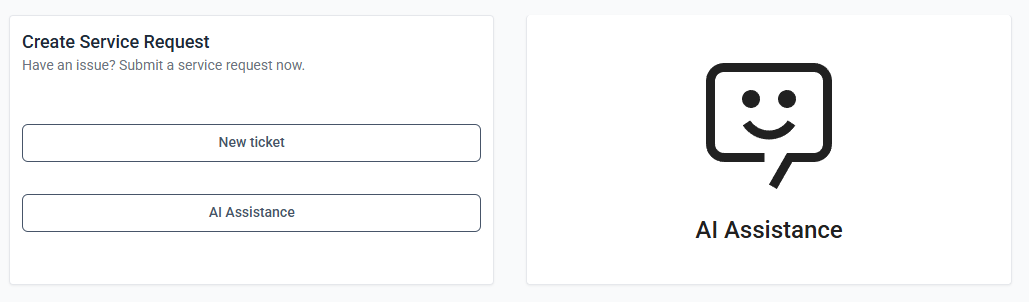
The main purpose of the client portal is for users to be able to submit tickets. They can either submit tickets via the Contact Support menu or directly via https://[Your MSP Name].deskdirector.com/portal/v2/request-support
They will be greeted by a page that looks like the screenshot below. Click on the Create a New Ticket button to submit a ticket:
If the client does not have chat permissions enabled, it bypasses this page, and they will see the list of service catalogue types instead:
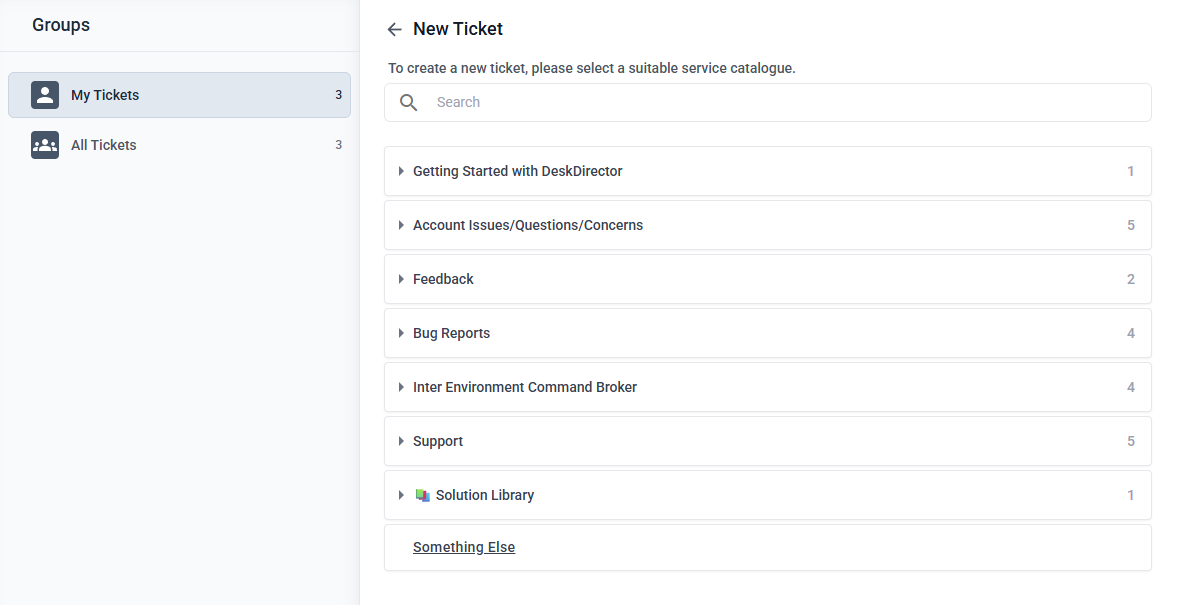
Select the category for your request, select a Service Type that matches your issue or concern, then fill out the form.
Generic Tickets
When submitting a concern/issue via the client portal, there are instances where the existing categories and Service Types do not match your request. We have considered this and added the Something Else option for just this reason.

Chat Sessions
Client portal users can create chat sessions that will allow them to speak to technicians in real time. This can be done in 2 places:
- From the Contact Support screen (known as a pre-ticket chat)
- From an existing ticket
Pre-ticket Chats
Portal users can request a chat before they create a ticket. They can do this by heading to Contact Support > Chat to a Technician (more about Pre-ticket chat here).
Once the client initiates a chat, our system will create a pre-ticket, then look for an available tech to handle the chat.
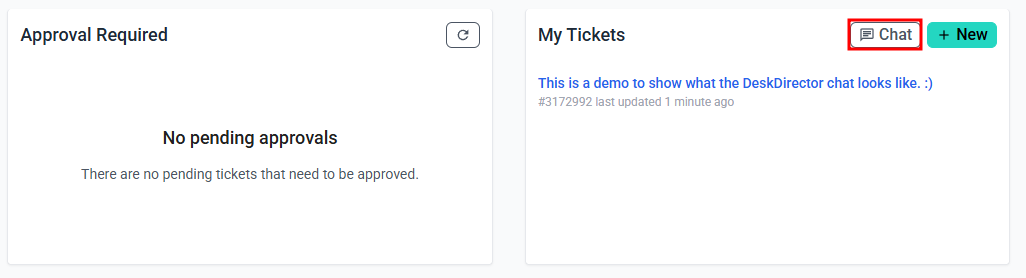
Chat
Users can also chat on an existing ticket by heading to one of their open tickets and pressing the Chat button:
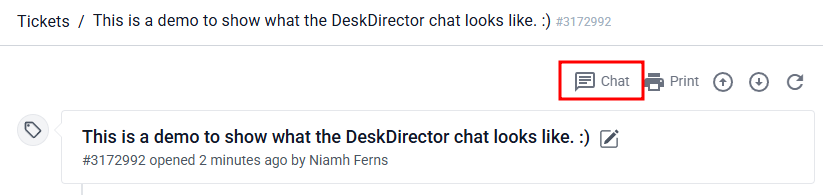
These chat sessions will have the ticket number attached to them, so service agents will be able to easily pull up the relevant ticket. Users can only have one active ticket chat session open per ticket at any one time. That means if you have 2 tickets, you can have 1 open on each ticket if needed. 'Active' is defined as being in either the waiting or handled state.
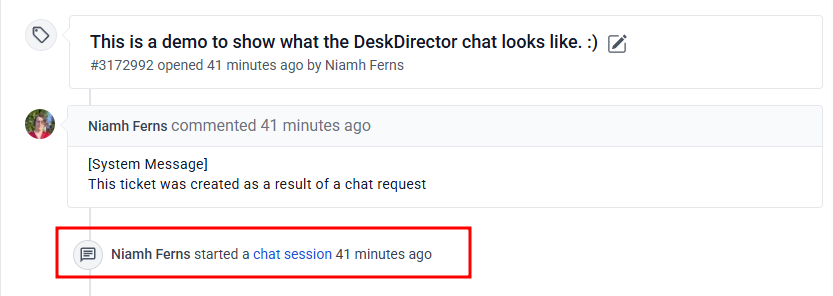
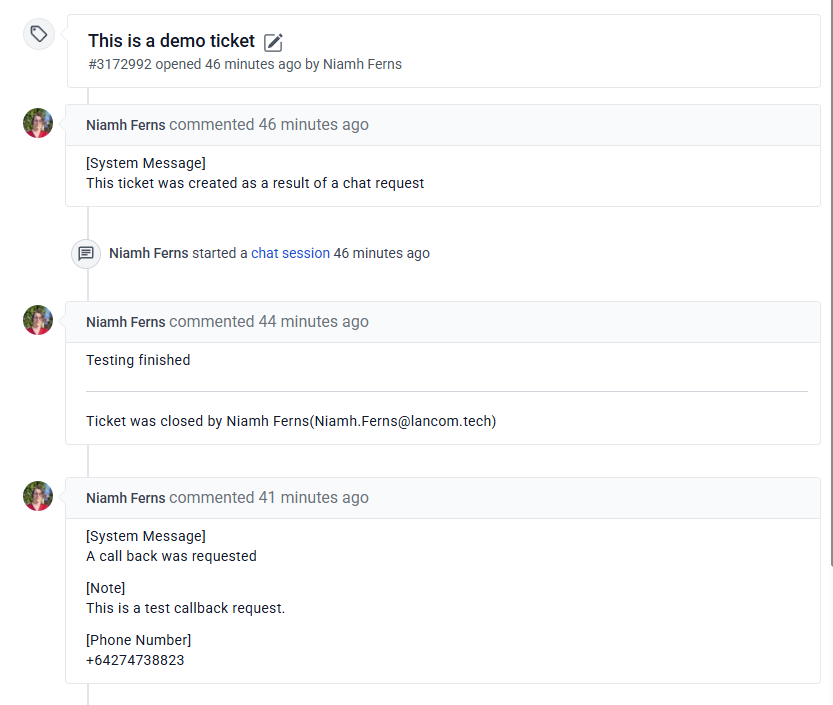
Chat History
Portal users will be able to view their past chat sessions via their Tickets list/history. The chat history will appear as a timeline item on the corresponding ticket that it was associated with.
Ticket List
This is where your clients can find their tickets. Let's go over the parts that make up the ticket list.
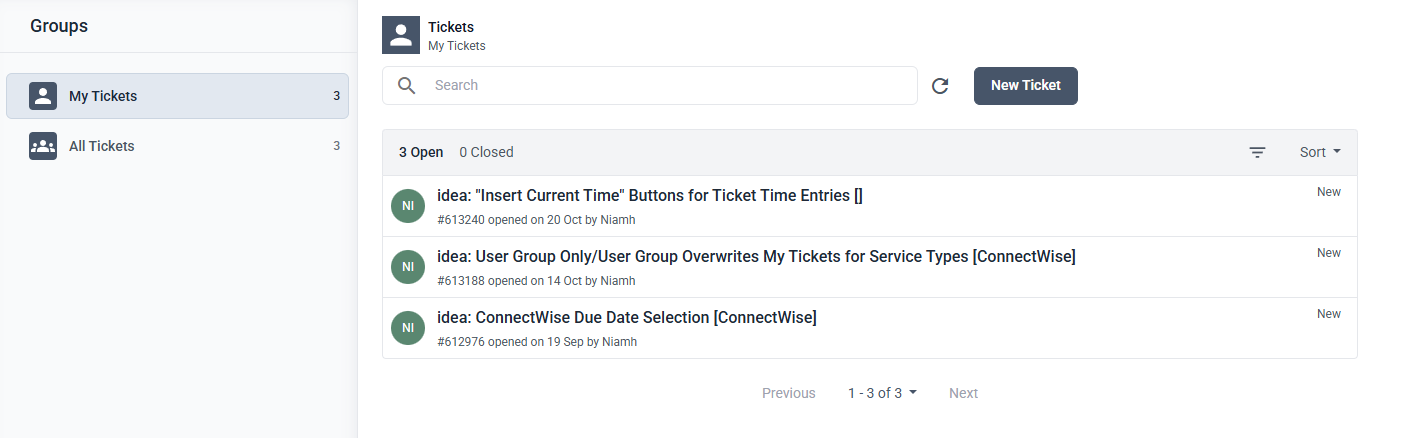
Ticket List Filter
The ticket list filter is made up of several parts:
- Search Ticket: Users can filter tickets by searching using keywords from a ticket title, summaries, descriptions, or ticket numbers
- Sorting: There are multiple sorting options available in the right corner of the search box.
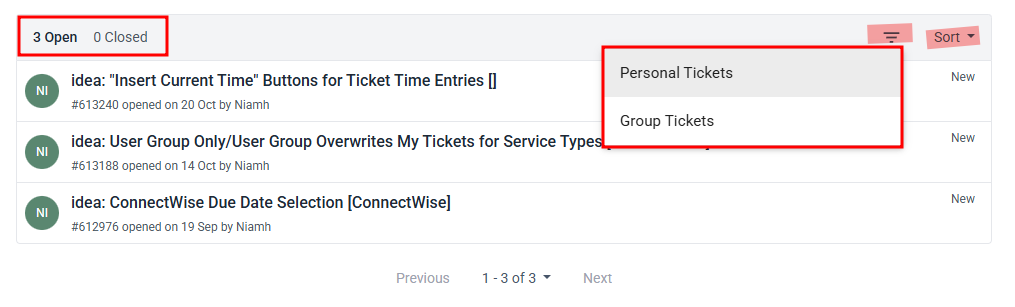
- Category (All tickets/My tickets): this option is only available if a user has "All Tickets" permission, is an approver, or is the default contact for their company. You can read more about these permissions here. The category filter allows users to select whether they want to view all of an Account's tickets or only their own.
- Ticket state (Open/Closed): users can choose whether they want to search by open or closed tickets
- Refresh: users can manually refresh the ticket list
- Filter by Contact: This can be used to filter tickets further to specific users. This is done by clicking the vertical ellipses on the right-hand side of the filter box. A pop-up will appear showing a list of contacts you can select from. After clicking this button, a dialogue will appear. From here, a contact can be selected:
Ticket Details
The ticket details page is where your customers are going to be interacting with you. Depending on their permission levels, they can perform many actions, from approving tickets to requesting a chat. Lets go over each part of this UI:
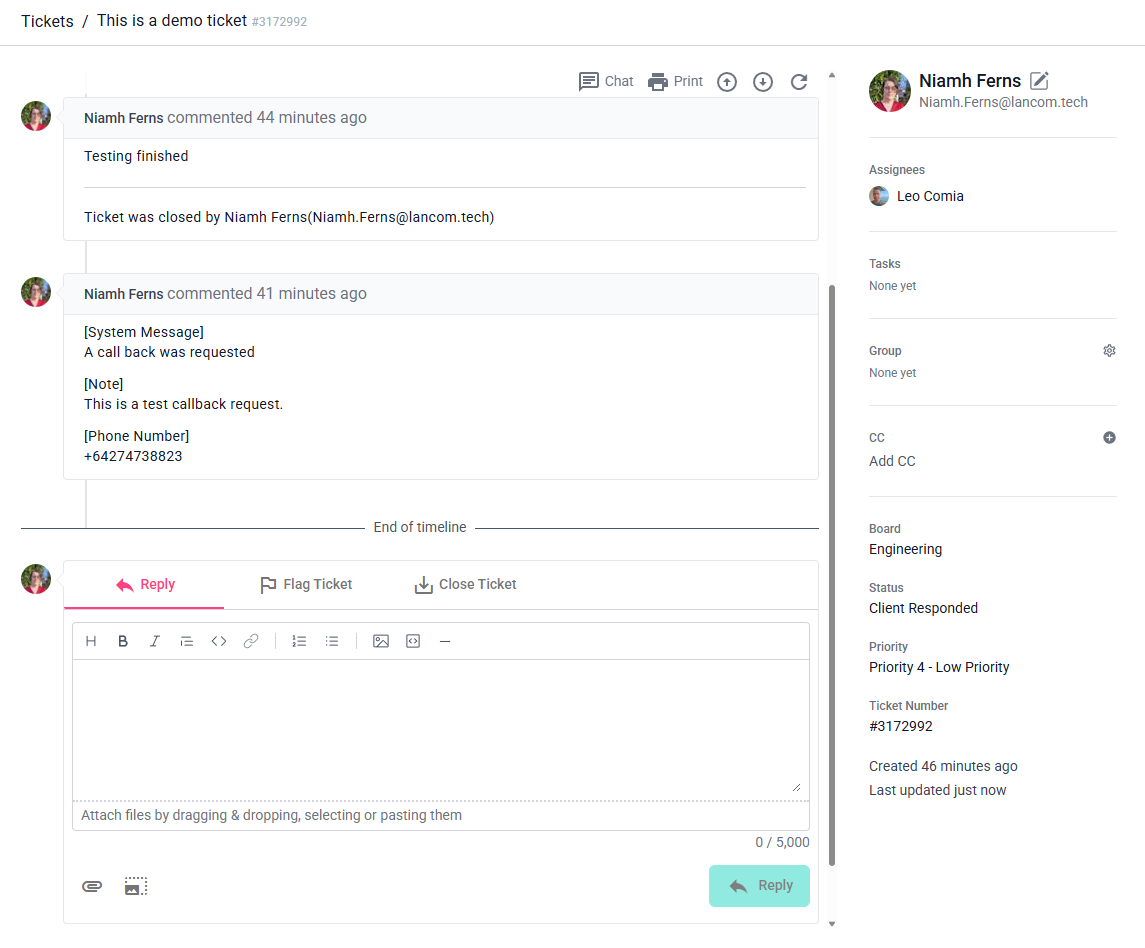
- Ticket Title bar: This shows a set of breadcrumbs so the user knows where they are in the ticket hierarchy, the ticket title and the ticket number. They can click the
Ticketslink to get back to the ticket list.
- Ticket Timeline Header: The timeline header is broken down into the following parts:

- Ticket summary: This is the name of the ticket. If a user is the default contact for their company, is an Approver, or has the All Tickets permission, they will be able to edit the ticket summary.
- Chat: This button will create a chat session for the user. This will only appear if they have the chat permission.
- Print: This button can be used to print a copy of the ticket
- Refresh: Manually refresh the ticket details
- Ticket Timeline: The timeline shows all the public notes, time entries, and attachments that have been added to the ticket. If an attachment is clicked, a dialogue will appear that will allow them to preview the file (if possible). If a file cannot be rendered in the browser, they will be able to download it to their computer to view.
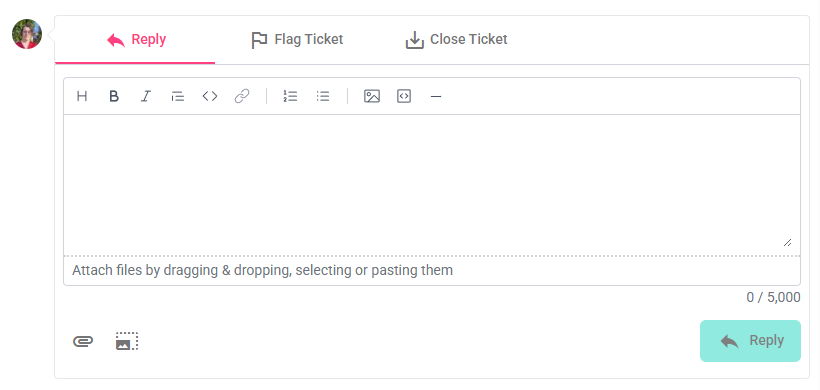
- Ticket Input: From here, your users can reply, flag, fast track, or close tickets. They can also attach screenshots and files.
- Ticket Information: The ticket information shows all of the relevant details of the ticket.

Setting a Custom Landing Page
A landing page is the first page that will load for a client once logged in to the Client Portal. Setting a landing page for your clients can be easily done from the Admin Portal using our Menus. If you want a specific menu item as a landing page, just click and drag it to the top of the menu group.
Landing pages enable you to personalise a client's experience while using the Client Portal. For example, you can create a menu specific to Approvers and have "Approvals" as the landing page. This means, each time any of the approvers log in to the client portal, they will be greeted with tickets that are pending their approval.
Frequently Asked Questions
"What if none of the existing request types match my current issue/concern?"
You can allow Something Else permissions for users who should be able to submit generic tickets. This will present a generic form where you can enter a summary and description of your issue/concern.
"The user can not see the 'Something Else' option under his form."
Double-check your global portal settings or the company's settings to confirm if the Something Else permissions are set correctly.
"Can I rename 'Something else'?"
No, you can't, but you can easily create another generic service type and name it however you like. You can then disable the default "Something else".
"Can I move 'Something else' to the top?"
No, you can't, but you can create a generic service type and follow the ordering logic for service types.