Getting Started with DeskDirector
DeskDirector Portals
Browser Support
What is the DeskDirector Admin Portal?
What is the DeskDirector TECH Portal?
What is the DeskDirector Client Portal?
Desktop Portal
Managing Your Account
Pricing & Subscription Plans
Deskdirector - Sign up walk through
Managing your DeskDirector Subscription
Admin Essentials
Release Notes
Permissions & Feature Configuration (ConnectWise/Autotask Partners)
Automatic Contact Creation
The Developer Corner
DeskDirector Features Overview
Logging in to DeskDirector
Desktop Portal Version Differences
Managing Tickets with DeskDirector
User Profiles & Profile Pictures
Office Hours
How Searching Works
Embedding Help Page Media
Get started with the DeskDirector Power Automate Connector
Features
Portal Customization
Service Catalogue
Forms
Communication
Actionable Messages for Emails
Real-Time Chats
Notifications
Email Notifications
Email Template Engine
Surveys
Broadcasts
Generative AI
Ticket Summary for TECH Portal
DeskDirector with Generative AI
Setting up AI Service Providers
AI Assistants in DeskDirector
Custom Tools for AI Assistants
Knowledge Bases for AI Assistants
Set up Microsoft Foundry Agent Service with DeskDirector Portals
Advanced
Login & Authentication
Contact Groups
Accounts and Companies
Contacts
Approvals
Task Lists
The Learning Center
Tags
Custom Domains
File Storage
Portal Deep Linking
Service Dashboard
Auditing and Analytics
Integrations
ConnectWise
ConnectWise Custom Menu Item for DeskDirector Tech Portal
ConnectWise
ConnectWise Quotes & Invoices
ConnectBooster
ConnectWise - Avoid Aggressive Notifications
AutoTask
Switching or Merging PSAs
QuoteWerks
Wise-Pay
TimeZest
BiggerBrains
OneNote Notebooks
Integrations - Frequently Asked Questions
IT Glue
Microsoft Teams App
Introducing the DeskDirector for Microsoft Team App
Installing the Microsoft Teams App (Client Mode)
Installing the Microsoft Teams App (TECH Mode)
Setting up Tags for Teams Discussions (TECH Portal)
Branding the DeskDirector Teams App
DeskDirector Teams App Notifications
User Groups Integration with Microsoft Teams
Setting up Content Security Policy (CSP)
Advanced topic: Setting up Tech & Client Mode in the same tenancy
Integrating Microsoft Teams with DeskDirector Tech Portal
Smart Alerts for TECH Users
Microsoft Power Automate
Actions
Solutions
Power Automate Template Gallery
Featured Solution: Teams Ticket Discussion
Featured Solution: Ticket Briefing
Power Automate Administration
Power Automate Connector - Setting up your first flow
DeskDirector Power Platform Connector Reference
Troubleshooting
Troubleshooting via Web Developer Tools
Diagnose Entities Tool
Troubleshooting DeskDirector Connection Issues
Permissions & Access - Common Issues
Tickets & Chats - Common Issues
ConnectWise Audit Trail - Exporting API Logs
Contact DeskDirector Support
Desktop Portal - Common Issues
Contact Impersonation
DeskDirector Desktop App - Installation Issues
Login & Authentication - Common Issues
Approvals - Common Issues
Email & Email Delivery - Common Issues
PSA Entity Syncing - Common Issues
PSA Integration - Common Issues
ConnectWise Integration - Common Issues
Autotask Integration - Common Issues
Microsoft Teams App - Common Issues
Security
Glossary
Archived
Table of Contents
- All Categories
- Archived
- Tech Portal Ticket Details
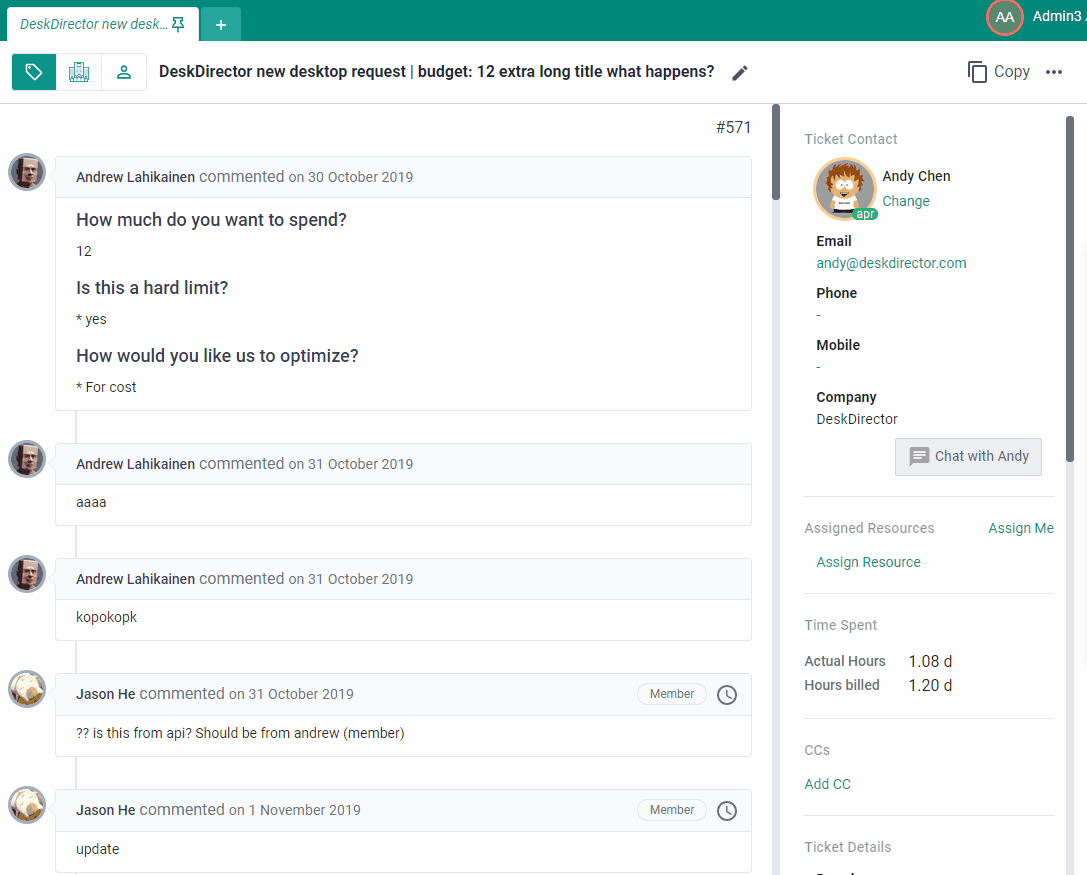
Tech Portal Ticket Details
The ticket details page is where you see all the specifics of the ticket - initial issue, tickets/notes added, assigned techs, sender, and all other information and features specific for the ticket. This is also where you can reply and edit ticket data.
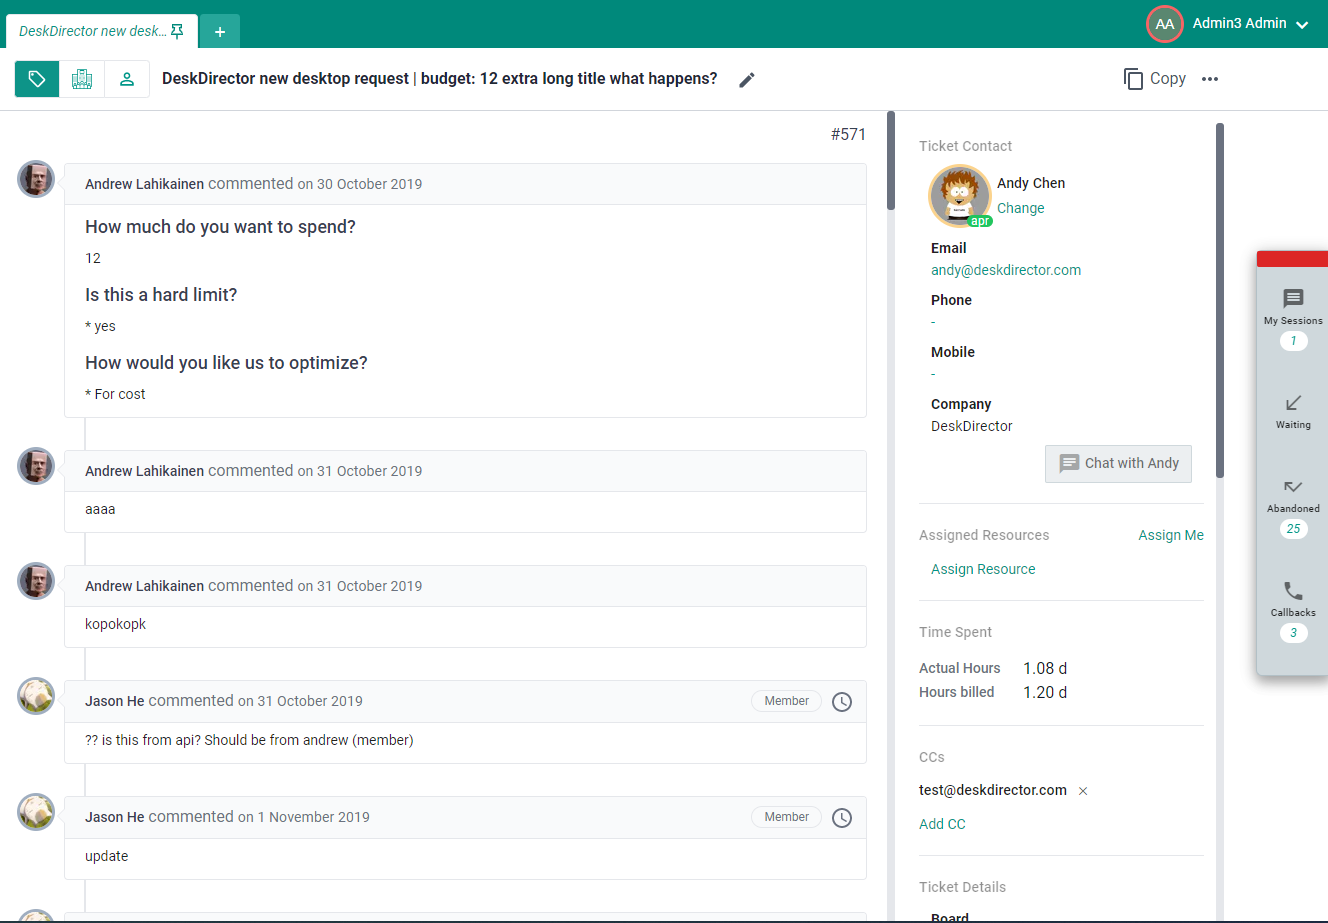
Top Ticket Panel
The top panel when opening a ticket shows multiple icons and functions. The screengrab shows these functions at work and they are discussed further below:
Ticket context icons
This portion shows three icons which allows you to easily switch between the ticket, the contact assigned to the ticket, and the company of the assigned contact (see screengrab for behavior). This can be useful if you need to check contact or company information quickly, or to check other tickets that they have created.
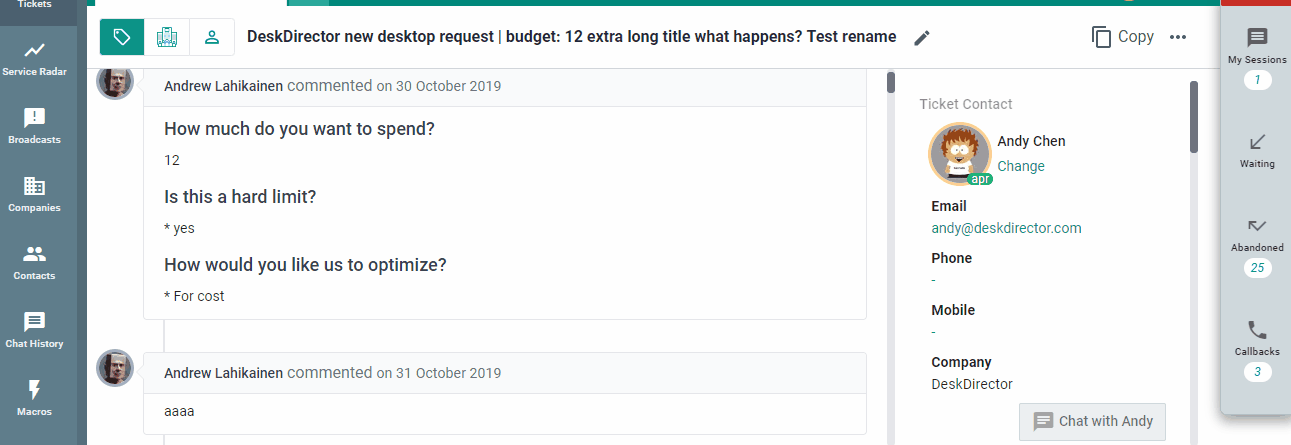
Ticket Title
This shows a preview of what the ticket is. As a technician, you can easily rename the ticket title and comes handy if you want to add keywords to it so you can easily filter through tickets in the future (Searching Tickets).
Copy
This feature was added on Tech Portal v1.32 update. Clicking this icon will open a pop-up showing three fields. The first field grants the tech easy access to copy the ticket number (address this GitHub Quick Copy feature request)
The other two grants easy access to portal deeplinking making it easy to copy it in case you need to reference this ticket somewhere and want it deeplinked.
More options
Beside "Copy" is an ellipses that presents more options specific to the ticket. Clicking it should trigger a dropdown showing multiple options.
- Open PSA - clicking this will open the ticket inside your PSA. This is useful if you need a specific function from the PSA that Tech does not implement.
- Clipboard - basically triggers the same pop-up as the Copy icon.
- Ticket Tabs - The set of texts that appear under Clipboard and before Delete are the Ticket Tabs.
- Delete - This enables techs to delete tickets from DeskDirector. This feature was added on Tech Portal v1.32 update.
Right Ticket Panel
The right ticket panel shows the details about the ticket contact, its assigned techs, CC'd contacts, board it belongs to and others. Let's break it down further.
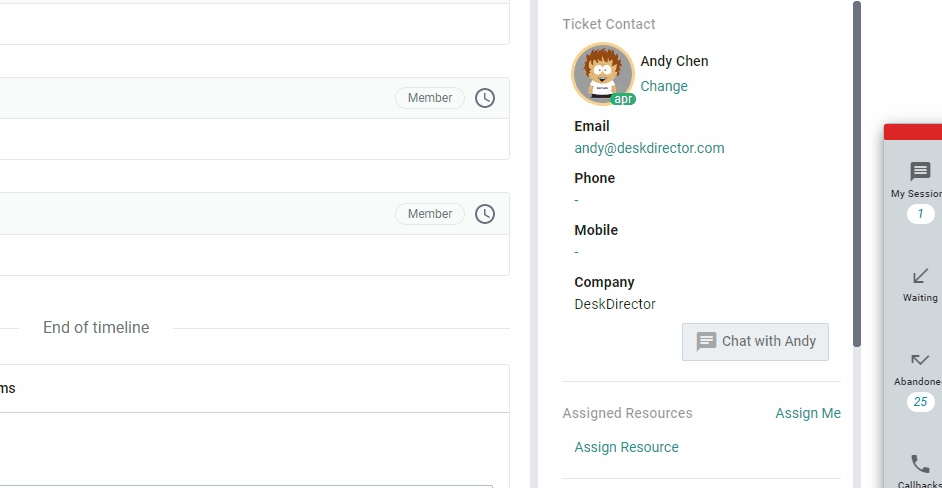
Ticket Contact
This section of the right panel shows who submitted this ticket, and his contact information. As a tech, you can re-assign the ticket contact to someone else by clicking on the "Change" link. If the customer is also online, and he has Chat Permissions set, a tech should be able to push a chat to the contact via the "Chat with ___" button.
Assigned Resources
This panel allows you to view all the resources that have been assigned to the ticket. There is also an assign me button which does what you expect. You can also assign other resources from this panel.
Time Spent
Is a summary of the time entries for the ticket.
CCs
This is where you can see all the CC'd contacts for the ticket. Tech can add/remove CC'd contacts to their liking.
Ticket Details
This section shows other more details about the ticket. It shows:
- Board/Queue
- Status
- Priority
- Type
- Date created/updated
- Tags
- and others...
As a tech, you can reclassify tickets using the dropdowns in the ticket details section, whether you want move it to another board, change the ticket's status and priority, reclassify the type then add/remove tags.
Ticket Timeline
The timeline shows all ticket notes (internal, resolution, and public), chat logs (if a chat was initiated in the ticket), and also shows all documents that have been attached to the ticket.
Most image files and pdfs can be previewed inside the tech portal. To do this, you can click on the thumbnail of the file (if you just want to download, click the file name):
This opens a modal which displays a larger version of the image. It also has options for you to download the file to your machine. The same goes for chat logs.
At the bottom of the timeline is the section to add note/time entry/forms:
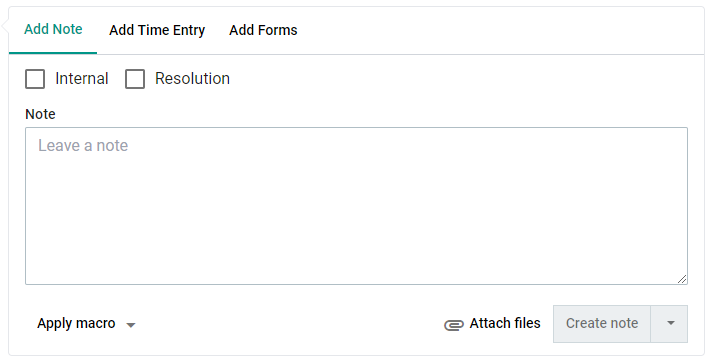
From here you can either add a note or add a time entry. In order to add a time entry, the current status of the ticket must allow time entries. If it doesn't, the add time entry tab will be disabled until the status is changed.
You can add inline forms to your replies, and/or you can also use Macros.