Table of Contents
Notifications
 Updated
by Niamh Ferns
Updated
by Niamh Ferns
Notifications Overview
The notification feature allows users to receive alerts on their desktops for certain events on their desktop and will automatically close after 10 seconds if not dismissed by the user. An end user will be notified when:
- A ticket status is changed
- Notes or time entries have been added
- A company broadcast is made
Portal Notification settings are global, so once enabled, all of your clients will see them. Unless you add contacts/accounts to the advanced filters listed in this document.
Enabling Notifications
To enable notifications, follow the steps below
- Log in to your Admin Portal
- Navigate to
Client Portal>Notifications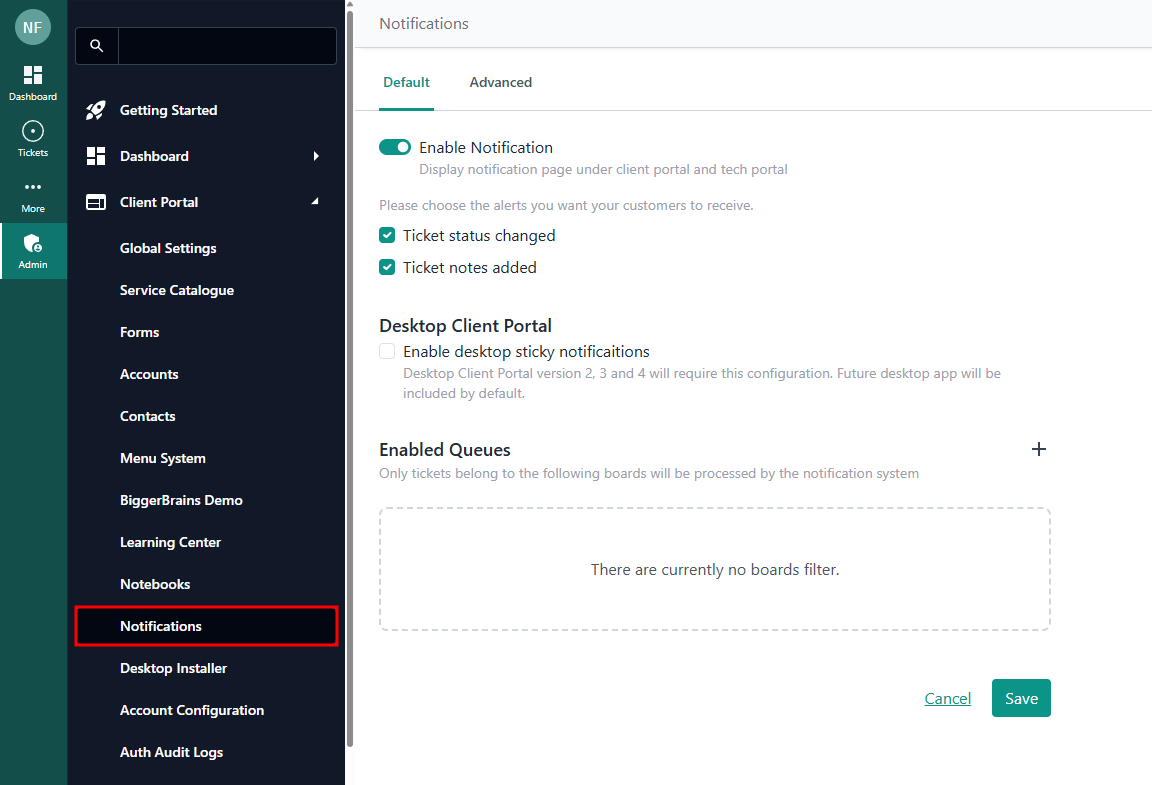
- Enable notifications via the toggle switch:
Enable Notification - Select which notification events you want end users to receive
- Add your preferred boardsNote: not adding any boards will mean that users do not receive notifications!
- Optionally, limit which companies or contacts receive notifications via Receivers under the Advanced tab. We recommend limiting this feature to individual clients as you update each one.
- Optionally, limit notifications by ticket status by adding them to the Status Triggers in the Advanced tab.

Controlling Which Statuses Fire Notifications
You may have certain statuses that you don't need your clients to be notified for. We have functionality in place to configure just that.
Log in to the Admin Portal and navigate to Client Portal > Notifications, then open the Excluded Status List:
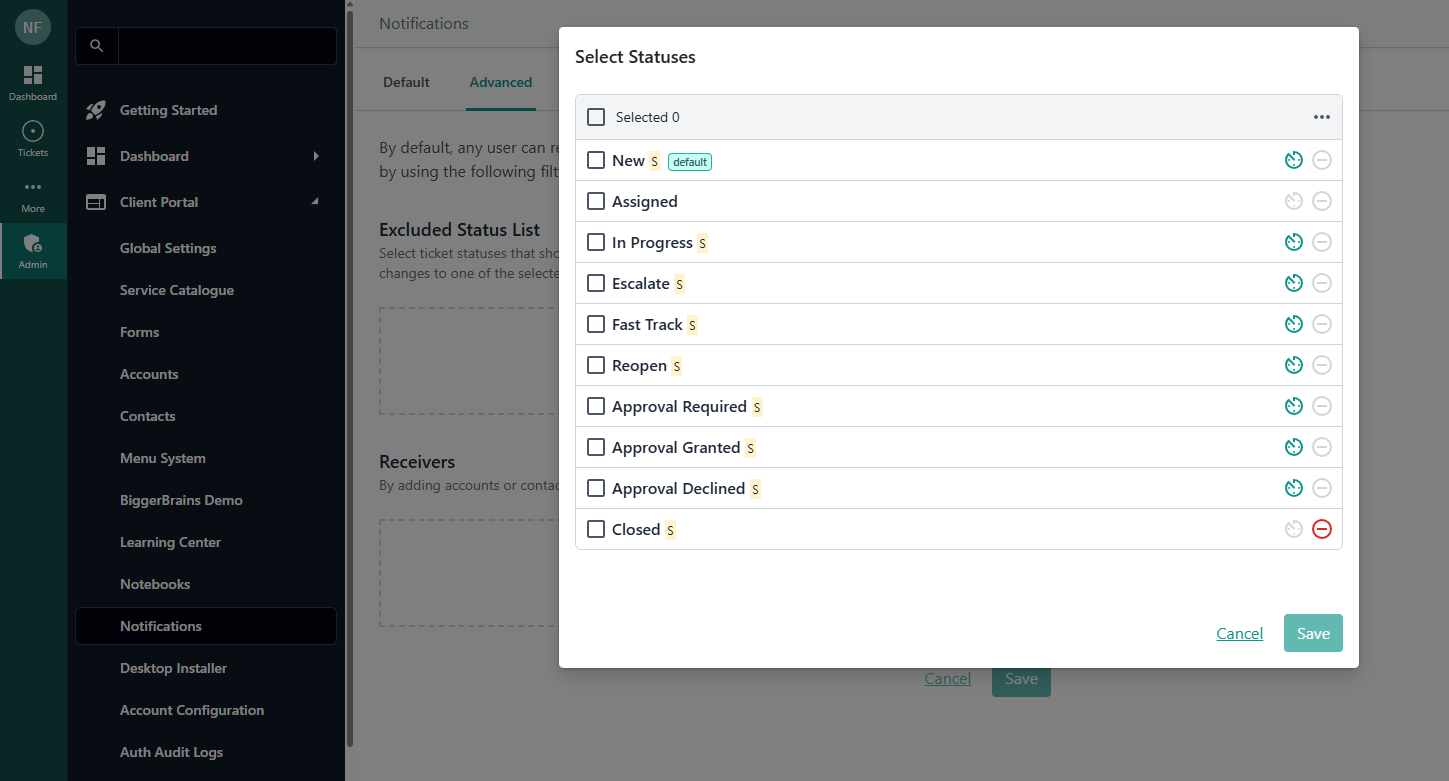
From here, you can enter the statuses you want to exclude from firing a notification. And that's it - any tickets with these statuses will no longer trigger notifications for your clients!
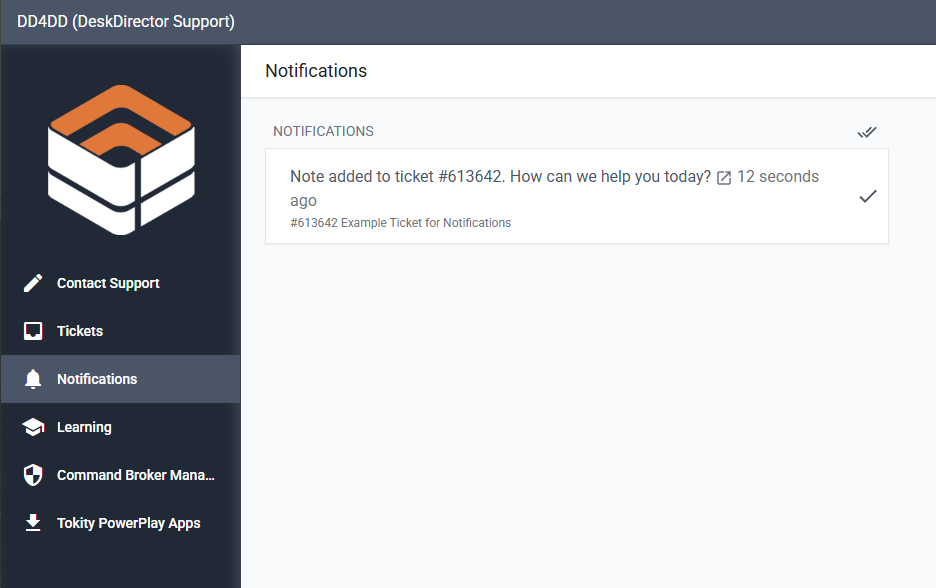
Client Portal Ticket Notifications
In the DeskDirector Client portal, the Notification page will show both active broadcasts and recent ticket updates.
Broadcasts
The top section of the notifications page is where all broadcasts appear. A client can not dismiss/remove any broadcast notifications. They can only be removed by Service Agents or will automatically disappear when reaching the end of their scheduled time.
Ticket Updates
As the name suggests, this is where notifications for updates to an end user's tickets appear:
- If the end user has submitted a ticket that requires approval, it will show whether the ticket has been declined/approved
- It will show ticket changes (i.e. status/priority changes, notes added, and other configured events).
- Any "internal" changes like techs assigning a resource, adding a CC, adding an internal note, changing ticket contact, et cetera, will not trigger a ticket update notification.
Example: If a ticket has its status changed, then a note is added, it will only show that a note has been added and not that it has changed status.
Push Notifications
Aside from the notifications page in the Client Portal, notifications are also pushed to clients from both the web and desktop portals. These will appear on your computer as a notification that you're usually used to seeing for your platform (whether it be Windows, MacOS, Android, or iOS).
Tech Portal Ticket Notifications
Notifications are a great way to keep track of any activity on a site Ticket Notifications make it easy to keep track of tickets that you have handled or assigned to you. All your notifications will be visible under the Notifications tabs in the DeskDirector Tech portal.

Opening the page will show all Unread notifications that you have. You can filter the notifications to show all or just unread. Selecting "All Notifications" will show all past notifications that are up to 7 days old. You are able to open the relevant ticket for each notification by clicking on the notification you're interested in.
You can mark notifications as read by clicking on the checkmark adjacent to them, or mark all unread notifications by clicking on the double check mark beside the unread notification count.
Frequently Asked Questions
"Why do I not see notifications from certain tickets?"
There are several settings for notifications that can be configured in the Admin portal. All these settings are under Portal > Notifications. Double-check whether the board has notifications enabled, or if company or contact filters are used for notifications or if there are exceptions as to which ticket status triggers notifications.