Set up Microsoft Foundry Agent Service with DeskDirector Portals

This guide walks you through integrating Microsoft Foundry Agent Service with DeskDirector (DD) Tech and Client Portals. With this integration, you can bring your production-ready Foundry agents directly into DeskDirector to augment your existing AI Assistant workflows.
Why This Integration
Organisations often outgrow simple chatbots. Foundry Agent Service provides a secure, governed runtime for intelligent agents with policy enforcement, tool orchestration, observability, and RBAC. Integrating Foundry agents into DD portals lets you:
- Deploy agents with enterprise-grade identity, networking, and content safety.
- Orchestrate tools server-side with retries and structured logging.
- Observe and improve agent performance with full visibility into conversations.
- Reuse agents you operate in Foundry across DD portals.
See an overview: What is Foundry Agent Service?
Compare Approaches: BYO Models vs BYO Agents
DeskDirector already supports “bring-your-own-models/KBs/tools” for AI Assistants.
- BYO Models/KBs/Tools:
- You configure LLM providers and optional Knowledge Bases and custom tools in DD.
- Ideal when you want fine-grained control over prompts, retrieval, and tool wiring inside DD.
- BYO Agents (Foundry Agent Service) (this integration):
- You build and govern agents in Microsoft Foundry, then reference those agents from DD.
- Ideal when your enterprise needs centralised agent governance, tool orchestration, security, and observability managed by Foundry.
For DD’s assistant types and assignment logic, review: AI assistants in DeskDirector portals.
Prerequisites
- Azure subscription and access to Microsoft Foundry (Azure AI Foundry).
- A Foundry project with at least one agent you plan to use.
- Microsoft Entra permissions to create an app registration and assign roles.
- DeskDirector Admin Portal access.
Step 1 — Create a Project in Microsoft Foundry
Create or select a Foundry project and set up your agent(s).
- Visit Azure AI Foundry: https://ai.azure.com/
- Create a project/workspace and configure your agents (models, tools, instructions, policies) per your use case.
- Note the API endpoint for your project (you will use this in DD). Typical format:
https://<your-resource>.services.ai.azure.com/api/projects/<your-project>.
Step 2 — Set up Authentication
You’ll authenticate from DD to your Foundry project using a Microsoft Entra application (service principal) with least privilege.
- Register an app in Microsoft Entra ID (Azure AD):
- Create an app registration.
- Capture the Tenant ID and Application (client) ID.
- Create a Client Secret and store its value securely.
- Consider secret rotation policies aligned to your security standards.
- Create and assign a custom role to your Foundry resource:
- Under your Foundry Project, head to the Access control (IAM) blade
- Open the Roles tab, search for Azure AI and then select Azure AI Developer:

- Select the hamburger menu for the Azure AI Developer role and then select Clone:

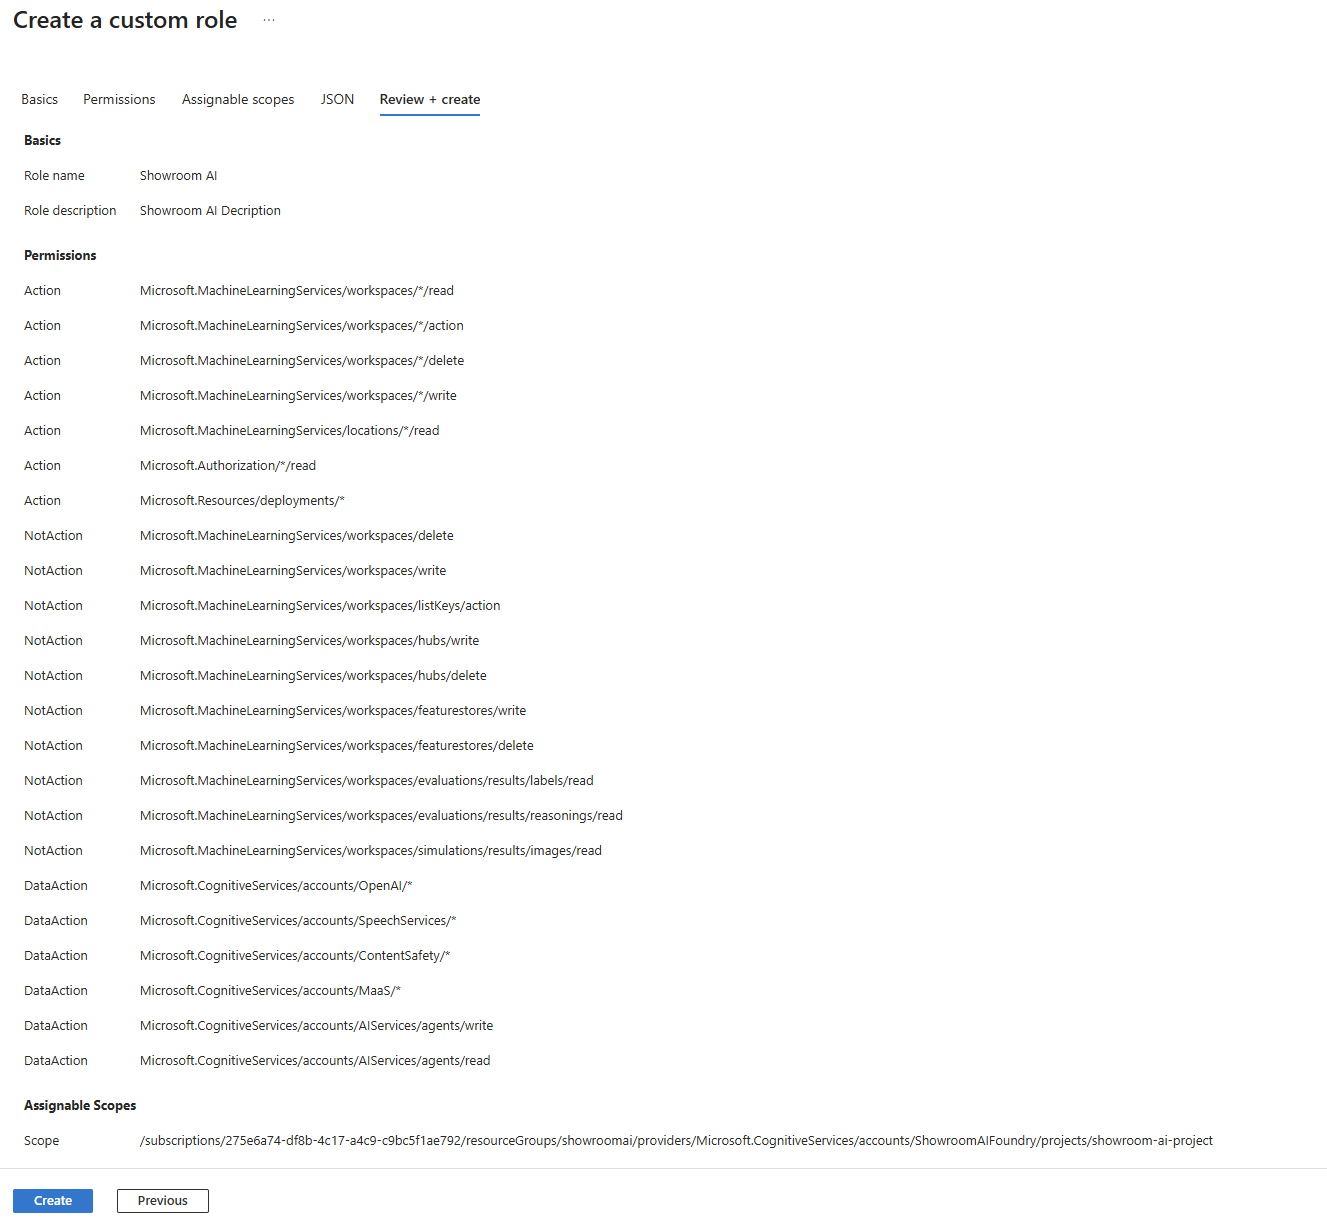
- Provide your custom role with a name and description.
Leave the Baseline permissions as Clone a role, and the Role to clone as Azure AI Developer - Select Next and then select Add permissions
- Search for the Microsoft Cognitive Services permission:
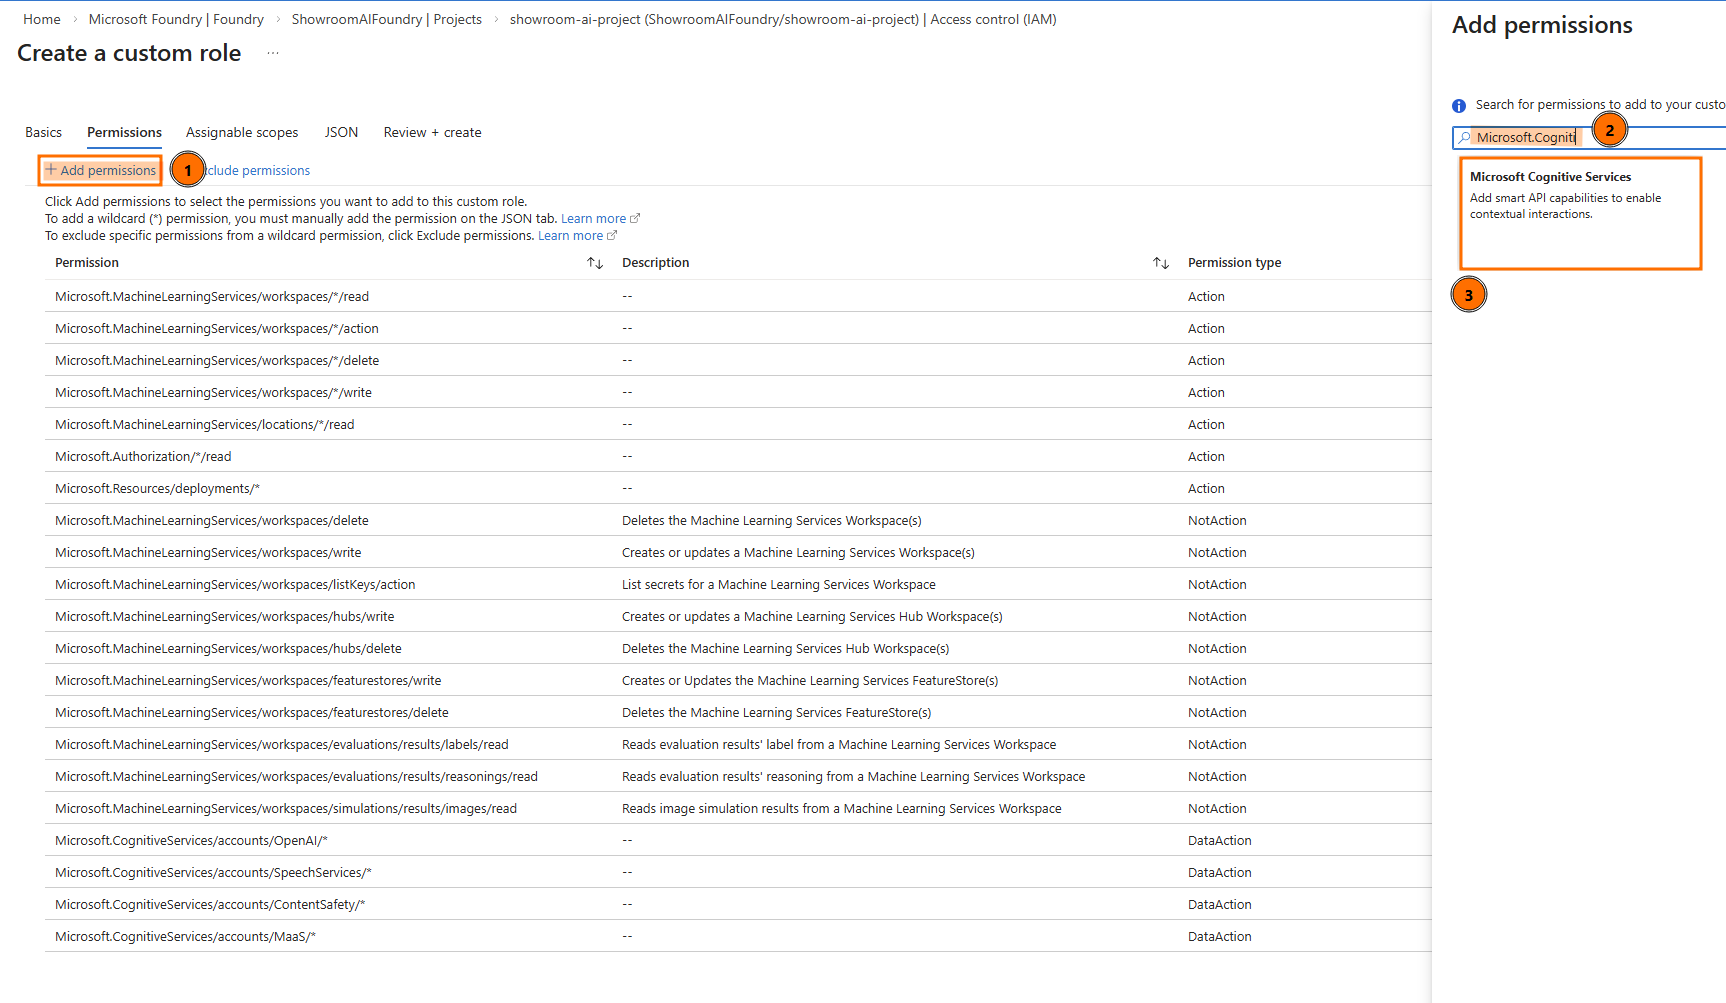
- Search for and add the following Data Actions:
-Microsoft.CognitiveServices/accounts/AIServices/agents/read
-Microsoft.CognitiveServices/accounts/AIServices/agents/write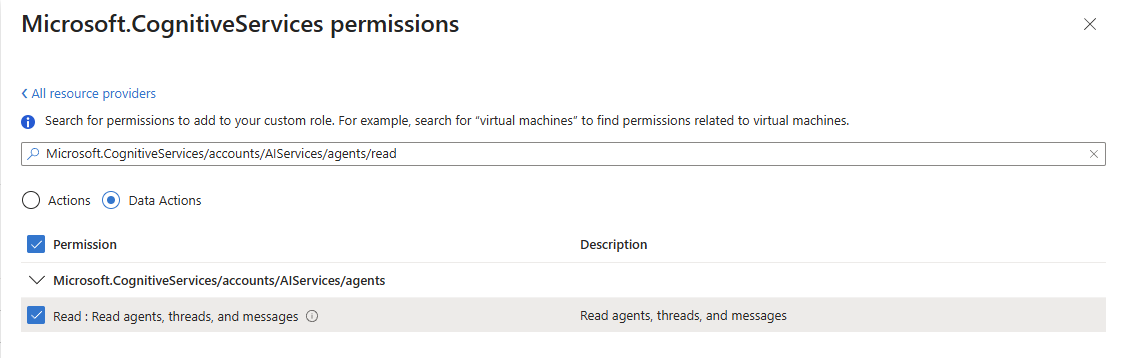
- Select Review + create, and then select Create:
- Back in the Access control (IAM) blade, select Add > Add role assignment
- Search for your custom role and select it
- Under the Members tab, select User, group, or service principal, and then Select members
- Search for the Service Principal (Enterprise App) you created earlier
- Review + assign
Reference guide: Authenticate to Azure resources from .NET apps hosted on-premises
Step 3 — Configure the Foundry Project in DD Admin Portal
Route: DeskDirector Admin Portal → AI Hub (under Integration) → Manage your AI service providers → Add New Integration → Azure Foundry.
Fill out the form and save:
- Tenant ID: Your Microsoft Entra tenant.
- Endpoint: Foundry project API endpoint (e.g.,
https://<resource>.services.ai.azure.com/api/projects/<project>). - Client ID: Application (client) ID from your app registration.
- Client Secret: Client secret value associated with the app registration.
Step 4 — Create an AI Assistant (Tech or Client) Using a Foundry Agent
Route: DeskDirector Admin Portal → AI Hub (under Integration) → Change Settings (under AI Assistants) → Create new AI Assistant → select assistant type (Tech Portal / Client Portal) → select Azure Foundry.
In the assistant creation flow:
- Basic Settings:
- Name the assistant.
- Select the Foundry Project and the Agent to use.
- For Tech Portal: select queue(s) (boards) this assistant serves.
- For Client Portal: select company/companies this assistant serves.
- Optionally add a description.
- Test Chat:
- Send messages to validate the agent responds as expected.
- For Tech Portal assistants, optionally include a ticket context to test contextual behavior.
- Review & Save:
- Confirm project, agent, and assignment.
- Create or update the assistant.
Troubleshooting
- Permission denied (403): Verify your custom role is assigned at the correct scope and includes the required actions/dataActions.
References
- Azure AI Foundry home: https://ai.azure.com/
- Azure AI Foundry docs: https://learn.microsoft.com/en-us/azure/ai-foundry/what-is-foundry?view=foundry
- Microsoft Entra app registrations: https://learn.microsoft.com/en-us/entra/identity-platform/howto-create-service-principal-portal
- RBAC custom roles: https://learn.microsoft.com/en-us/azure/role-based-access-control/custom-roles