Table of Contents
- Chat Overview
- Additional DeskDirector Chat features
- Using Chats
Real-Time Chats
 Updated
by Niamh Ferns
Updated
by Niamh Ferns
- Chat Overview
- Additional DeskDirector Chat features
- Using Chats
Chat Overview
This article outlines the steps you need to take to get started with DeskDirector Chat.
Enabling Chat
Access to the chat feature can be allowed/restricted in three ways: globally, by company or by contacts. This will depend on whether you want everyone to have access to this, just want it for specific companies, or fine-tune it further to specific contacts.
To give chat permissions globally:
- Log in to the Admin Portal, then head to
Client Portal>Global Settings - Click on the General tab under the "Features" sub-heading in the left-hand panelFor our ConnectWise/Autotask partners, this will instead be under
Client>Global Settings>Feature Permissions. - Check Chat to enable chat globally and save changes
To give chat permissions to a specific company
- Head to the
Client Portal>Accountspage of your Admin Portal - Search for the account you want to grant chat access to and open the General tab under the "Features" sub-heading in the left-hand panelFor our ConnectWise/Autotask partners, this will instead be under
Client>Companies>{Company}>Feature Permissions. - Enable the Ticket Chat and Chat Callback features as desired.
To give chat permissions to a specific contact
- Head to the
Client Portal>Contactspage of your Admin Portal - Search for the contact you want to grant chat access to and open the General tab under the "Features" sub-heading in the left-hand panelFor our ConnectWise/Autotask partners, this will instead be under
Client>Contacts>{Contact}>Feature Permissions. - Enable the Ticket Chat and Chat Callback features as desired.
Note that permissions can be overridden in the following ways:
- Global permissions are overridden by permissions and contact permissions
- Company permissions are overridden by contact permissions
Contact level permissions are always respected if they are defined. For example, if chat is enabled globally, but disabled for a particular contact, that contact will not be able to chat but everyone else will be able to chat.
Additional DeskDirector Chat features
Pre-Ticket Chat
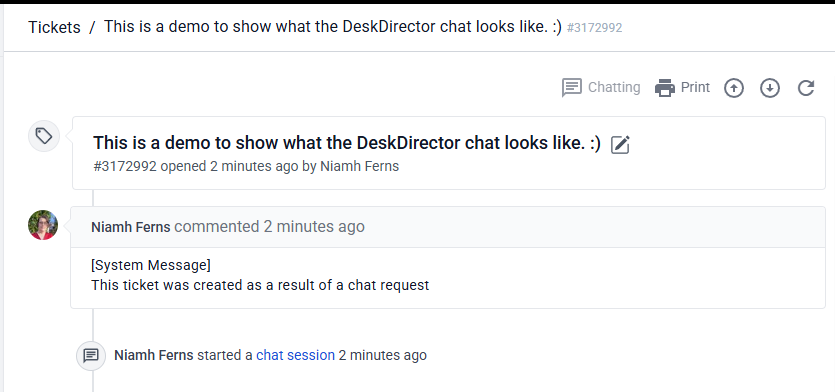
Pre-Ticket chat is a way for users to chat with your agents, without requiring them to create a ticket first. They will be asked for a short description of their problem, then a ticket will be created behind the scenes and launch them directly into a chat.
- The Contact Support page will contain an extra Chat option
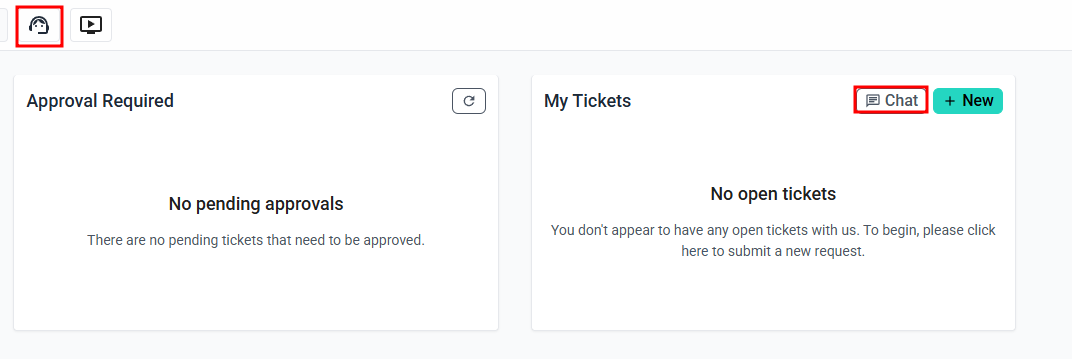
- The user will be asked for a brief description of their problem
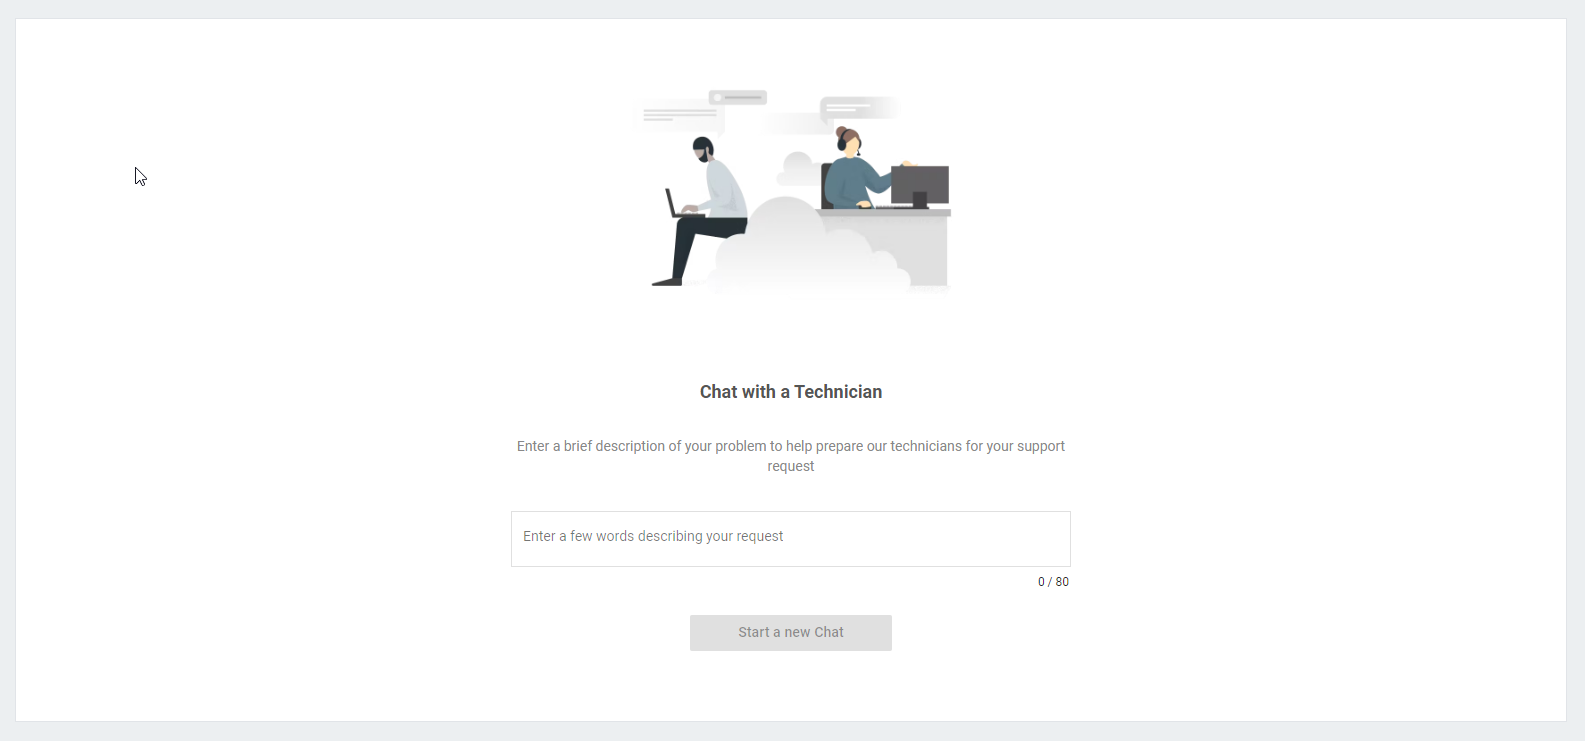
- Once "Start a New Chat" is clicked, a new chat session will be automatically created for them
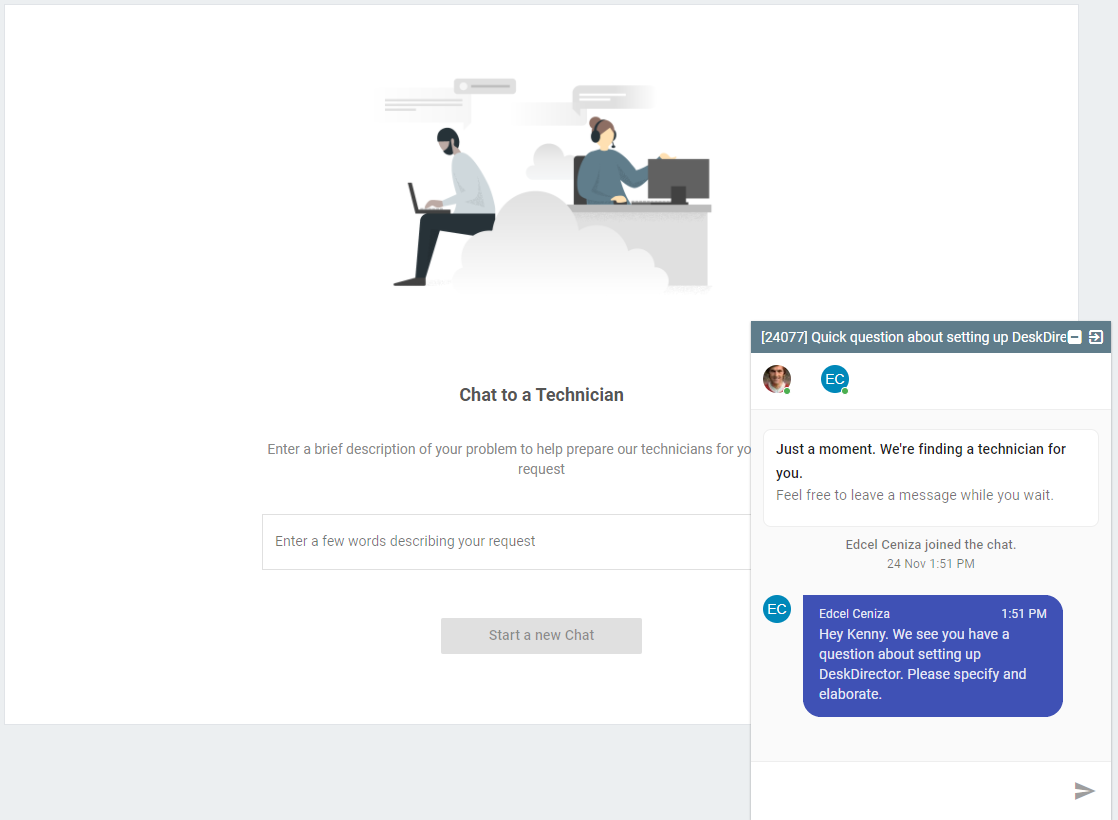
- A new ticket is also created for the issue
Chat Callback
The chat callback feature helps client portal users easily leave a message asking someone to get back to them. Turning on the feature will make the "Call Me Back" action available inside the chat dialog. This will become visible in the two situations below:
Outside of Office Hours
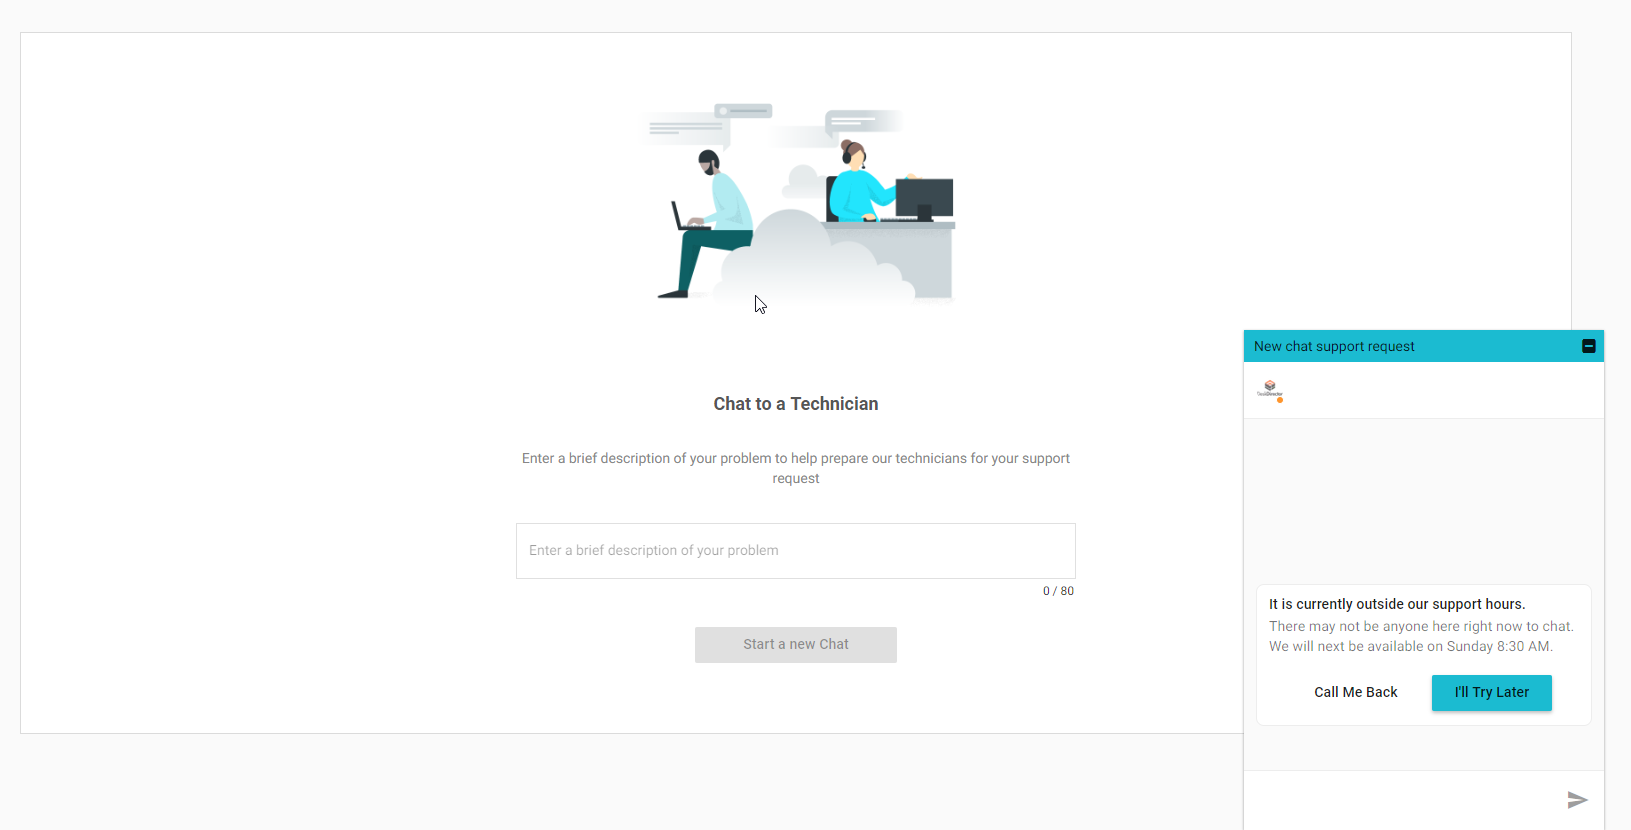
Call Open for >1 Minute
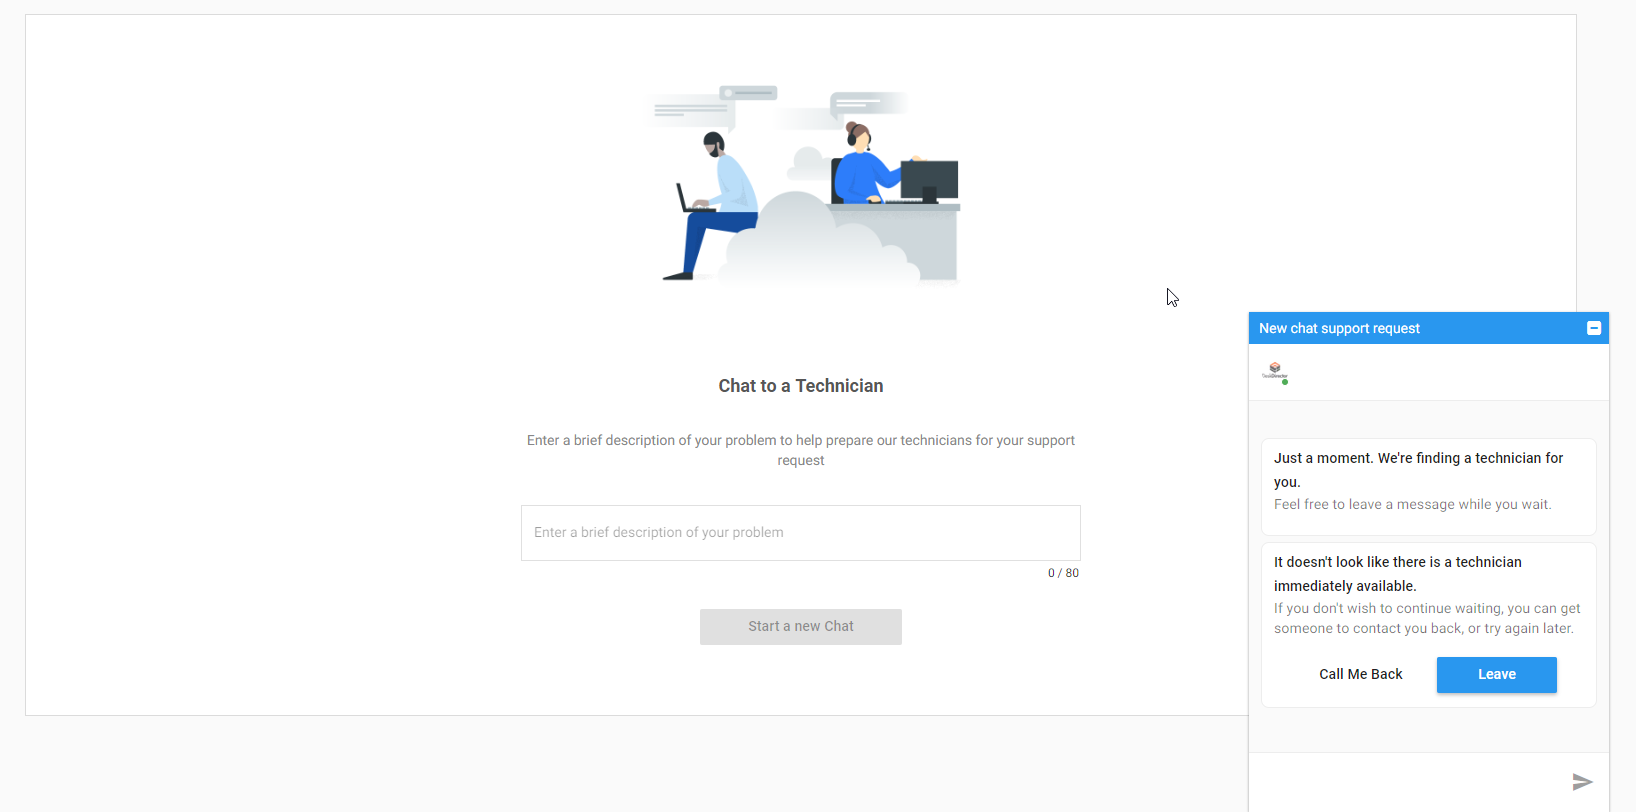
The end user will then be presented with a "Call me Back" pop-up that looks like below:
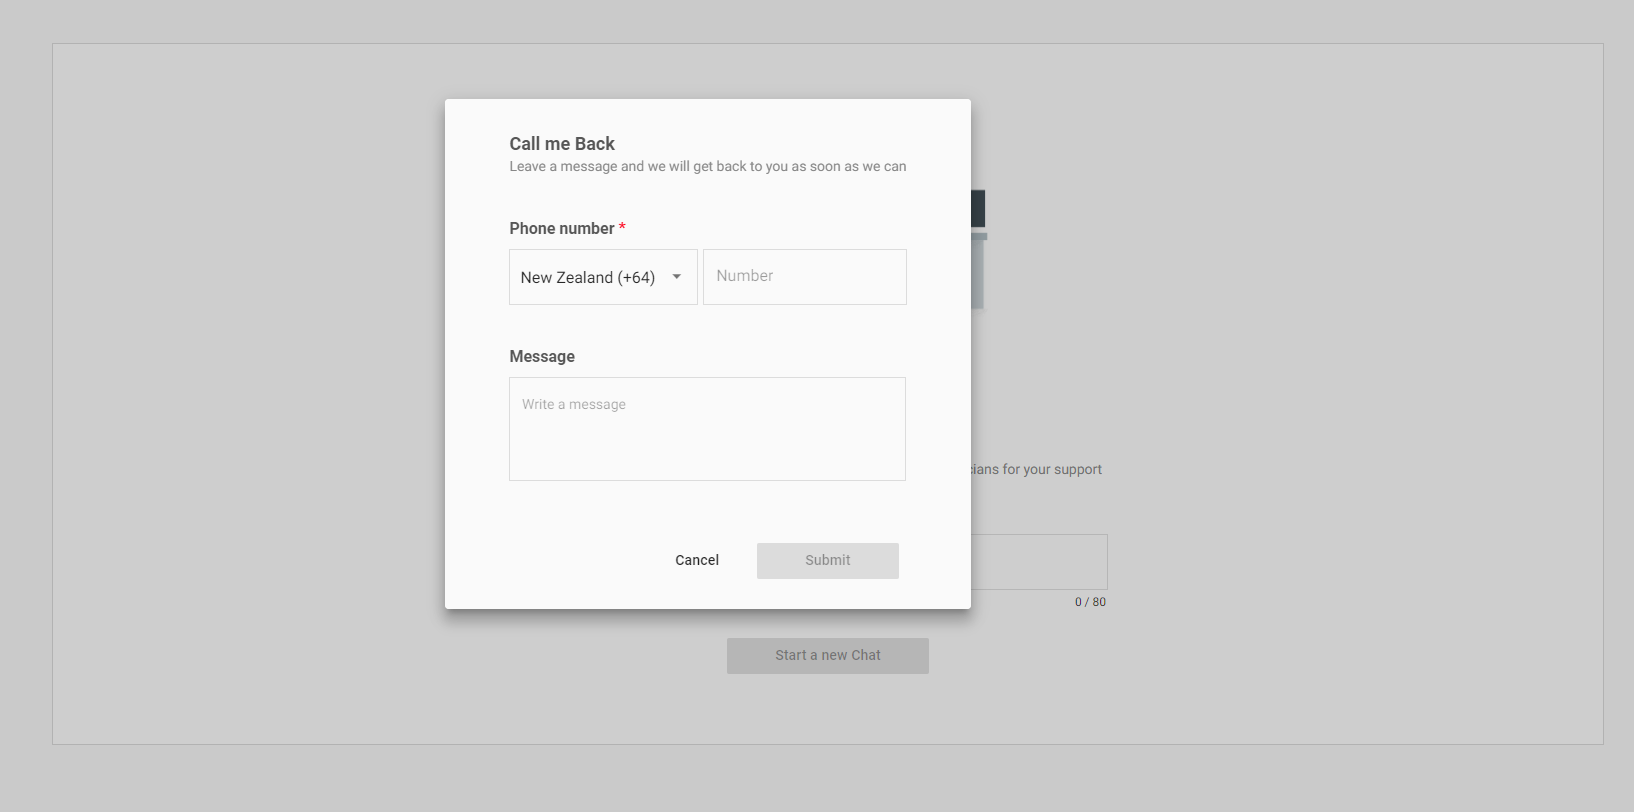
The callback request, the note and the phone number provided will be appended to the associated pre-ticket chat:

Using Chats
Creating a Chat Session via Tech Portal
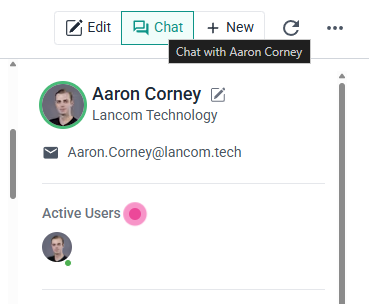
Tech members can create chat sessions for open tickets to chat with end users in real time. Chats may be opened by an agent only if the ticket has an online contact assigned.
This is known as a push-chat, where a chat session is created by an agent with a target user:
If there is no activity on the client portal for 5 minutes, they will be automatically switched to Away. Once an end user closes the tab/window containing their open session, they will be set to
Offline.Handling Chat Requests
Receiving Chat Requests
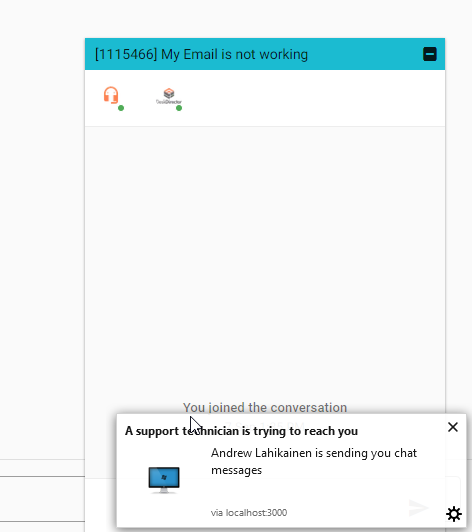
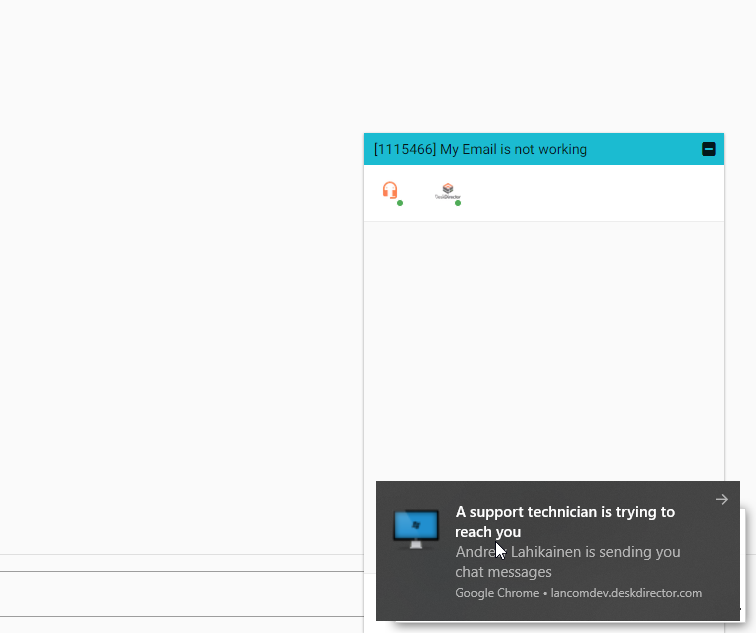
Chat request notifications will be pushed to the user's desktop:
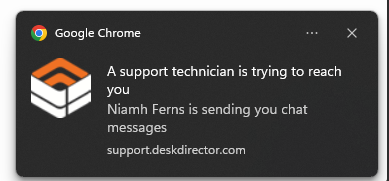
You will only receive these notifications if you are available based on your current presence setting. Chat requests will also show up in the chat session manager. If you don't have your TECH tab or browser window visible, a persistent notification sound will be played, and a browser notification will pop up to get your attention.
Joining Chat Requests
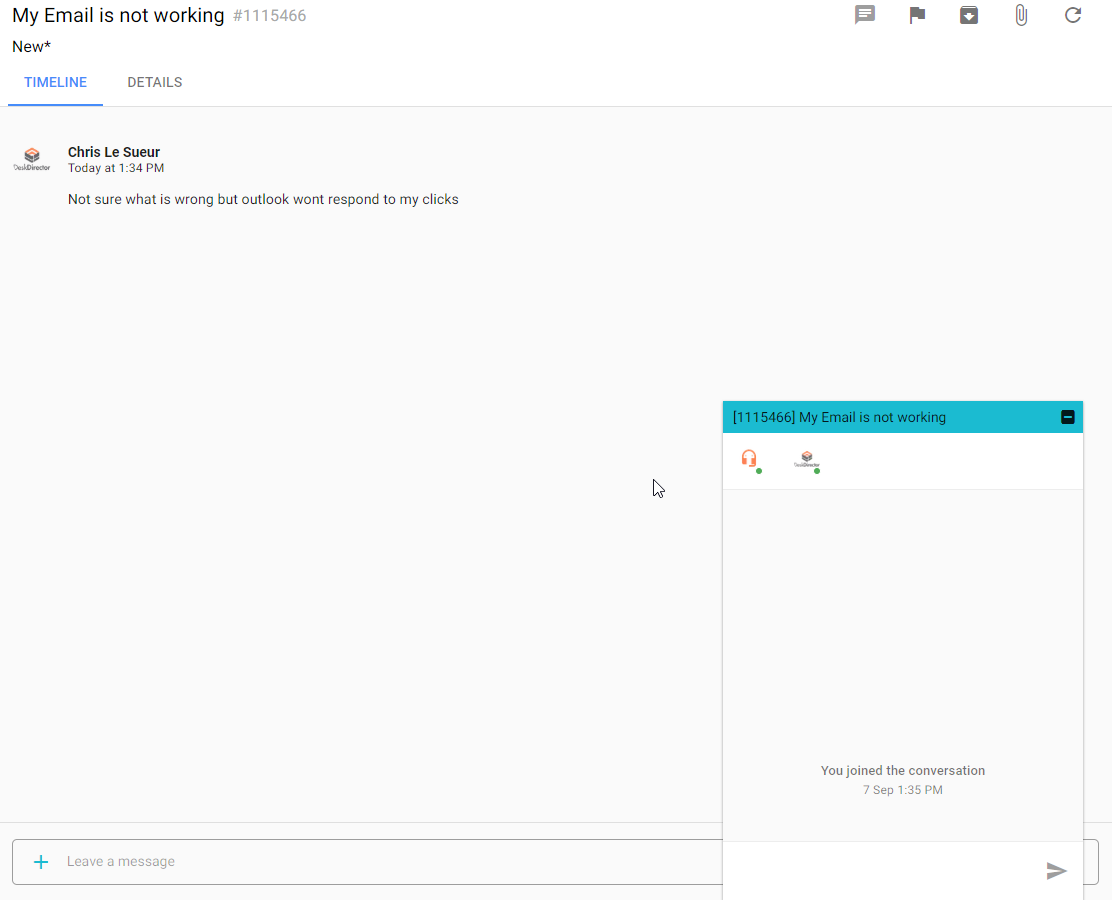
When you click Join on the chat request notification, a chat window will pop up at the bottom of the screen. From here, you will be able to chat with your customer:
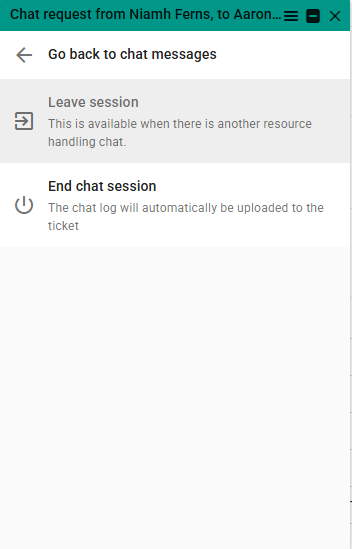
Ending chat sessions
Once you have solved the customer's request, you can end the chat session. To do this, click the menu button on the chat window. This will bring up the chat menu, and from here you can click 'End chat session'.
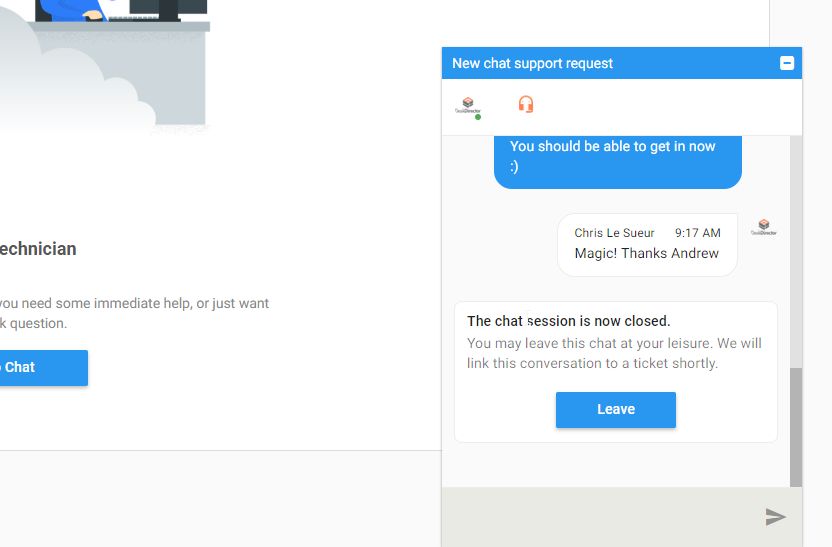
The end user will be notified that the chat has finished and will no longer be able to send you messages. A log of the chat will automatically be attached to the corresponding ticket.
Leaving a Chat Session
After the chat session has been completed, you will now have the option to leave the chat session. Just click the leave button on the chat window toolbar, or click the "Leave Session" button on the system message that is displayed inside the chat window.
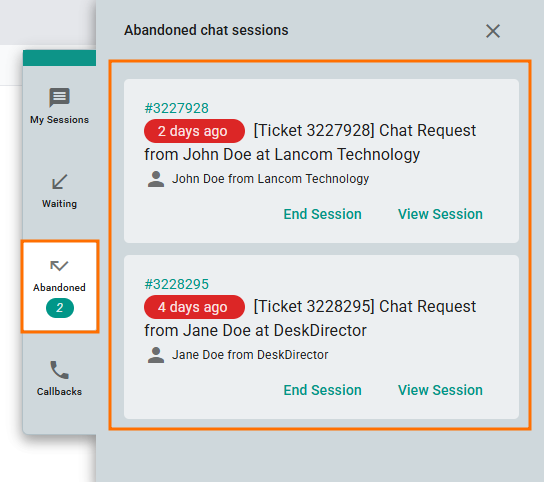
Following up on Abandoned Sessions
Abandoned chat requests should be followed up on as soon as possible. You can easily get back in touch with the customer by sending a push chat request to them from the ticket (providing they are online).
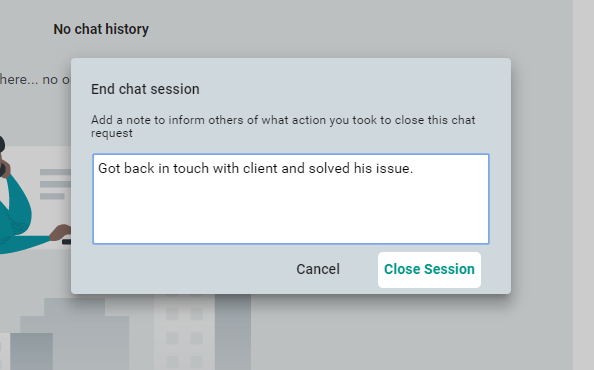
After you have got in touch with the client and solved their request, you can close the chat session. Just hit the End Session button on the chat session card in the chat session manager
You can then fill out the dialog:
Following up on Callbacks
The process for following up on callbacks is very similar to abandoned chat requests, but you will be given more information from the client. They will provide you with a phone number to ring and, optionally, a message. You can click on these phone numbers directly from the chat session card to call using your phone system software.
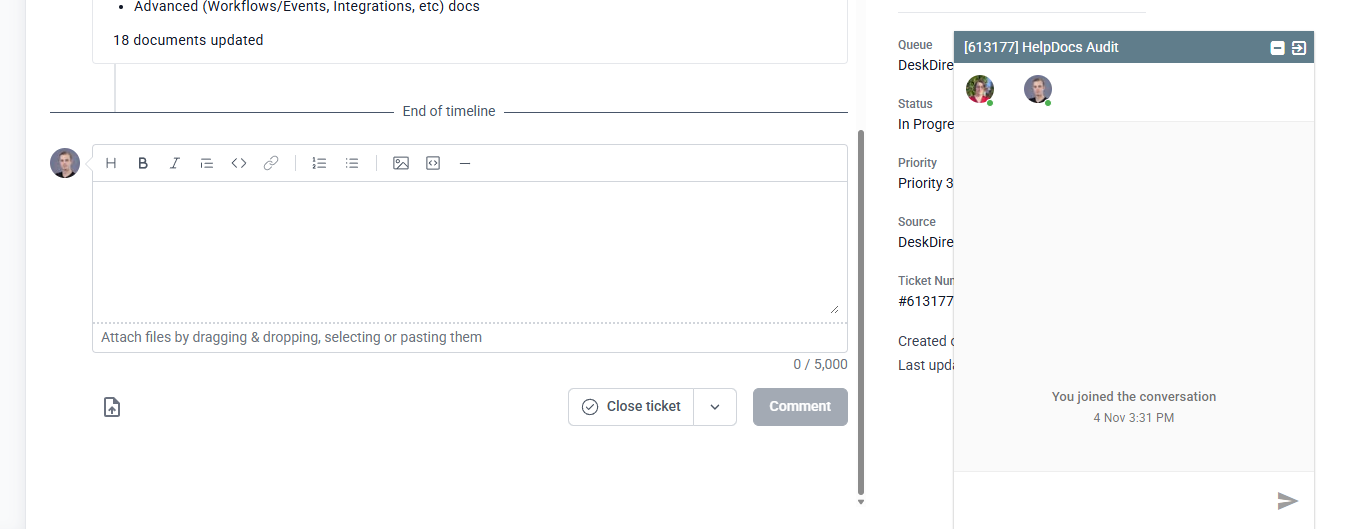
Viewing Chat History
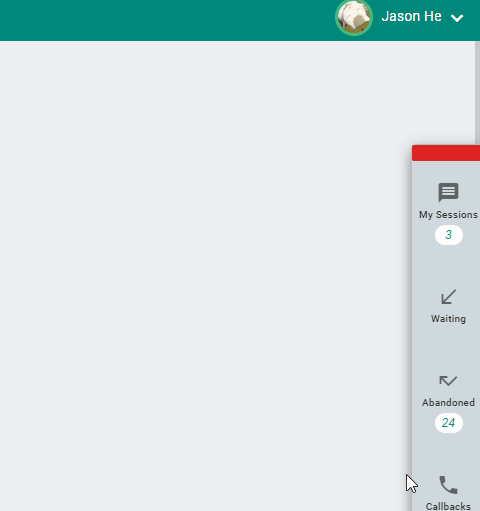
There are instances where you need to go back and reference a past chat session. The most common reason for doing this is to follow up on an abandoned chat request to see if they left any messages. You can easily check on past chat sessions from the Tech Portal via 2 options
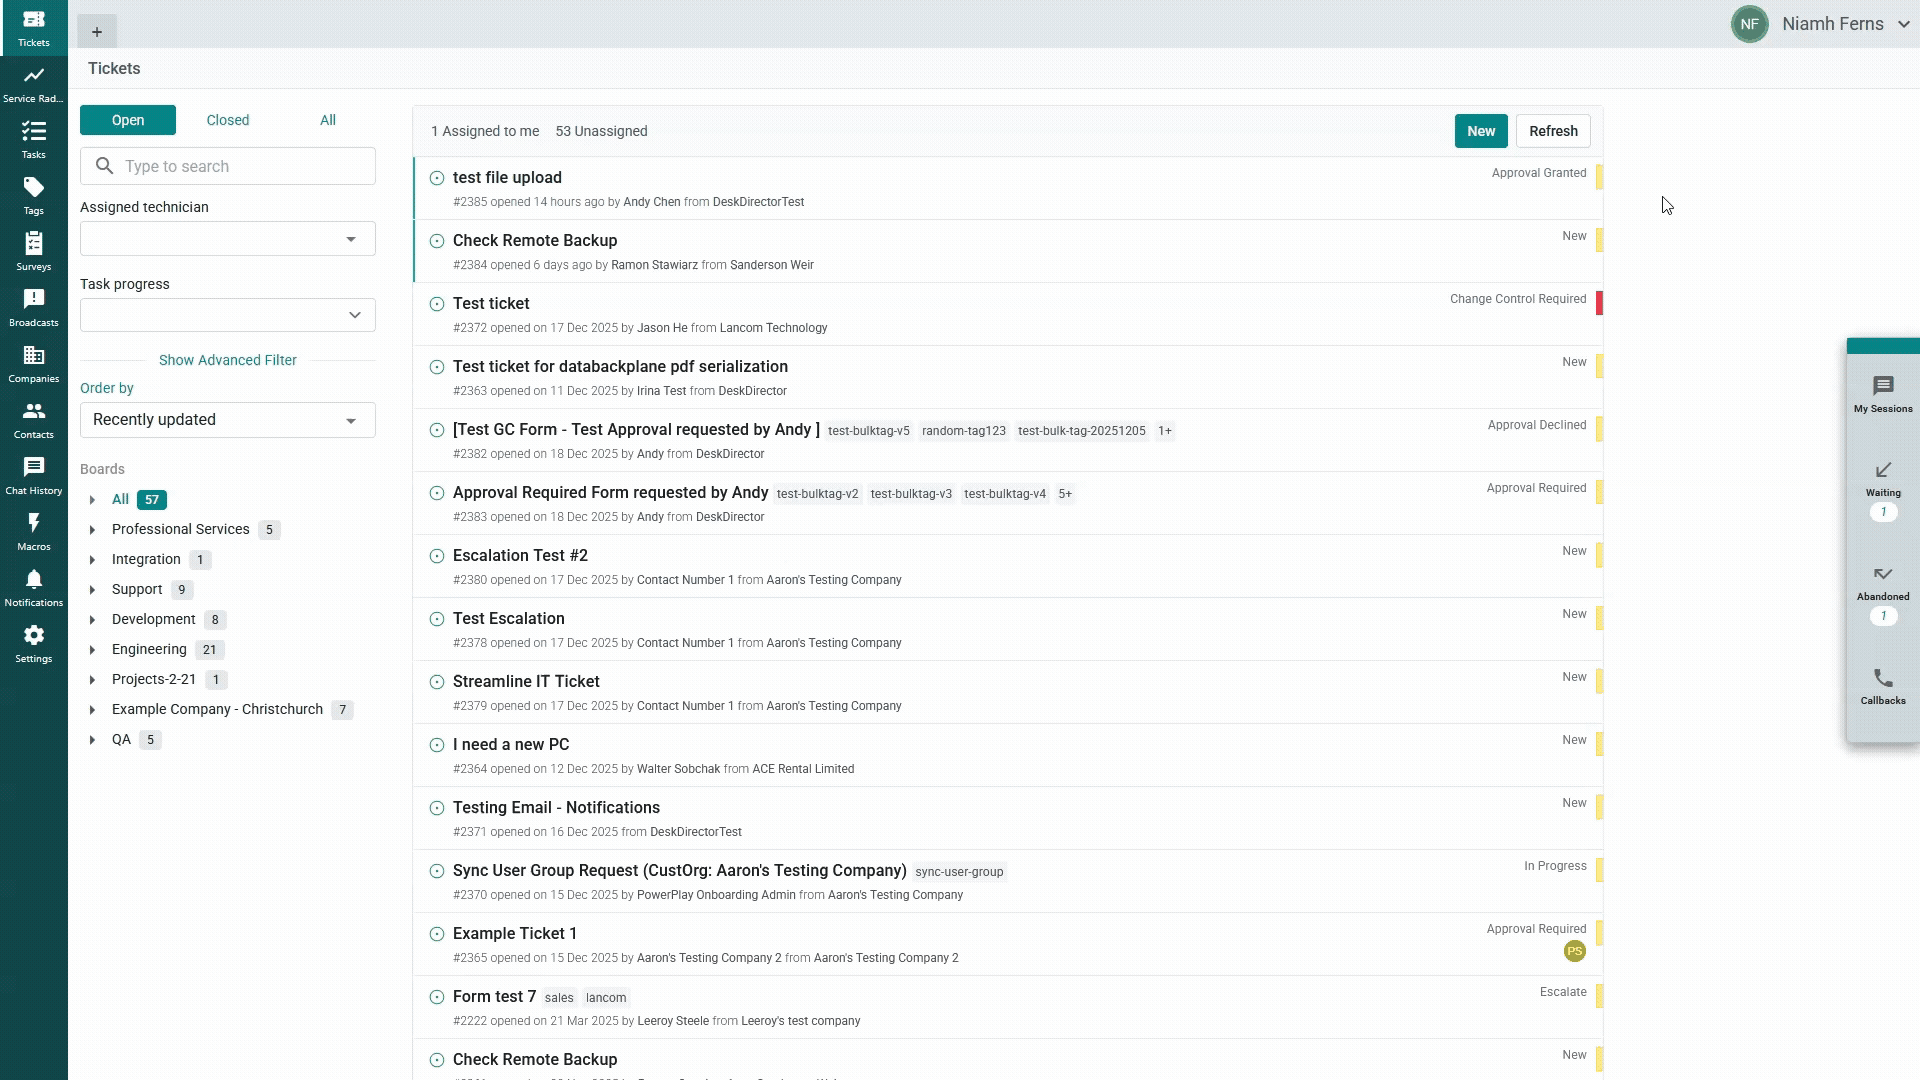
From the Chat Session Manager
To view chat history from the chat session manager, just expand the chat session manager and look for the chat you want to view. You should see 4 types of chats you can check here: My Sessions, Waiting, Abandoned and Callbacks.
From the Chat History List
The chat history list allows you to search through all previous chat sessions. One reason you might come to this page is to search for an abandoned chat session that you closed to add a note to it.
To make it easier to search for the right chat session, you can filter by company and contact. To view the chat history, just click the chat title.
You can view the chat log as well as all the other details of the chat session on this page. If you were the person who closed the chat session, you will be able to add or edit the closing note.
Client Portal
Receiving chat requests
A chat request from a technician to a user will cause a chat dialog to open in the Portal, automatically joining the user to the conversation.
From here, the technician can immediately start sending messages to the user.
Chat requests will also create a Web Notification or an OS Desktop Notification if the installed client is running
Ending and leaving chat sessions
There are only a few situations where the client user will be able to end their own chat session.
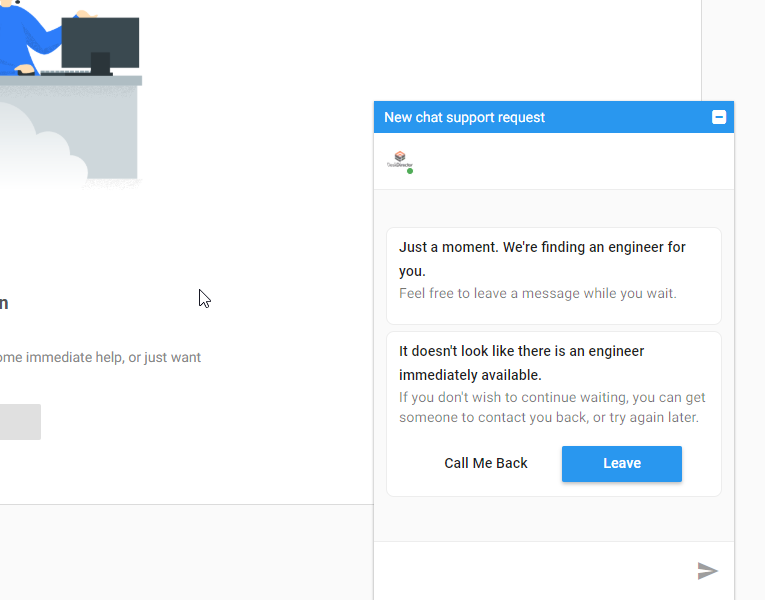
- When they have created a new chat request, but no one has answered within 1 minute:
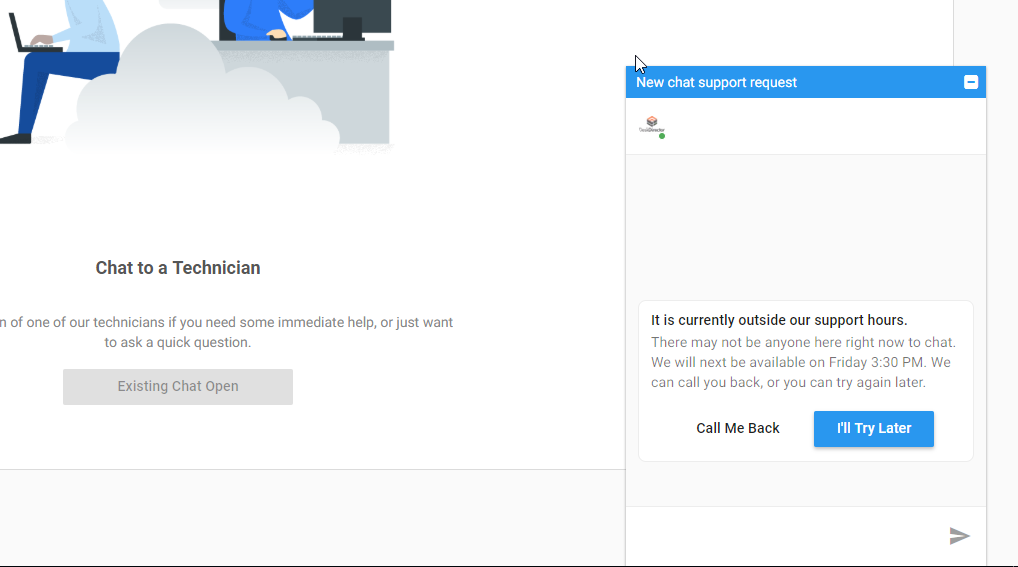
- When they have created a new chat request, but it is currently outside of your support hours, as configured inside of your
Office Hours:
- When they have been communicating with an engineer, but there has not been any chat activity for more than 1 hour:
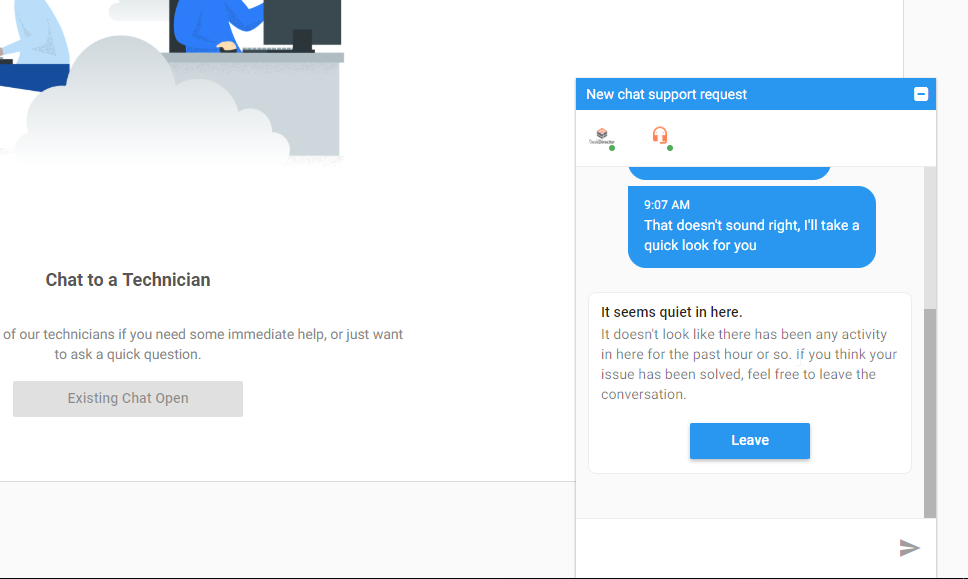
In all other situations, the burden is on the engineer to formally complete the conversation. Once an engineer has ended a chat session, the user will be presented with the ability to leave:
User Presence
Tech Portal
It is possible to change your chat presence in the Tech Portal to Online, Away or Busy.
You can easily do this by clicking on your avatar in the upper-right corner of the portal, then selecting your intended chat presence. You can also sign out from this drop-down. To be available to take in chats, your presence needs to be set to Online.
Client Portal
It is not possible for Client Portal users to manually change their chat presence. Their chat presence is either Online, Away, or Offline. When there are actions (mouse/keyboard) on the window where the Client Portal is open, the user will be set to online and can receive chats initiated by technicians. If there is no activity on the client portal for the past 5 minutes, their presence will be automatically switched to "Away", then once they close the tab/window where the portal is, they will be set to Offline.
Frequently Asked Questions
"I've enabled chat permissions for a user, but they still aren't seeing the option to create a chat."
As above, chats can be created either as a pre-ticket chat or as a chat for an existing ticket. Please confirm whether you have granted access to both the chat feature and allowed for pre-ticket chats in your Admin Portal.